About the Blog: We started RVing in 2019, but did not decide to start blogging about our experiences until 2021. So, we have some catching up to do. We’ll sprinkle in some new present-day stories as they happen. But if you have time, start at the beginning. You’ll learn (and hopefully laugh) a lot.
Looking for a particular blog topic?
We Stopped Full-Time RVing — Here’s Why
Our decision to stop full-time RVing was a gradual one. There wasn’t “one thing” that made us want to stop, but the reasons generally fall in into three categories.
Hello! It’s been several months since we have posted anything on this blog, YouTube, or our other social media accounts. Several of you have sent messages, asking what is going on, and we are grateful to folks who have taken the time to do so.
Yes, we are okay. Yes, we are still together. Yes, we still like biking, bucket lists, and beer. However, we are no longer full-time RVers. Why, you ask? Here’s the highlights….
Why Did We Stop Full-Time RVing?
Our decision to stop full-time RVing was a gradual one. There wasn’t “one thing” that made us want to stop, but the reasons generally fall in to these categories.
First and foremost, I (Lana) started having some health issues last fall -- severe back/shoulder pain that would radiate into my extremities, numbness in my hands, and headaches. We are not entirely sure what is going on, but it probably relates to an old softball injury from 25+ years ago. I dove for a fly ball, and ended up with a cervical spinal fusion. The area above and below fusion has now started to deteriorate. Ultimately, we decided that continuity of care would be best from a sticks-and-bricks home. I am now feeling much much better, and feel very blessed that is the case.
Second, full-time RVing simply lost its charm over the past year because of all of the stuff that kept breaking. You may recall that someone hit our towed vehicle; then we had hot water (Aquahot) problems, a transfer switch issue (or so we thought), and a DEF header debacle. We also had to replace a rear A/C unit (in August!), as well as a slide motor. We realize that EVERY RV has stuff that breaks, and we knew that going into full-time RV life. Moreover, all of those things that went wrong are fixable, and Kasie is pretty amazing at fixing things. However, over time, they simply started to wear on us. It’s quite stressful to try to fix things while living in the chaos of the problem at the same time.
Third, we simply don’t like travel days. Although we developed a great checklist to make things easier, it’s still very stressful driving from one place to another. Our upcoming itinerary featured 20+ stops throughout Florida over the next few months. The idea of hopping from one place to another just started to sound exhausting, rather than exciting. Sure, we could make reservations at some big resort for a couple of months; yet, if we were going to be stationary for a relatively long time, it would be nice to do it from the comfort of a sticks-and-bricks house.
Fourth, planning our itinerary even got to be exhausting at times. Many RV parks have a two-dog limit. As much as we have mastered the art of walking the dogs in two-dog shifts, we prefer to stay at places where we don’t break the park rules. Plus, with a rig our size, that narrows where we can stay and comfortably drive to. As such, we always felt like we needed to plan around 6-9 months out to be able to secure a spot in many of the popular locations we wanted to visit and could accomodate our needs. For those places that don’t offer booking that early, we would set calendar reminders. Florida was especially hard to book because the state parts allow their state residents to book a month before outsiders. For a type-A personality like me, not knowing exactly where we will be staying is stressful.
Fifth, our insurance company (State Farm) decided that it would no longer cover full-time RVers. I have been a State Farm client for 30+ years, and was obviously frustrated that they would just drop us like that. While I shopped around and got other (probably better) coverage, it was as if the travel gods were trying to tell us something.
Lastly, finding good vet care on the road is challenging. It seems like every month or so, someone in our pack needed a vet visit. We would often spend hours googling and calling around. Many vets would not see us unless we were existing clients, and those that did often charged us crazy prices. As I explained in my first blog, the dogs were the main reason we started RVing. When lost Percy last spring and then Sophie last fall, the importance of having “our vet” nearby really started to hit home.
Our Sophie
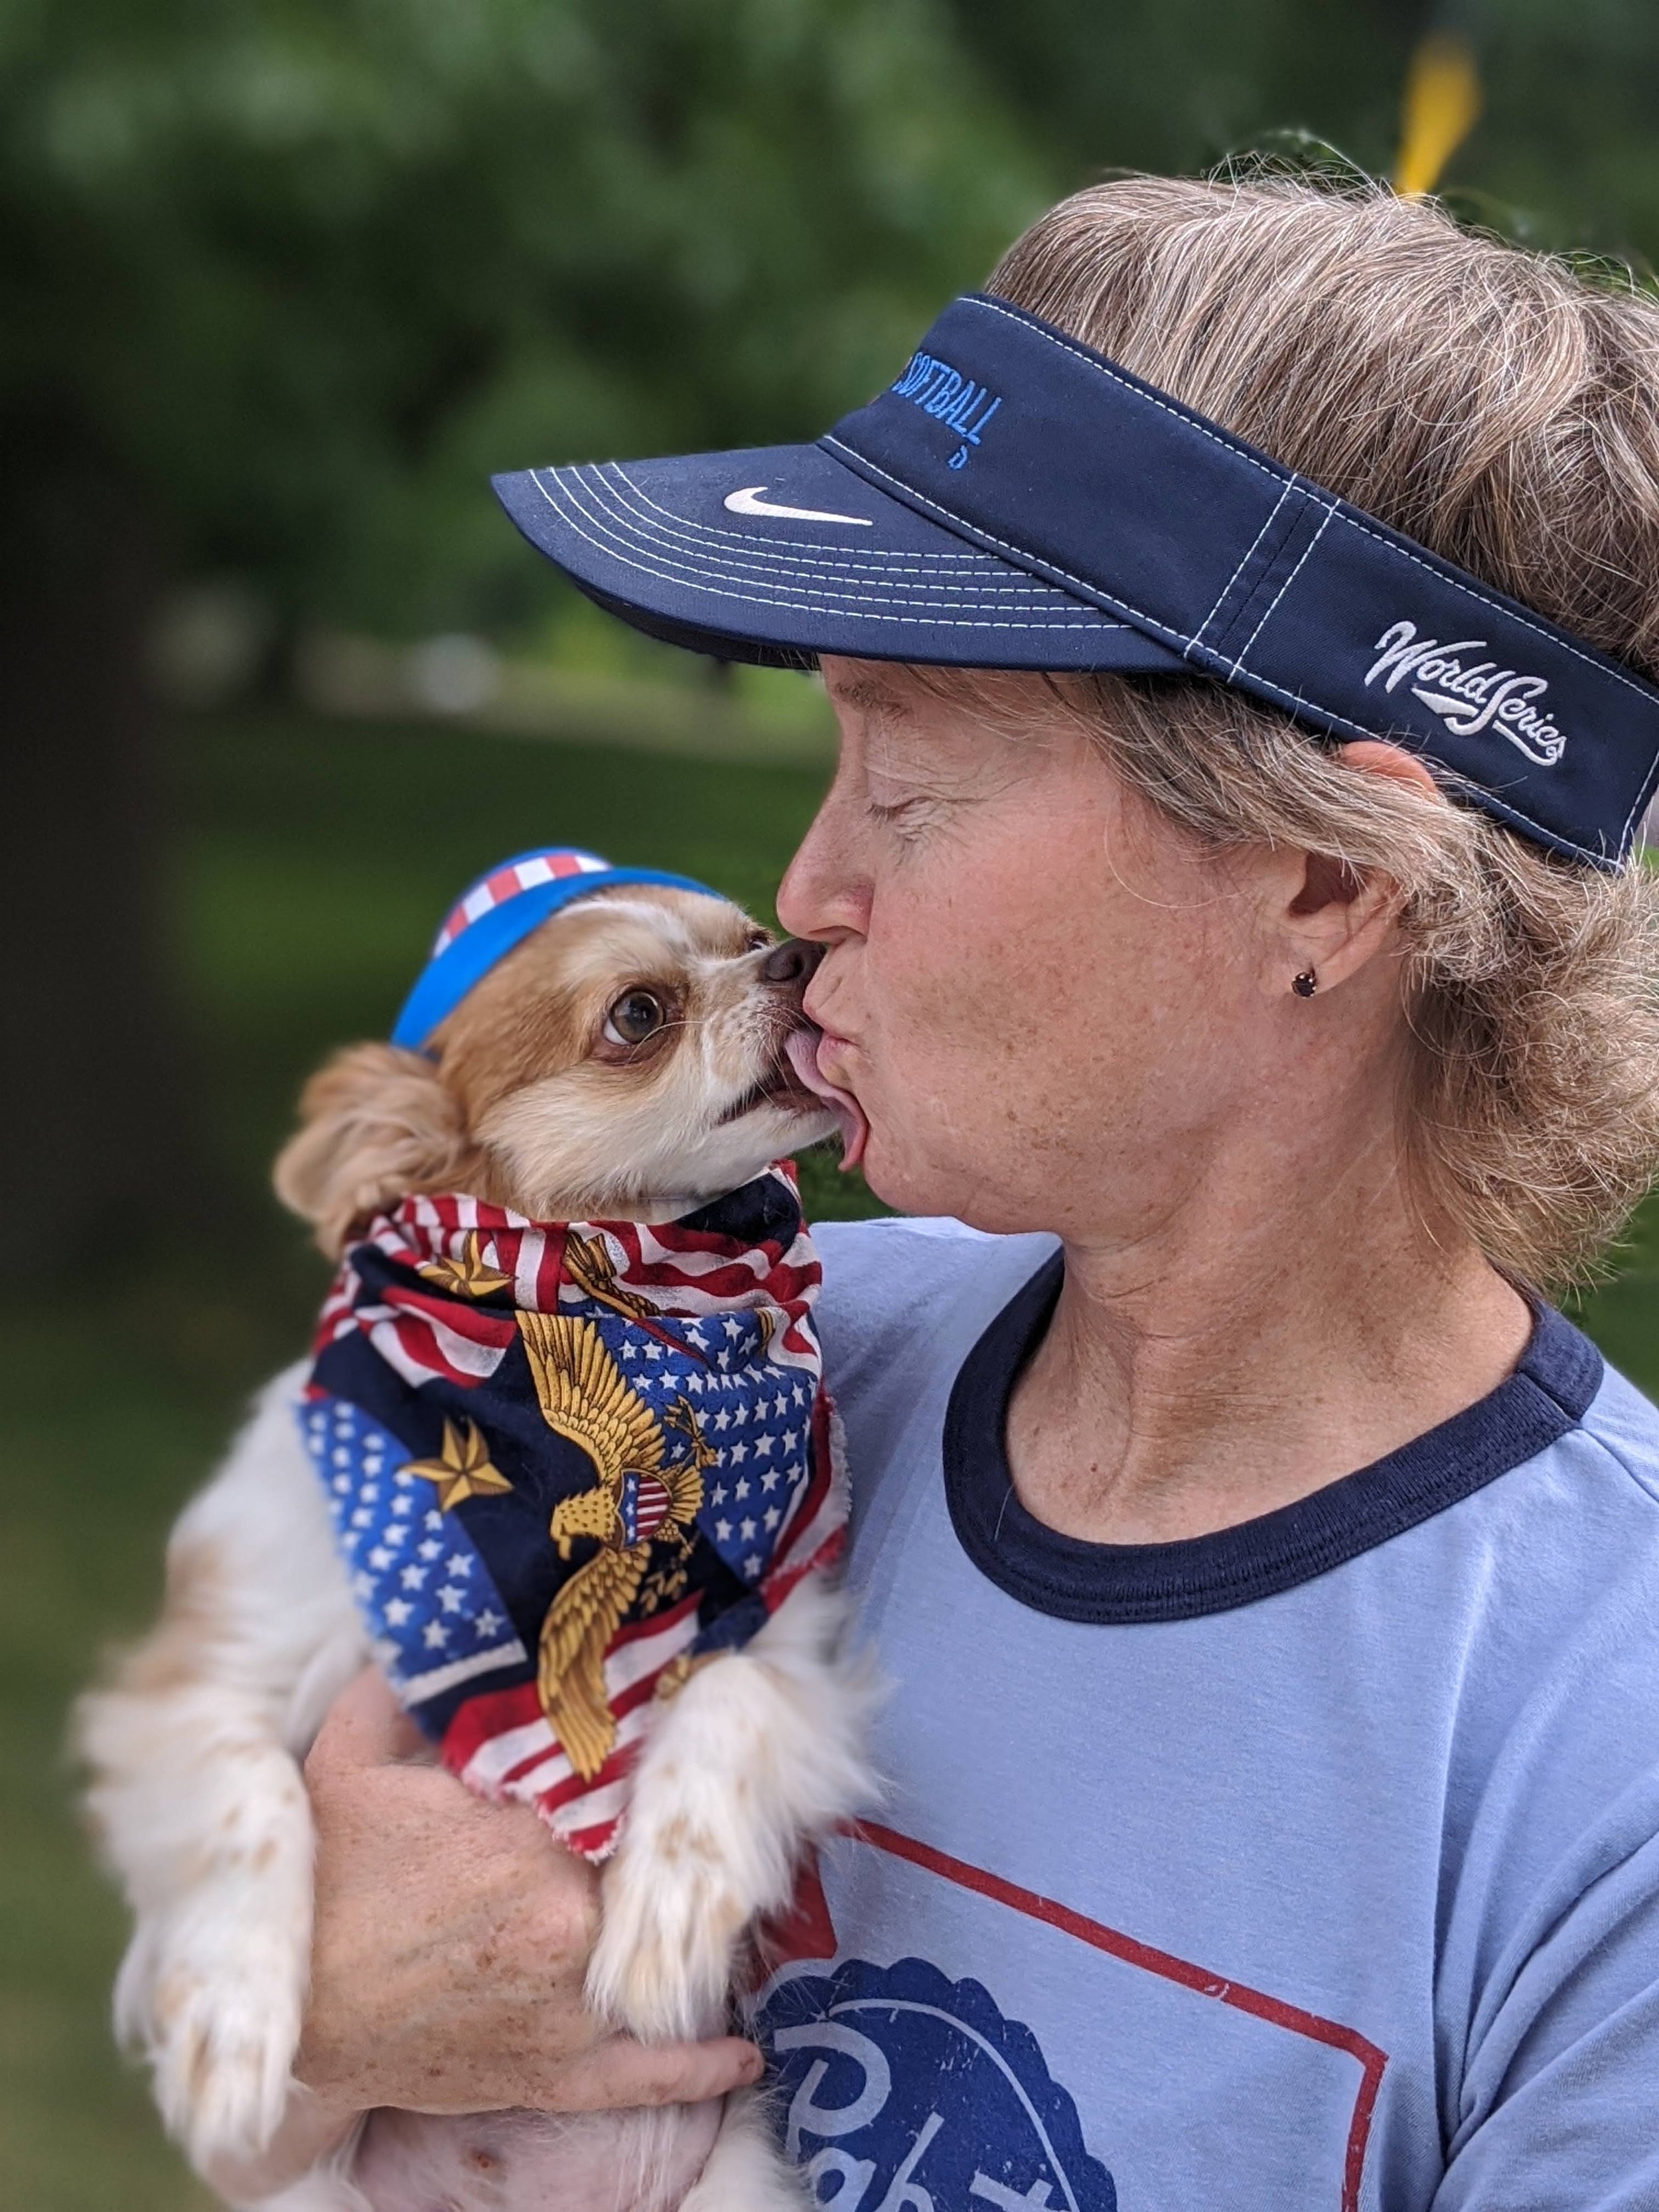
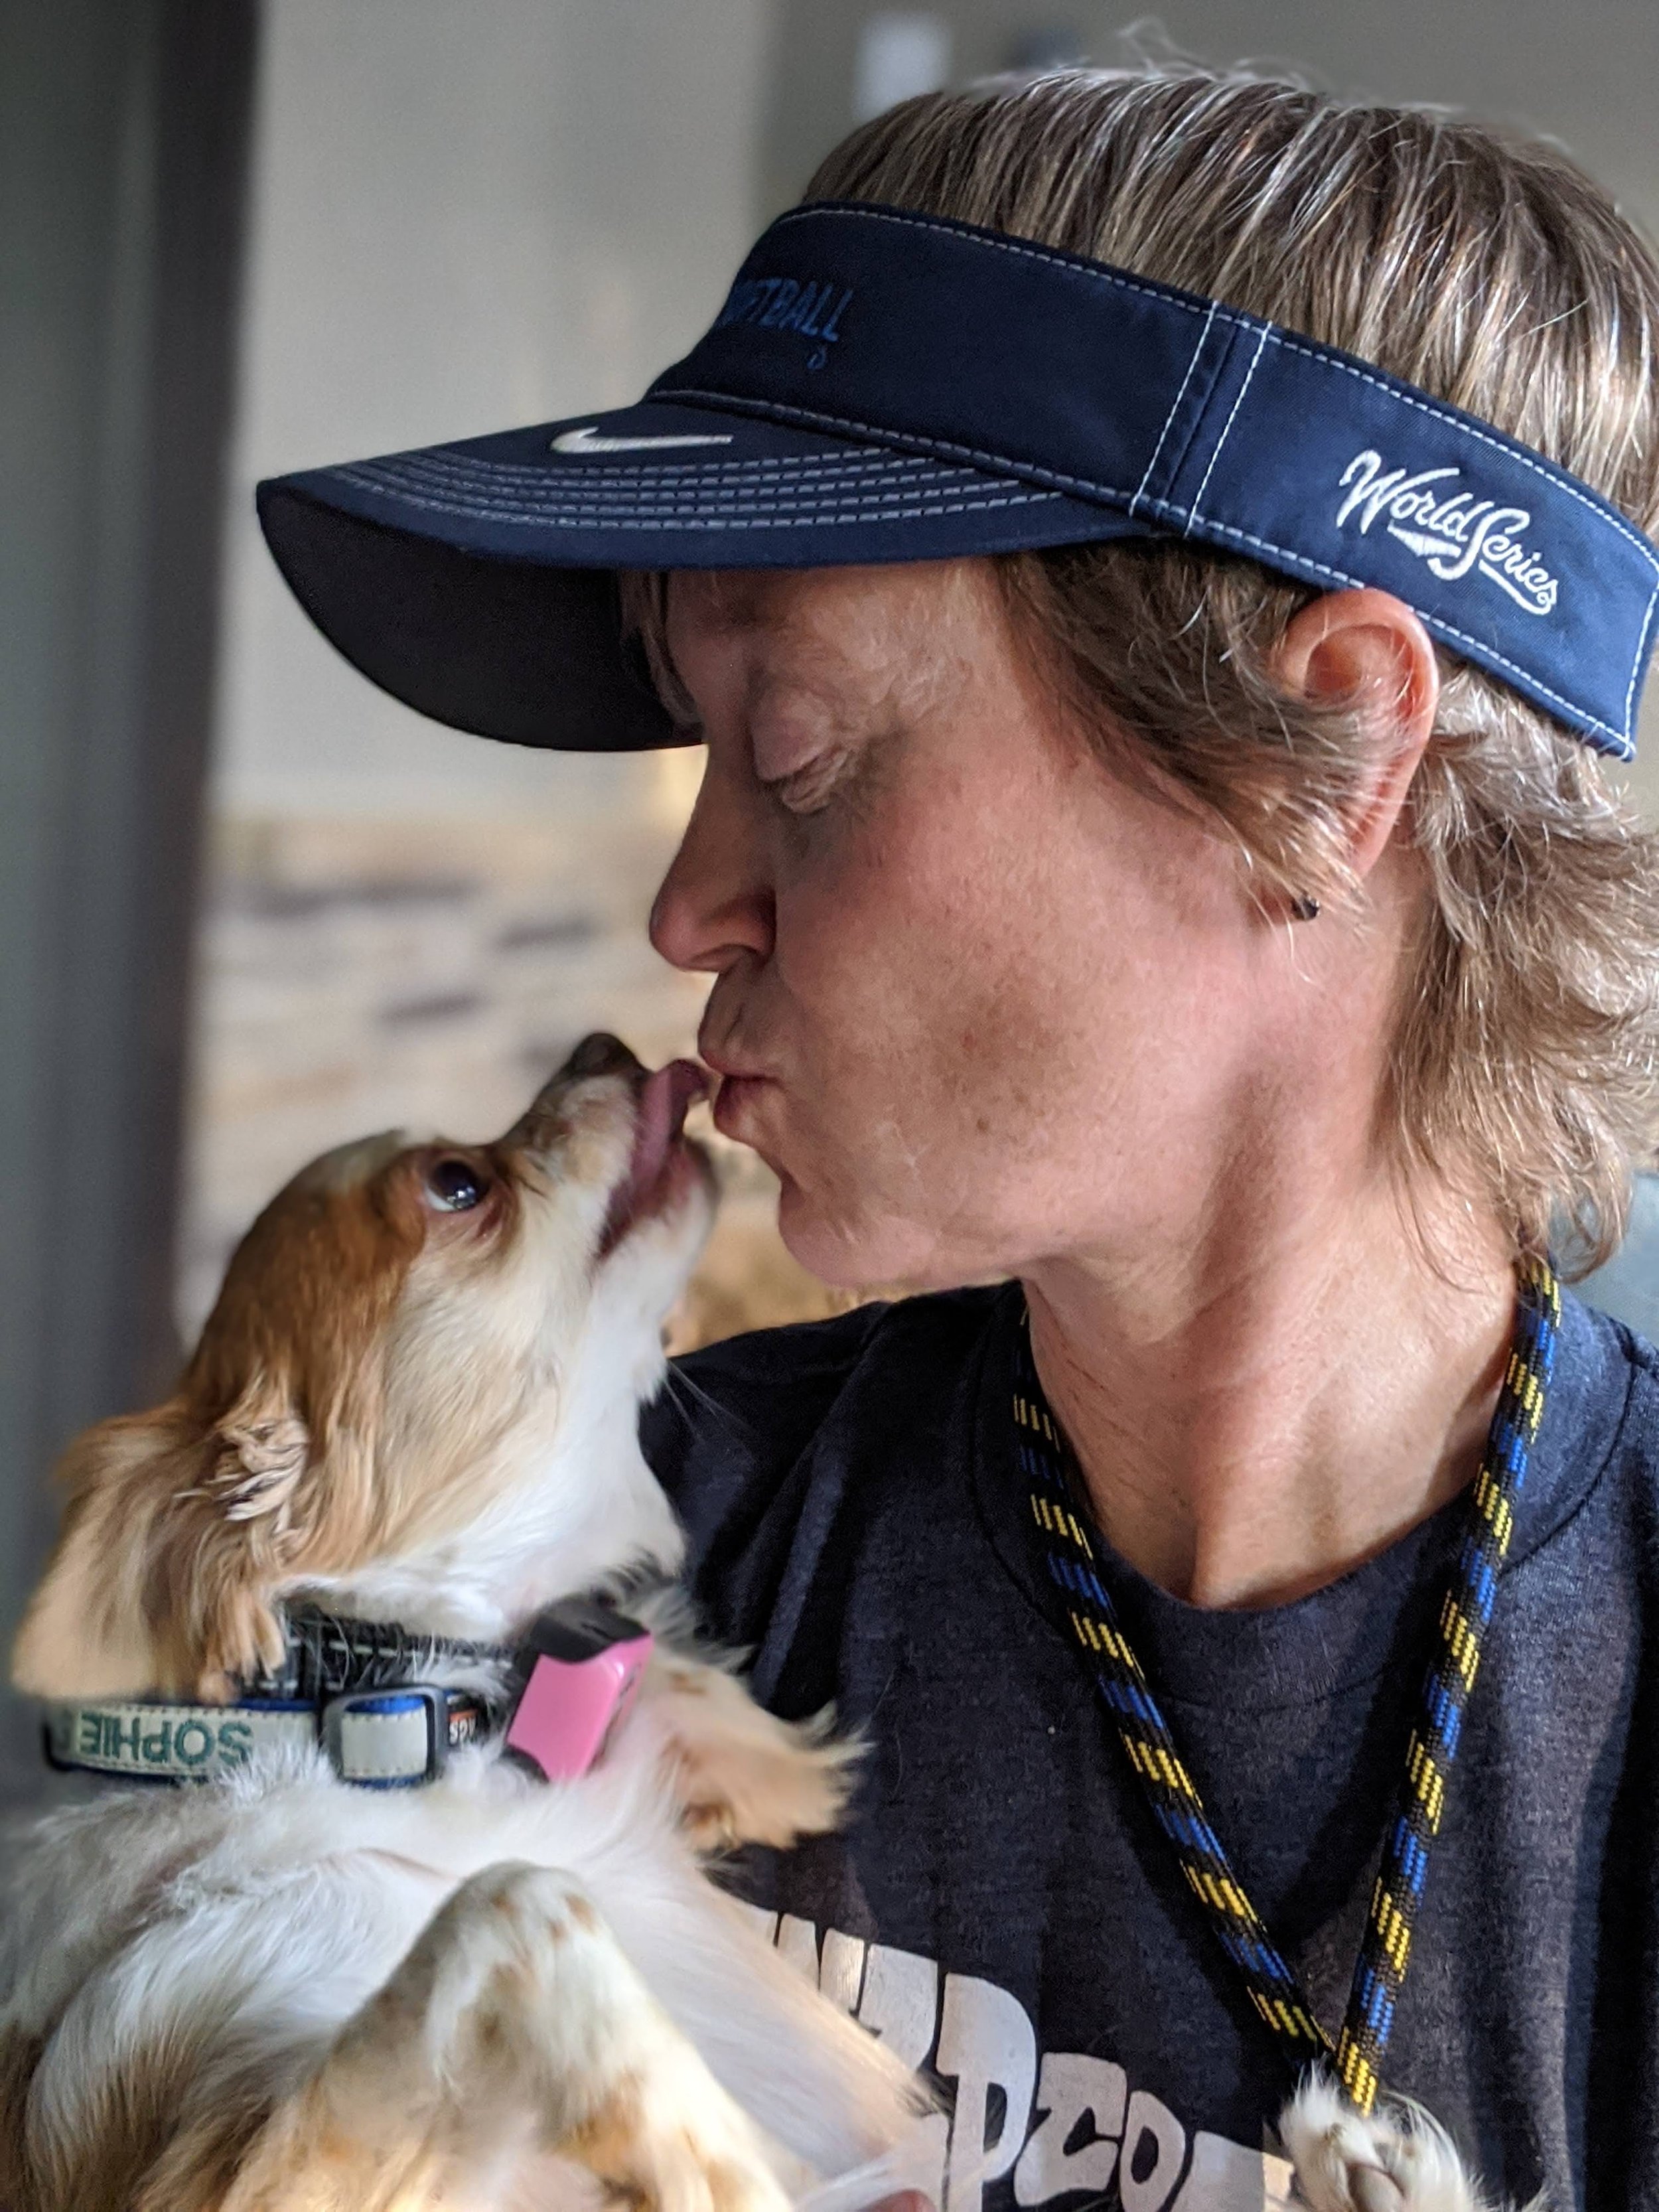
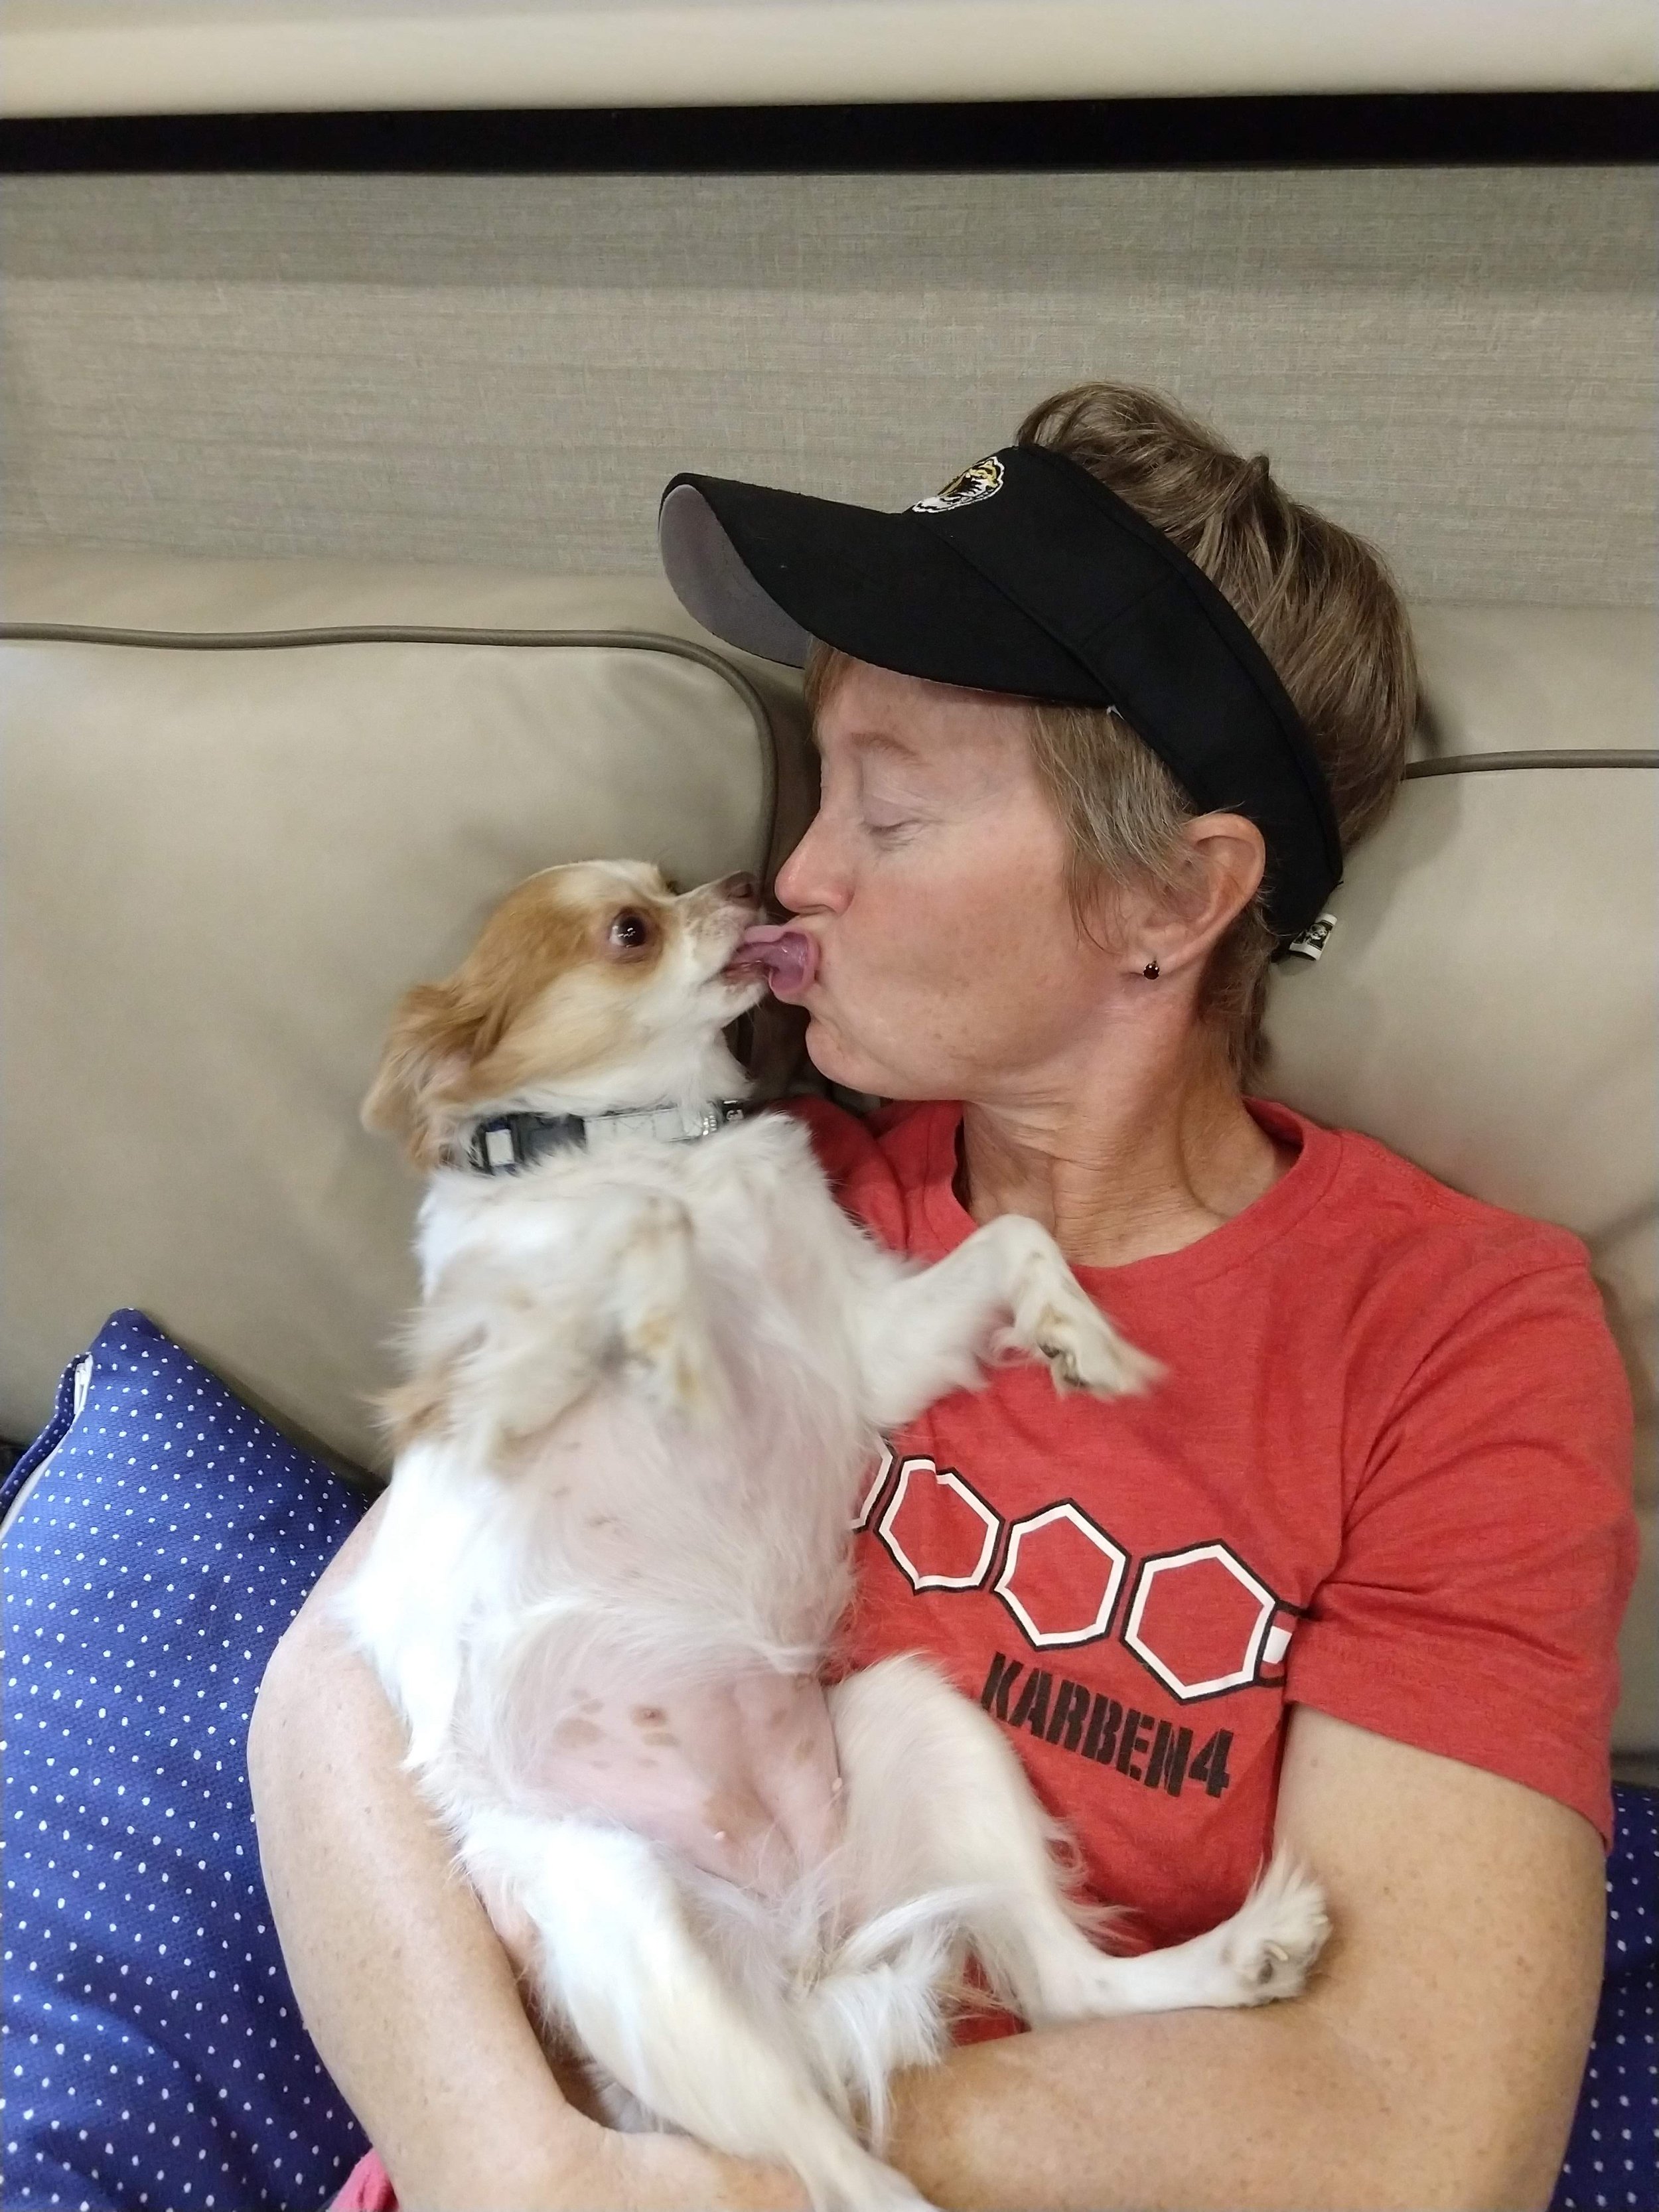
Sophie (a/k/a Sophie Bordello, you stinka, you smello) joined our pack in 2018 after being rescued from a meth lab down at the Lake of the Ozarks. She was the sweetest girl and eager to love. She could clean your nose out with one of her kisses if you let her. A master of air swims, the queen of flopping — Miss Sophie never met a neck massager she didn’t like. She was the ultimate lap dog, under-the-covers tunneler, and occasional head warmer. She was known for her spontaneous zoomies, but most of all, for the incessent humping of her sister, Billie. God bless you, sweet Sophie girl.







Where Did We Settle?
When we started our full-time RV journey, our plan was to settle down in the Rapid City area when we were done. However, on our last visit to South Dakota, we discovered a few things that we didn’t like about the area. Among other things, we didn’t have a good experience with the doctors, and house prices are through the roof. We starting thinking about where else we might go.
Of all the places we visited in the past 2.5 years, we decided that the best place to settle down given our circumstances is right where we started – Columbia, Missouri. There are two large health systems here (including an adult Trauma Level I hospital), as well as vet school with an amazing staff. We have an existing network of friends, and our parents are both located within a day’s drive.
Not suprisingly, our 5 bed/3 bath home is just slightly bigger than the RV. Of all the things I love about the home, it is the jetted tub! Yes, a tub where I don’t have to worry about how much water I’m using! I still catch myself trying to flush the toilet with my foot though. Oh well.
Any Regrets?
Do we regret selling pretty much everything and hitting the road? For me, the answer is “sorta.” I certainly would have kept our old house if I would have known this was how things might turn out. I may have thought through the healthcare implications a little more too — not just for me but for the dogs. Then again, shoulda, woulda, coulda.
The truth is that I wouldn’t have traded the past couple of years for anything. We learned so much about ourselves, the diversity of this country, and even made a few new friends. It does sadden me a little that this part of our lives is now over, but on most days, I don’t miss it.
What is Next for the Class C Broads?
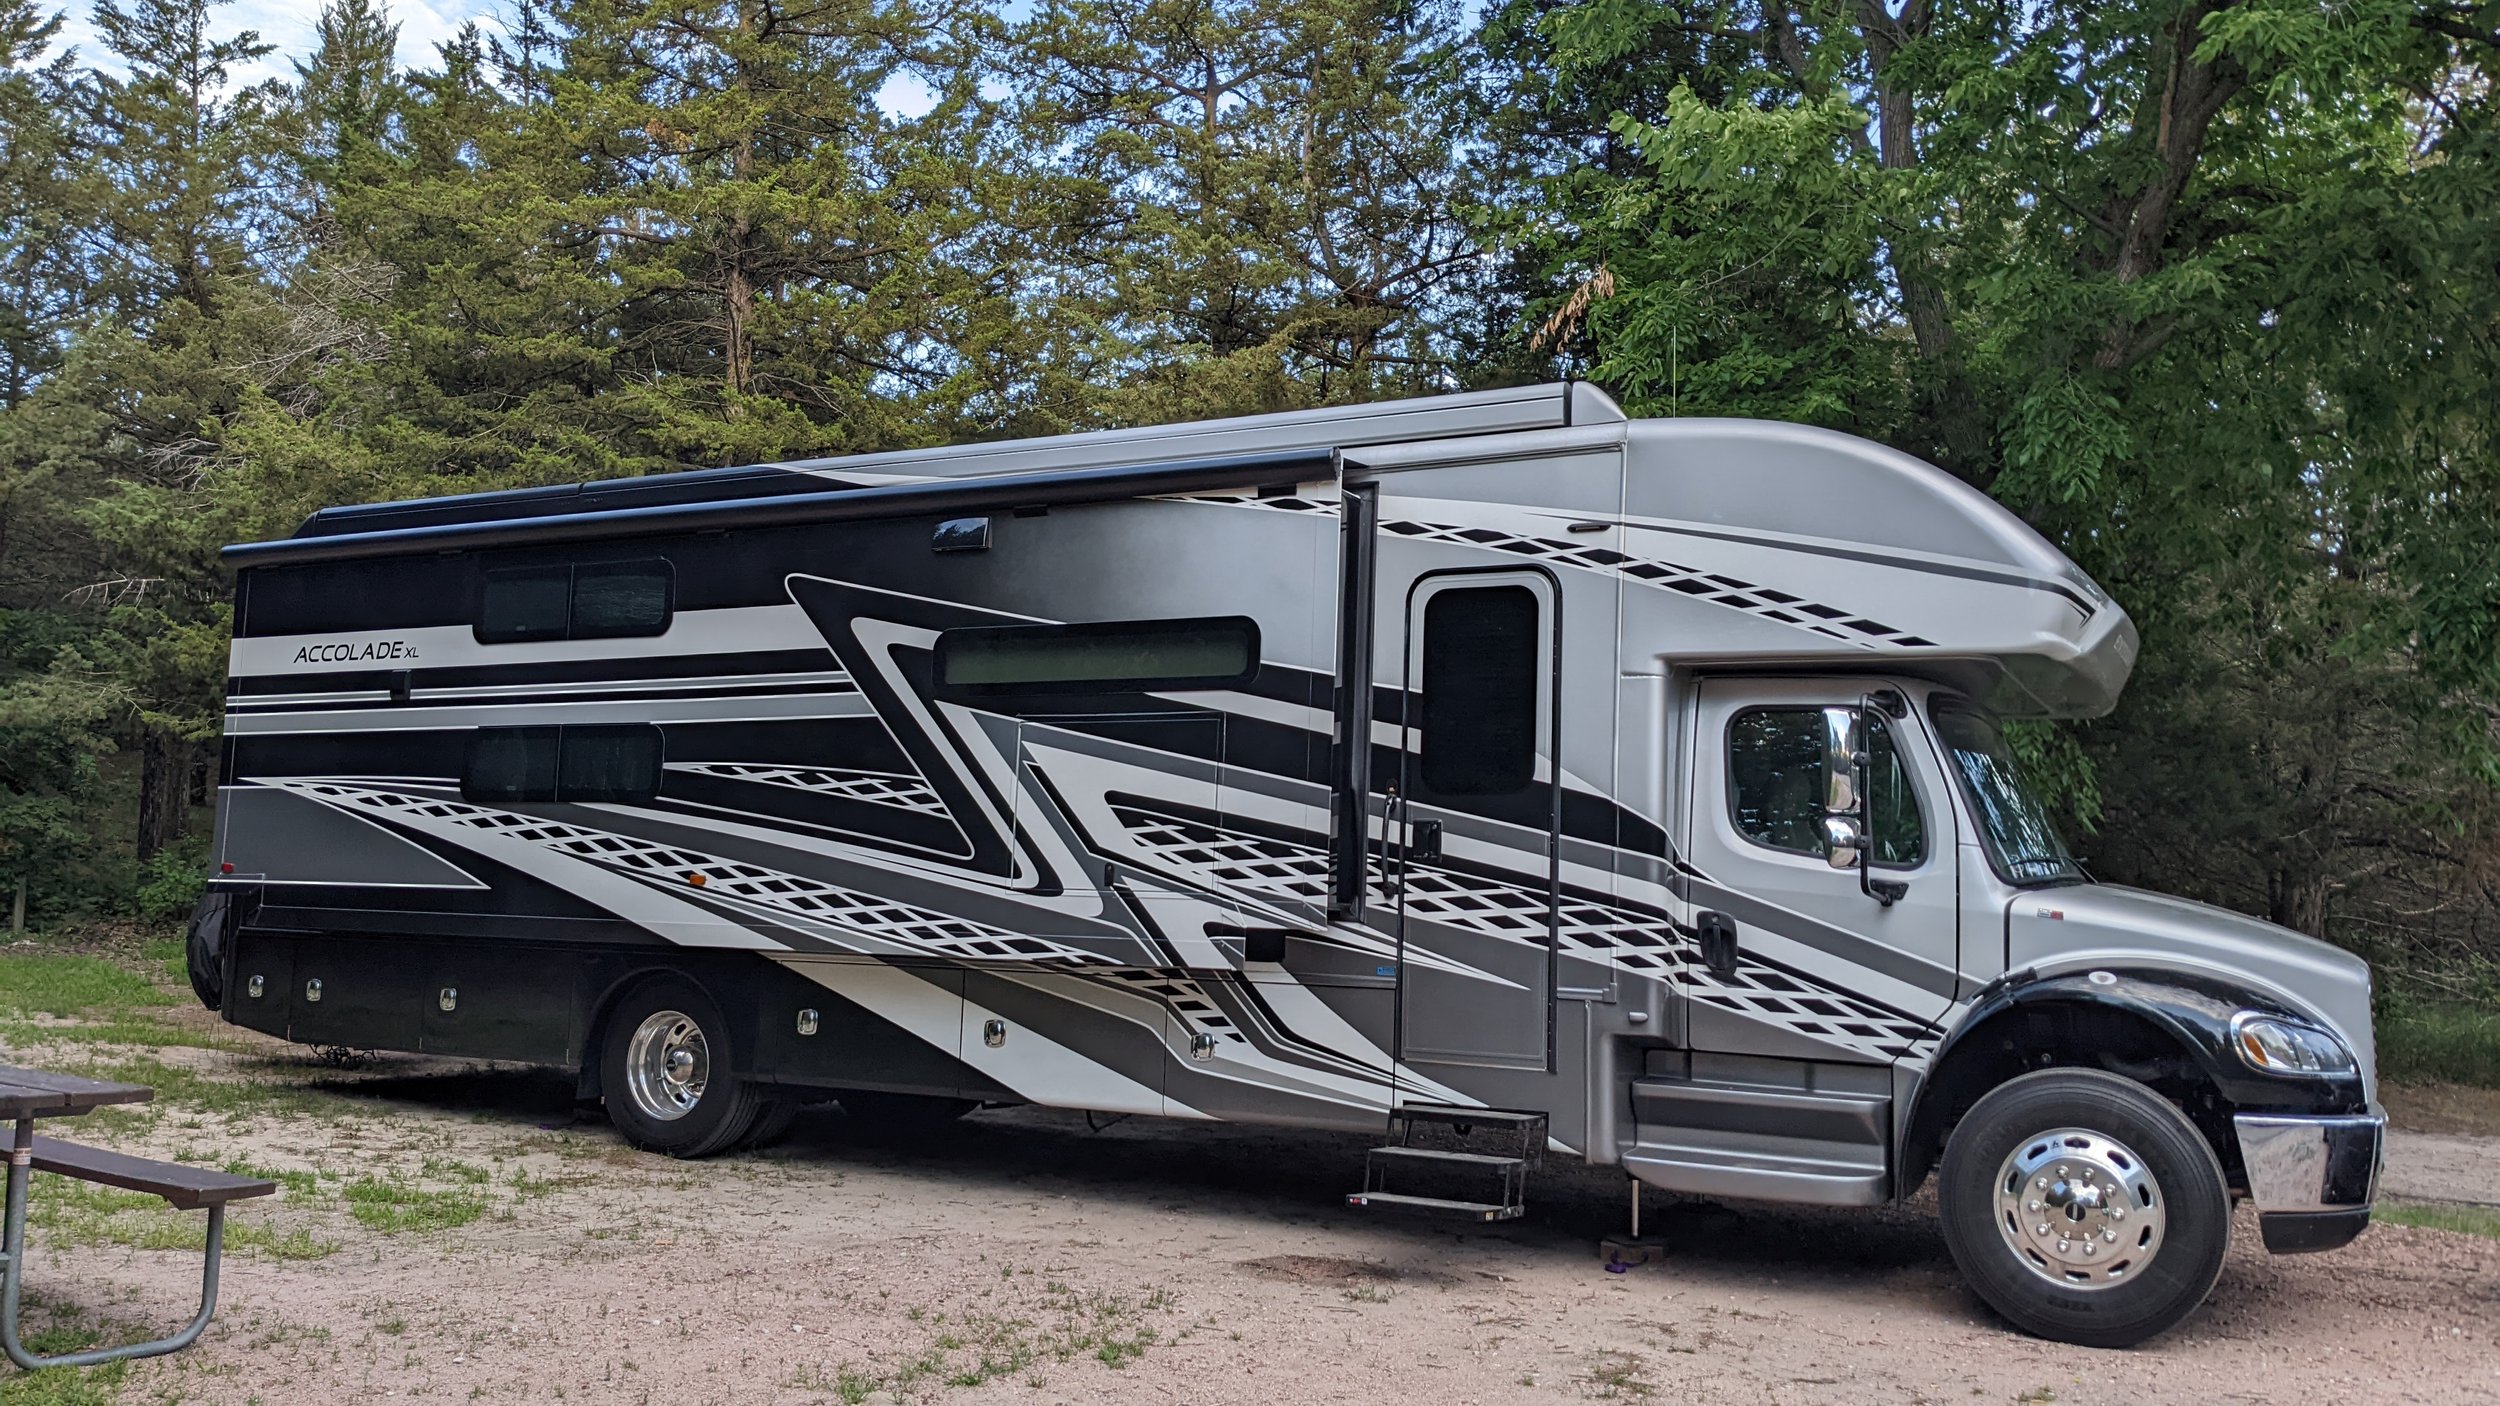
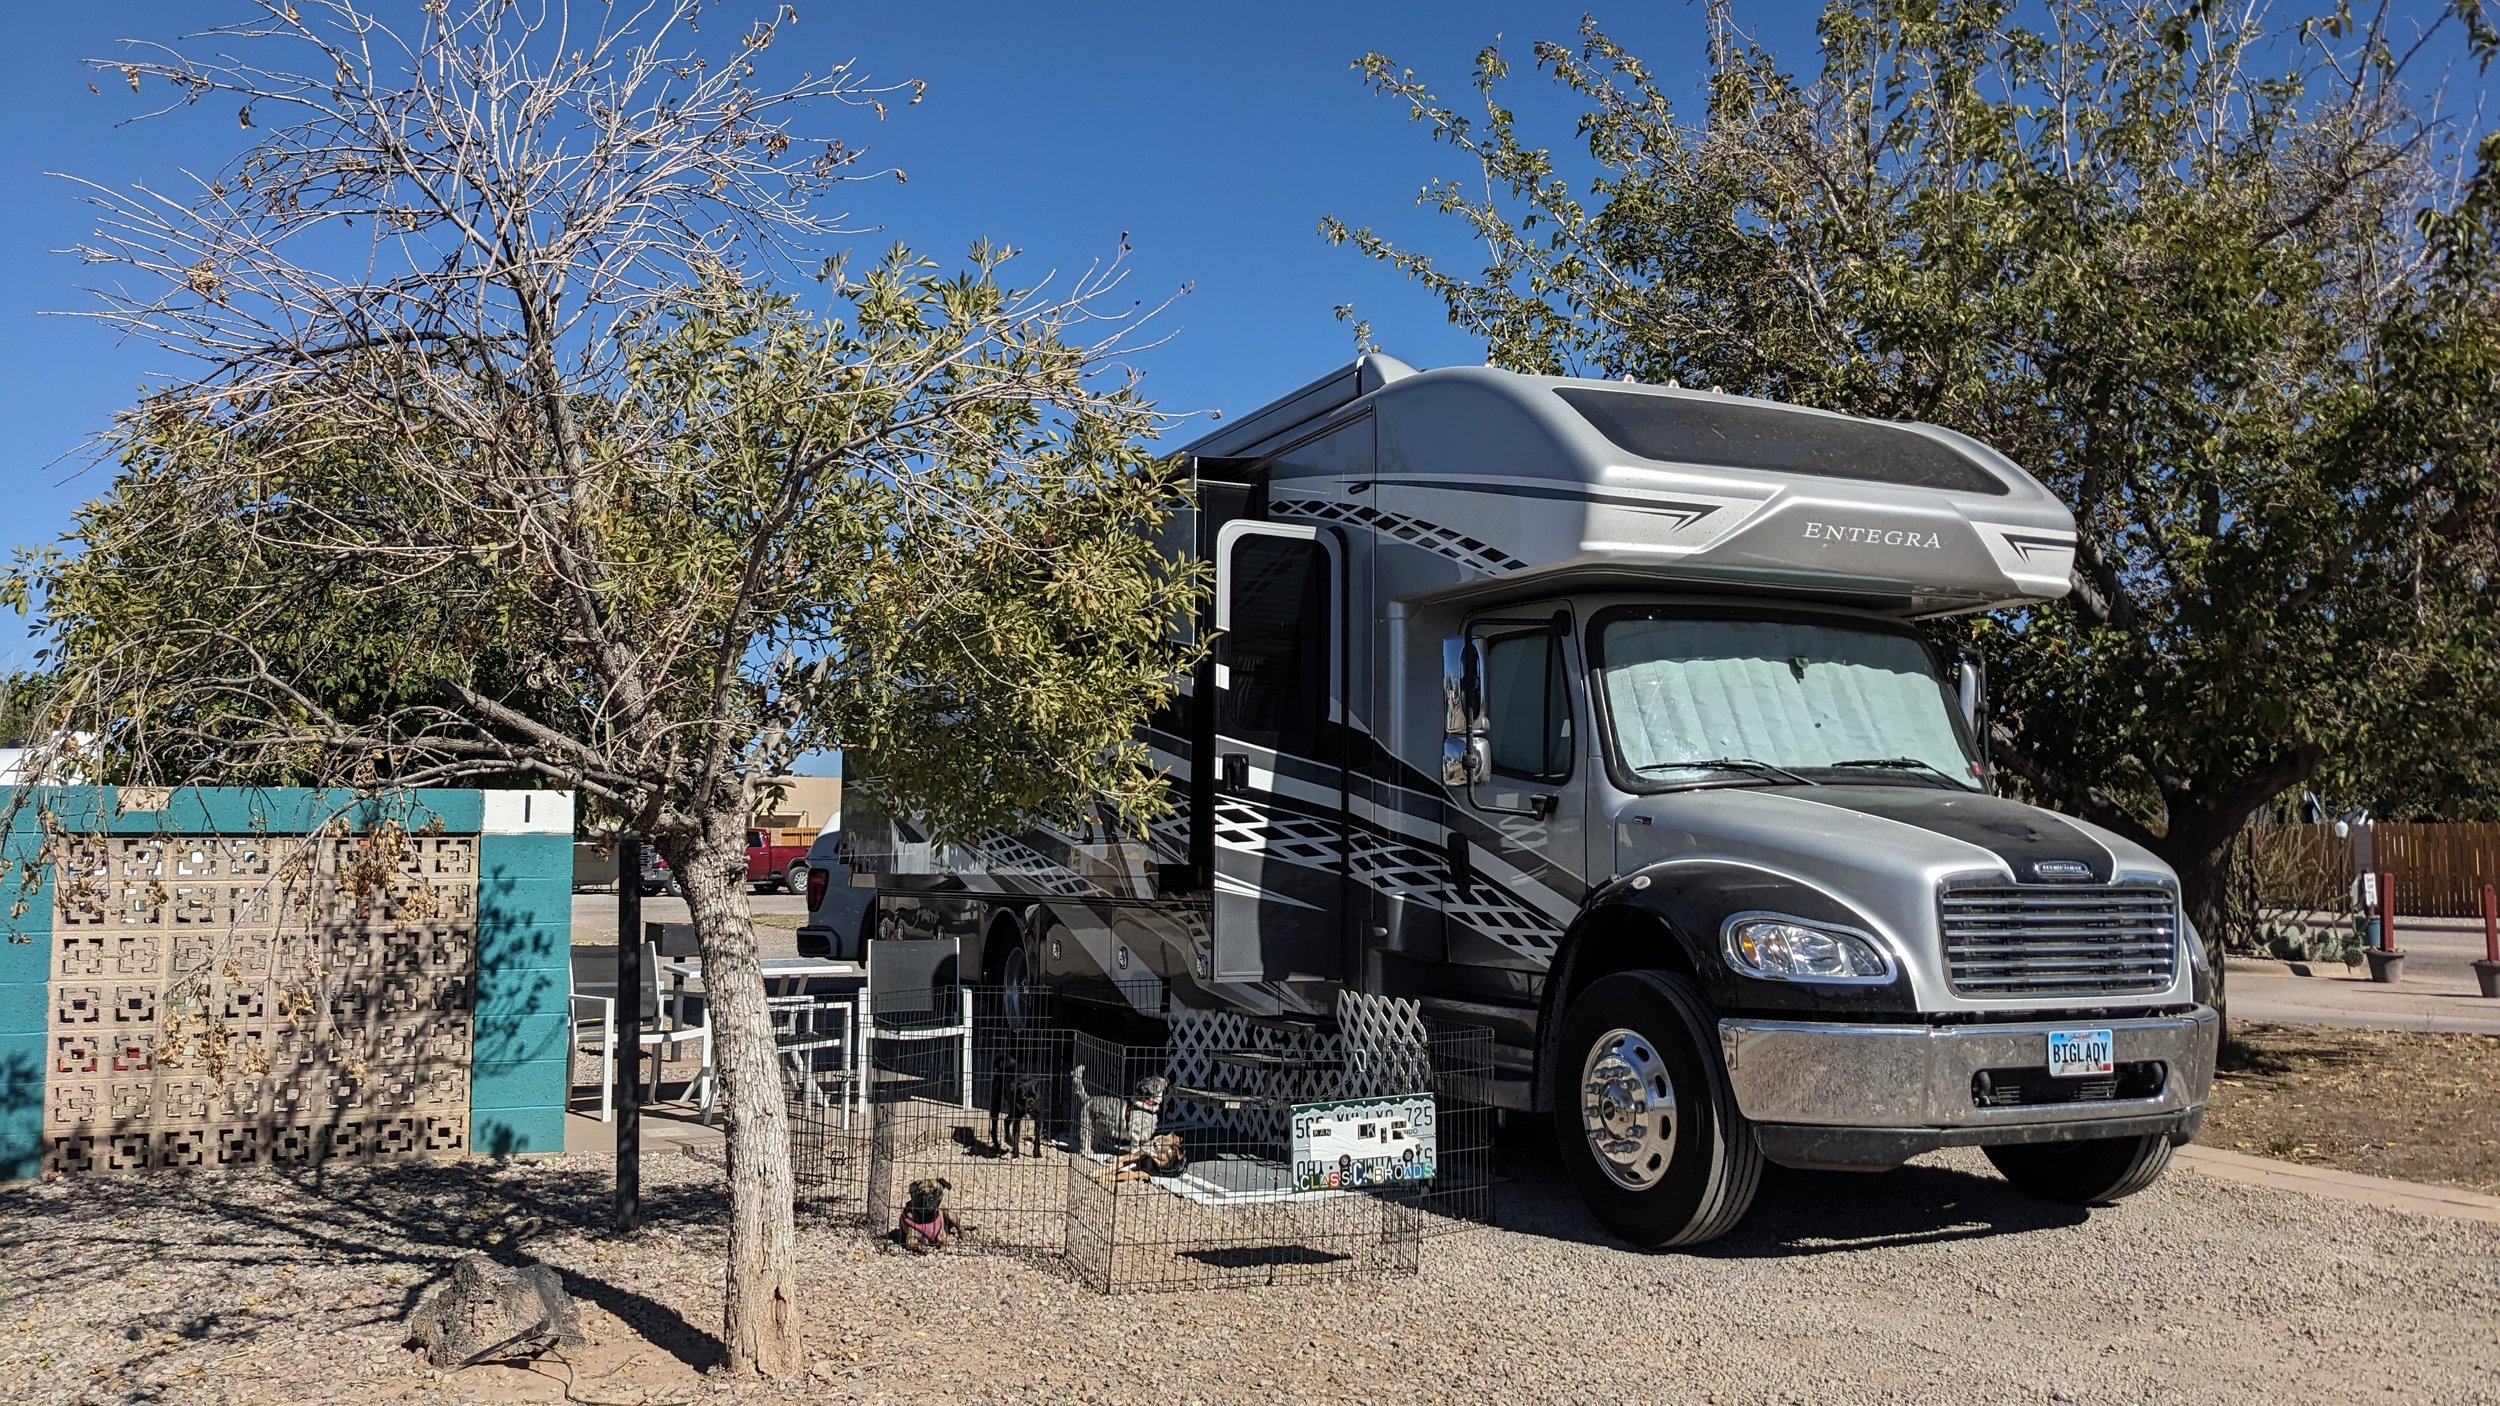
For now, our Entegra Accolade (Big Lady) is in storage. We have thought about selling her because we are no longer full-time and don’t need all of that space. Yet, we know that rig, and overall, it has been a good one. Plus, I would miss the washer/dryer and heated floors that wouldn’t come with something smaller. Our current plan is to attend the Super C Rally in May and see how that goes.
For now, our social media is on indefinite hold. Even though we are the Class C Broads, I’m the one who films and edits everything. There was a time last fall when I physically just couldn’t do that. While I am feeling much better now, I have also enjoyed this unplanned reprieve from documenting our lives. I still have many ideas about content regarding lessons we learned on the road that I may share at some point; for now, that isn’t a priority. So…again…we will just see how things go. In the meantime, I plan to keep the YouTube channel and blog active and accessible because I do think there’s some good educational stuff there that is worth sharing.
When we started all of this social media nonsense, I came up with a mission statement (click on the link to unpack what it means). “To provide unbiased educational and entertaining content about RV travel and RV life from the perspective of two women who enjoy learning and sharing their experiences in the comfort of a Class C motorhome.” For the most part, I think we succeeded. For those of you who followed our journey, thank you. For those of you in the Super C community who helped as along the way, here’s a big SUPER-C-SIZED THANK YOU! THANK YOU! THANK YOU! #WWBMD.
If you find yourself on I-70 in mid-Missouri, drop us a line. We know of a few good breweries in the area…
Until then…whether you are on the road, or on the web, Stay Classy!
(PS: In case you wondered, I didn’t catch that softball).
DEF Sensor Simulator - Is it Worth Building?
While driving from Klamath, California to Cresent City, California in our 2022 Entegra Accolade XL 37L Super C, we got the dreaded dashboard light that no one wants so see: our DEF warning light turned on. I panicked. Kasie remained calm. When we arrived at our campground, we drank a beer. Then we got into task mode and immediately began researching what to do. Here’s what we learned.
Disclaimer: Please note that WE ARE NOT RV EXPERTS! WE ARE JUST TRYING TO SHARE WHAT WE HAVE LEARNED ABOUT OUR RIG. DO YOUR OWN RESEARCH. WE ARE NOT RESPONSIBLE FOR YOUR RIG OR ANY DECISIONS THAT YOU MAKE. We do get a very small commission at no cost to you if you use one of the Amazon Links (a/k/a beer money).
While driving from Klamath, California to Cresent City, California in our 2022 Entegra Accolade XL 37L Super C, we got the dreaded dashboard light that no one wants so see: our DEF warning light turned on. I panicked. Kasie remained calm. When we arrived at our campground, we drank a beer. Then we got into task mode and immediately began researching what to do. Here’s what we learned.
Why Does Our RV Have DEF?
Our RV is built on a Freightliner S2RV chassis with a Cummins 6.7L ISB diesel engine. Back in 2010, new emissions regulations came into effect for diesel engines, which required the use of diesel exhaust fluid (DEF) to reduce oxides of nitrogen (NOx) emissions. Small quantities of DEF are injected into the exhaust upstream of a catalyst, where it vaporizes and decomposes to form ammonia (NH3) and carbon dioxide (CO2). The ammonia, in conjunction a catalyst, converts the NOx to harmless nitrogen (N2) and water (H2O).
If you want to know more, check out the Cummins Diesel Exhaust Fluid Q&A.
What are the Four Stages of DEF-Related Warnings for a Cummins Diesel Engine?
Cummins created a nice little flyer on DEF-related warnings. Our DEF gauge doesn’t quite look line the one in the flyer. Instead, on our S2RV chassis, we have four little bars that tell us if our DEF tank is 25%, 50%, 75%, and 100% full. There’s also a light that will show up as amber or red, depending on the DEF system status and level. Amber means there is a problem; red means there’s a BIG PROBLEM. Here’s a couple of photos from others showing what the dash might look like on the S2RV chassis.
DEF warning light (amber) with a full DEF tank.
Red DEF light showing that DEF is critically low.
Did We Really Have an Issue with Our DEF or Did We Just Have Bad Sensor?
The first thing that we wanted to do was isolate our DEF issue. We have a Scan Gauge D that tells us error codes. We were getting the 3364 code with the amber DEF warning light. We googled the code and found that this means that the DEF fluid quality was not right.
But did we really have a DEF quality issue? Or did we have a bad sensor?
As background, we typically fill our DEF tank with Super-Tech DEF (blue jugs) from Walmart. We always open the cap to make sure the seal is still in tact before purchasing our DEF to make sure it has not been tampered with. Given that we had driven over 100 miles or since adding DEF and we were camping in mild climates, we felt very confident that our DEF was fine and that we had a bad sensor. After all, why would the DEF suddenly go bad?
We had a couple of options to test our “bad sensor” theory. First, a refractometer can be used to test the DEF fluid concentration, which is supposed to contain 32.5% urea. If that looks good, there probably isn’t a DEF quality issue and instead the issue is a sensor. Second, the existing DEF can be siphoned out of the DEF tank and replaced with fresh DEF. If fault code persists after trying to clear it, then the issue is likely the sensor.
Why is a DEF Fault Code so Scary to RV Owners Like Us?
Simply put, DEF Fault codes cause the RV to derate. Essentially, the engine will lose power over time. We both vaguely recalled people complaining about being derated on the Facebook forums. Given our circumstances, we didn’t know exactly how fast or to what extent we would lose power. I immediately freaked out about the possibilty that we could end up being derated to 5 mph (a/k/a “limp mode”) as we made our way along some highways through the Redwoods. That’s scary.
How Fast will an S2RV Super C Derate with a DEF Issue?
Derating Under the Current EPA Regulations
When the EPA implemented the NOx / DEF regulations, the agency basically left it up to the manufacturers to induce drivers to fix a faulty DEF system. The general idea is to have the vehicle “derate” over time until the problem is fixed. A 2009 EPA Guidance Document stated:
Possible approaches for the manufacturer to degrade performance include a derate of the engine’s maximum available engine torque of a sufficient magnitude for the operator to notice decreased operation (a derate of at least 25% is likely to be needed for such an effect) and progressing to further degradation that could include operation of the engine being disabled or severely restricted, implemented in a manner designed to prevent operation without DEF. EPA recognizes that there may be safety concerns regarding a complete disablement of the engine or severe degradation occurring while the vehicle is moving, and therefore believes that such degradation would best be initiated at the time of refueling, parking or restart.
See CISD–09–04 REVISED.
I contacted Cummins and asked about the derate shedule in our S2RV chassis. When would we start to derate? When would we be in “limp mode” (derated to about 5 mph)? The answer I got back from Cummins was not helpful. Cummins replied: “When a fault code comes up there isn't a certain amount of time before it happens.. you need to take it into an authorized shop as soon as possible.” Geesh….
The “best” information I could find about a possible derate schedule was a 2021 article from the Entegra Owners Association President titled “How to Survive a DEF Sensor Fault.” The article stated:
So when the DEF light turns on indicating a problem, NOTHING happens for the first hour…you just have a warning…but know the clock is ticking. After the first hour, the engine de-rates by 25% for the next two hours. You probably won’t even notice a decrease in performance at 25%. At the fourth hour, however, the Engine Control Module (ECM) will de-rate the engine by 40%, and again, you probably won’t notice that unless you’re traveling in some pretty hefty hills. After the 40% de-rate, the ECM goes into the 5 mph “LIMP MODE.” Now in a 40% de-rate, you can run INDEFINITELY, unless one of these 3 things occur:
1. You idle for more than one hour;
2. You turn off the engine;
3. You fill your diesel WITHOUT also filling your DEF fluid. The ECM Looks for that!
If any of those three conditions occur, your engine will de-rate to the 5mph LIMP MODE. Of course, if you get the SPN#1761 – FMI9 DEF TANK VOLUME, you cannot recover from that and it goes into LIMP MODE. So to continue traveling under these conditions, DON’T LET ONE OF THOSE 3 CONDITIONS OCCUR! Keep going! If you need to fill up, LEAVE THE ENGINE RUNNING….AND…fill your DEF TANK too. Keep driving until you land somewhere safe where you can have the problem addressed safely.
Keep in mind that this information was likely for an Entegra Class A motorhome, not a Super C, like ours. This article was a data point, but it certainly did not give me much comfort.
Derating in the Future (2027 and on)
Driving down a busy highway at significantly reduced speeds is certainly a safety issue. The regulators have finally realized this. As such, in 2022, the Biden Administration implemented new regulations (effective for 2027 models) that, among other things, provide operators more time to fix the DEF issue before derating occurs and implement a 25 mph final derate speed.
See 40 CFR 1036.111. The new rules will also require manufacturers to give way more more detailed information on what exactly the problem is. See 40 CFR 1036.110. Among other things, “[i]f there are additional derate stages, also [the system must] indicate the next speed restriction and the time remaining until starting the next restriction.” Essentially, those with newer rigs won’t be guessing like we are. Lastly, the new regulations will require manufacturers to warrant the DEF system for 10 years (instead of the current 5 years). See 40 CFR 1036.120. That is welcome news given all of the issues with DEF systems.
What Options Did We to Fix our DEF Sensor Issue?
After getting the DEF fault code, we called the nearest Freightliner Service Centor (Medford, Oregon) get their advice on what to do. They assured us that they had a replacement DEF header and could fix the problem if we drove to Medford. However, like Cummins, they didn’t know the derate schedule for our Super C, but told me that “the clock was ticking” and it was possible that we could derate into “limp mode” (maximum speed ~ 5 mph) within a few hours.
Keep in mind that (1) we had already driven 40 minutes (from Klamath to Cresent City) and (2) the closest Freightliner Service Center was another 2.5 hours away. I was fearful that we would increasingly derate on our journey to Medford. Moreover, our route would take us down curvy Highway 199 through the Redwood National park. Where we going to lose significant power and speed on our journey? And if so, when?
We briefly investigated other options.
Service Tech. Freightliner offered to have a service technician travel to our RV (at a cost of $175/hour + mileage). That travel time wouldn’t be covered by our warranty. We were skeptical that the technician would have the parts and ability to fix the issue on site as well.
Tow our RV. I researched a few tow companies in the area. However, I doubted that our warranty would cover a tow because we had not yet underwent a significant derate (at least that we could feel). Moreover, neither of us wanted to put BIG LADY through a tow if we could help it.
The best “solution” we could come up with was to build a DEF Sensor Simulator. If we started to significantly derate, the plan was to use it.
What is a DEF Sensor Simulator?
During the pandemic, DEF system failures were abundant — perhaps because parts (especially working sensors) were hard to come by. As a work-around, a group of really smart folks developed the DEF Sensor Simulator. Bascially, when a DEF sensor failure occurs, the DEF system stimulator allows the operator to temporarily drive without being derated so that the operator can drive to a repair facility safely with full engine power. The DEF system simulator has some computer code that tricks the DEF system into thinking that the DEF tank is 75% full and operating properly.
We belong to several Facebook groups where other Jayco Seneca and Entegra Accolade owners had built their own DEF Sensor Simulator for less than $100. If they could do it, we figured that we could as well.
DEF Sensor Simulator
DEF Sensor Simulator (requires soldering)
Connector for the Freightliner S2RV chassis
Pro Tip: Several people offer homemade DEF Sensor Simulators for sale. If you purchase one of those for our Freightliner S2RV chassis, make sure that it contains the Freightliner connector plug.
How Can Someone Build a DEF System Simulator?
We aren’t going to reinvent the wheel here, folks. This DEF Sensor Simulator website provides detailed instructions on how to build the sensor simulator and how to use it. THANK YOU! THANK YOU! THANK YOU!
(Note: The website now a passive archive of the original DEF sensor simulator site. The original site was privately hosted and has been deactivated. This site is hosted via a free service at wordpress.com, so should live on indefinitely unless WordPress elects to remove it. The content was last updated in 2022 and is no longer monitored or updated, however most of it has been checked for accuracy and is intact. No support or additional instruction can be provided. Any comments present in the included posts are from the original site and are just a part of the archive. No new comments can be accepted. Use at your own risk.)
Most of the parts (links below) are available on Amazon too.
Please note that many of these items can be sourced from alternative suppliers. These suppliers may be able to provide the parts quicker and cheaper than Amazon. For example, we found that we could get many of the parts much faster from Digikey (Raspberry pi) and Mouser Electronics (4-Hole Wire Harness Connector, Male Terminals (TE), Connector Cover). Because time was important to us, this was a key factor in our sourcing. Many of the parts were also cheaper when purchased from a non-Amazon source (at least at the time of our our build).
|
MOUSER |
|
|
TE Connectivity 4-Hole Wire Harness 1-1703818-1 (2) |
$3.60 |
|
TE Connectivity Male Terminals 571-1-963745-1 (10) |
$7.86 |
|
TE Connectivity Connector Cover 571-965786-1 (2) |
$1.58 |
|
Freight |
$9.99 |
|
Tax |
$1.08 |
|
Total |
$24.11 |
|
|
|
|
DIGIKEY KEY |
|
|
Canbed RP2040 Bus Board |
$15.90 |
|
Shipping |
$12.99 |
|
Tax |
$1.44 |
|
Tarriff |
$1.59 |
|
Total |
$31.92 |
|
|
|
|
AMAZON |
|
|
Electrical Wire (4-Core) |
$15.49 |
|
Electrical Box |
$9.29 |
|
Tax |
$1.89 |
|
$26.67 |
|
|
|
|
|
PARTS TOTAL (includes ~$23.00 shipping) |
$82.70 |
|
|
|
|
|
Our cost for the parts (including about $23 in shipping) was $82.70.
As for equipment, we did purchase soldering gun and upgraded our multimeter as part of the DEF Sensor Simulator build.
Was the DEF Sensor Simulator Hard to Build?
The DEF Sensor Simulator was not hard to build given the detailed instructions on the DEF Sensor Simulator website. Kasie built it less than 2 hours. Keep in mind that she had never soldered anything before (we didn’t even own a soldering gun before this project).
Perhaps the hardest part about the project was figuring out where to mount the DEF Sensor Simulator if we needed to use it. In our S2RV chassis, there’s a small slot where the DEF Sensor Simulator was easily positioned behind an existing bolt head. We had some high-strength magnets on hand that we placed around the DEF Sensor Simulator in order to hold it in place. If we had to use the newly-built DEF Sensor Simulator, that sucker wasn’t going anywhere.
Is Temporarily Installing a DEF Sensor Simulator on an RV to get to a Service Center Legal?
WARNING! The information contained in this site is provided for informational purposes only, and should not be construed as legal advice on any subject matter.
You should not act or refrain from acting on the basis of any content included in this site without seeking legal or other professional advice. The contents of this site contain general information and may not reflect current legal developments or address your situation. We disclaim all liability for actions you take or fail to take based on any content on this site.
You should consult with your own legal counsel to answer this question. However, I personally think that there are strong arguments that a DEF Sensor Simulator used in “emergency” situations is not illegal.
Section 40 CFR § 1068.101(b) contains the relevant provisions:
(1) Tampering. You may not remove or render inoperative any device or element of design installed on or in engines/equipment in compliance with the regulations prior to its sale and delivery to the ultimate purchaser. You also may not knowingly remove or render inoperative any such device or element of design after such sale and delivery to the ultimate purchaser…. For a manufacturer or dealer, we may assess a civil penalty up to $44,539 for each engine or piece of equipment in violation. For anyone else, we may assess a civil penalty up to $4,454 for each engine or piece of equipment in violation. This prohibition does not apply in any of the following situations:
(i) You need to repair the engine/equipment and you restore it to proper functioning when the repair is complete.
(ii) You need to modify the engine/equipment to respond to a temporary emergency and you restore it to proper functioning as soon as possible…..
(2) Defeat devices. You may not knowingly manufacture, sell, offer to sell, or install, any component that bypasses, impairs, defeats, or disables the control of emissions of any regulated pollutant, except as explicitly allowed by the standard-setting part. We may assess a civil penalty up to $4,454 for each component in violation.
If an RV owner is on busy highway and being substantially derated, the RV owner could argue that temporarily installing a DEF Sensor Simulator to get to the nearest service center might fit within one of exceptions in Section 1068.101(b)(1). After all, the RV owner is in the process of trying to “repair” the DEF system. Certainly, if the RV were significantly derate, that is a safety issue that could be categorized as a “temporary emergency” as well.
Likewise, the DEF Sensor Simulator itself does not “defeat” the emissions operations. The DEF sensor simulator tricks the system into thinking that the DEF tank is 75% full and operating properly. As long as there is DEF in the tank, the DEF system should theoretically continue to operate properly until the driver can get to the nearest service center. (On that note, it’s my understanding that someone should NOT use the DEF sensor simulator if there is not sufficient DEF in the tank. Doing so would damage the DEF system and/or the engine itself!).
Of some interest, in late 2020, the EPA offered some guidance in a non-binding Enforcement Policy:
The EPA typically does not take enforcement action for conduct that might be a violation of section 203(a)(3) of the Clean Air Act if the person engaging in the conduct has a documented “reasonable basis” to conclude that the conduct (or, where the conduct in question is the manufacturing or sale of a part or component, the installation and use of that part or component) does not and will not adversely affect emissions. This Policy Statement does not apply, however, to conduct affecting an OBD system, which may be subject to enforcement regardless of effect on emissions.
See The EPA Enforcement Policy on Vehicle and Engine Tampering and Aftermarket Defeat Devices under the Clean Air Act (Nov 23, 2020). Although this document expressly carved out conduct affecting the OBD system from the Enforcement Policy, the guidance suggests that EPA is largely concerned with prosecuting activities and devices where the intent and actual effects on emissions are much different that those involving the temporary use of a DEF Sensor Simulator to help transport an RV to a service center for repair.
Given that the EPA issued new regulations to provide more time for operators to fix a DEF issue before significantly derating (effective for 2027 models), I also think an argument can be made that the temporary use of a DEF Sensor Simulator by RVers who are being substanitally derated is alligned with the overall goals of the new regulations.
Lastly, I’m not aware of any RV owner being fined for installing a DEF Sensor Simulator under this circumstances. (If you are aware of an RV owner who was fined, please leave a comment or send an email to ClassCBroads@gmail.com and let me know).
Did the DEF Sensor Simulator Work?
As a retired lawyer, I’m very risk adverse. As such, I’m not going to tell you whether we actually used the DEF Sensor Simulator or not on the road. Yes, you heard that right. After all of the trouble of building the DEF Sensor Simulator and mounting it, I’m going to take a hard pass on whether the DEF Sensor Simulator worked. The bottom line is that I don’t want to get into trouble with the EPA on the off-chance that they don’t buy my arguments about the legality of the using the device under our circumstances.
I will tell you that (1) having the DEF Sensor Simulator on hand did give us peace of mind and (2) we drove from Cresent City to the Medford Freightliner Service Centor with no problem.
And, it was a bad sensor.
Stay safe. Stay classy.
Rear Air Bag Dump Valve Installation in Our Super C RV (S2RV Chassis)
Our 2022 Entegra Accolade XL 37L is built on the S2RV chassis with rear air bags….. Many Super C owners have added air bag dump valves to their rig. We decided to do the same.
Our 2022 Entegra Accolade XL 37L is built on the S2RV chassis with rear air bags. Leveling the rig requires many steps as we explained in our 9-step leveling blog/video. Perhaps the most time-consuming step in the leveling process involves releasing the air from the rear air bags. It’s a long hhhhsssssss-ing process. As such, many Super C owners have added air bag dump valves to their rig. We decided to do the same.
THANK YOU! Special thanks to Dave Poole, Amy and Rob Taft, and Kraig and Rachel Pike — all of whom completed the project on their rig and gave us the confidence to do this project ourselves!
Some RV owners have installed automatic rear air bag dump valves like the ones in this forum. We opted to install a manual system instead because it just seemed more straight forward.
Parts List for Super C Rear Air Bag Dump
Here’s the parts list for the rear air bag dump system that we installed:
DISCLAIMERS: PLEASE DO YOUR OWN RESEARCH. WE ARE NOT RV EXPERTS! WE ARE NOT RESPONSIBLE FOR YOUR RIG! We just want to share our experiences about this project in this blog. We do get a very small commission at no cost to you if you use one of the Amazon Links (a/k/a beer money).
Steps for Rear Air Bag Dump System
The installation of our system involved the following steps.
(1) Dry Fit the Rear Air Bag Dump System
Using a lot of Teflon plumber’s tape, we dry-fitted the system together. That is tougher than it sounds because we needed the valves to be oriented so that we could actually use them.
(2) Figure Out Where Mount the Rear Air Bag Dump System
The location is largely a matter of personal preference, as well as the specific Super C layout. For our rig, Kasie opted to locate the rear air bag dump system near the driver’s side exterior storage bay in front of our rear tires. From that area, she figured out the general path that the air lines would go back to each of the rear air bags (more on that below).
She drilled a couple of 5/8” holes (wide enough to receive the air brake tubing and loom). The loom probably isn’t needed, but because we had some laying around from a prior project, Kasie decided to use it. Next, Kasie attached some plywood to the bay sidewall where the rear air bag dump system would be mounted. She then fastened the dry-fitted system to the plywood panel.
Ideally, the valve handles would have been oriented so that they ran parallel to the bay side wall and take up less space. However, it was quite difficult to get all of the pieces aligned in that configuration AND air-tight. In the end, Kasie was able to orient the valves so that were perpendicular to the exterior bay side wall.
(3) Run the Air Line Hose
Where exactly to run the air lines is also a matter of personal preference and chassis/floorplan configuration. Below are photos generally showing the route that Kasie chose.
Passenger Side
Driver Side
A few things to note on the installation:
Kasie made sure that the air bags were deflated before running the new air lines. Because we had already leveled the rig, she didn’t take any extra steps to do deflate the air bags.
Kasie installed the new air hose lines so that each “T” was before motion control unit (“MCU”) adjacent to the air bag. If your rig doesn’t have MCUs, you may want to consider installing them. Check out our blog “Four Easy (and Not So Easy) Upgrades to our S2RV Chassis” for more info on the MCUs.
Kasie routed the new passenger side air line towards the rear of the coach through part of the frame in “U” shape in order to route the line to the driver’s side of the rig. She then zip-tied the both newly installed air lines together as they made their way to the exterior bay with rear air bag system.
Kasie used a Husky pipe cutting tool (similar to the one below) so that the cuts in the air lines were clean and straight.
(4) Test the Rear Air Bag Dump System
After connecting everything, Kasie tested the system for leaks. She aired up rear air bags by turning on the RV and then retracting the jacks. Then, she used sprayed soapy water on all of the connections to look for leaks. There were a couple so that meant more Teflon tape plus more time to complete the project.
Final Thoughts
Installing a manual rear air bag dump system on S2RV chassis looks pretty straight-forward, but it is not. Getting all of the parts to align AND be air-tight is not easy. Moreover, routing the air lines and installing the “T” in such a tight space wasn’t a cake-walk. The project took about a day to complete.
Would we do it again? I’m honestly not sure if all of this work is worth shaving several minutes off of our leveling process. Kasie seems to think it is, especially because our plans over the next several months will involve us setting up the RV every few days. Only time will tell…
RV Transfer Switch - Problem and “Fix”
While camping at Pinnacles National Park, we had some major electrical issues. In the video below, we describe our trouble-shooting process and how we “fixed” the issue with our RV’s transfer switch.
While camping at Pinnacles National Park, we had some MAJOR electrical issues. In the video below (starting around minute 12), we describe our trouble-shooting process and how we “fixed” the issue with our RV’s transfer switch.
Disclaimer: Please note that WE ARE NOT RV EXPERTS! WE ARE JUST TRYING TO SHARE WHAT WE HAVE LEARNED FROM OTHERS. DO YOUR OWN RESEARCH. WE ARE NOT RESPONSIBLE FOR YOUR RIG. We do get a very small commission at no cost to you if you use one of the Amazon Links (a/k/a beer money).
Our Electrical Set-Up at Pinnacles National Park
We own a 2022 Entegra Accolade XL 37L — otherwise known as “Big Lady.” This rig is basically the same as the Jayco Seneca Prestige. Both are 50-amp “Super C” RVs equipped with an on-board Onan generator.
The campground at Pinnacles National Park contains only 30-amp pedestals. As such, when camping in places like Pinnacles, our set-up involves (1) a 30-to-50 amp dogbone and (2) a Hughes Power Watchdog EPO 50-amp “smart” surge protector. “EPO” is an acronym for “emergency power off.” If something is wrong with the electrical power at the pedestal, the “smart” surge protector is supposed to provide an error code and cut power. Other brands (like Progressive Industries) sometimes call this device an “electrical management system” or EMS.
Our Electrical Issues at Pinnacles National Park
After a couple of days of camping at Pinnacles National Park, we simply lost power. The first time, the power outage was cause by a blown breaker at the campground breaker box. Easy fix. The second time, we could not figure out what was going on.
Our EPO/EMS told us that the power at the campground pedestal was fine (i.e., no error codes). A Pinnacles staff member also checked the pedestal and told us it was okay. However, every time we tried to power up the RV from the pedestal, the power would not come on. We even tried hooking up to a DIFFERENT pedestal at Pinnacles and still got the same result — no power! In the video, we explain some of our other trouble-shooting steps in more detail.
In the end, we determined that our Southwire Transfer Switch was stopping the power from the Pinnacles electrical pedestal from coming into the RV. The transfer switch was detecting an “open ground” even though our EPO/EMS did not detect any problems.
We contacted Southwire, and they sent us the following information to test.
Table 1: Southwire’s definition of “good power.”
FIG 1: Southwire’s diagram and photo showing how to measure voltages.
The voltage readings we were getting with our multimeter were as follows:
Pinnacles Campground Pedestal:
L1 to N: 120 V
L1 to G: 121 V
N TO G: 2.2 V
Automatic Transfer Switch:
L1 to N: 120 V
L1 to G: 119 V
L2 to N: 120 V
L2 to G: 119 V
N to G: 2.0 V*
L1 to L2: 120 V**
*That N to G voltage reading should be zero (not around 2 V). Was that our problem?
**The dogbone adaptor connects the single 120 volt hot pole to both the L1 and L2 inputs of the RV’s 50 amp breaker panel. In hindsight, I’m not sure why we were reading 120 V instead of 0 V on the L1 to L2. Perhaps we took an improper reading.
Regardless of what was causing the electrical problem, the BIGGER problem was that we were camping at Pinnacles over a VERY HOT Memorial Day weekend. We needed to run our air conditioners, especially so our dogs could stay cool. Somehow, we needed to get power to the rig.
What about just using the generator? Our RV powered up perfectly fine with our generator. Unfortunately, generators are not permitted at Pinnacles National Park under any circumstances. Even if we cleared running the generator with our neighbors, the park staff said “no generators!” That’s when we started researching more about transfer switches and whether there was some work-around to our electrical dilemma.
What is an RV Transfer Switch?
As part of our trouble-shooting process, we learned a lot about transfer switches. Our transfer switch is manufactured by Southwire, but there are several others on the market. As with most brands, there are “dumb” transfer switches and “smart” ones. The “dumb” ones just make sure the appropriate power source is being used, giving priority to the generator. The “smarter” transfer switches, like ours, do a little more.
Wiring diagram for our Southwire Transfer Switch (Model 40101)
Interior of our Southwire Transfer Switch (Model 40101) — which is located underneath our bed.
Model 40100 (“dumb”)
Transfers to generator power automatically when energized after a delay
Does NOT provide surge protection
Model 40101 (ours - “smart”)
Reverse polarity
Open ground
Does NOT provide surge protection
Model 41261 (what we ordered - “smarter”)
Reverse polarity
Open ground
Surge protection
Model 40350 (“smartest”?)
Reverse polarity
Open ground
Surge protection
Low (132V) voltage
Miswired pedestal
High / low frequency
Interestingly, many Entegra Accolades and Jayco Senecas were manufactured with “dumb” transfer switches. We don’t know when or why Jayco/Entegra made the switch (pun intended).
How We Fixed our Transfer Switch Problem?
Since we could not use our generator, our temporary “fix” to our transfer switch problem was to bypass the transfer switch entirely. In short, Kasie re-routed the wires from the RV’s electrical cord directly into the 50-amp breaker. It’s not as easy as it sounds because working with those large wires in such a small space is not easy (see the video for more details). Importantly, we continued to use our EPO/EMS to detect electrical/power issues when we turned on the power, hoping that the EPO/EMS would detect any major electrical issues.
Did bypassing the transfer switch work? YES YES YES!
By bypassing the transfer switch under these circumstances, we were able to get power directly from the pedistal and keep our air conditioners running for the rest of our stay at Pinnacles National Park. Woo hoo!
Was the Electrical Problem the Campground Pedestal or the Transfer Switch?
To recap…
Our transfer switch was detecting an open ground at the Pinnacles National Park campground, even though our EPO/EMS was telling us that everything was fine at the pedestal. The transfer switch therefore cut off power. Was the transfer switch sensor bad? Or was the pedestal power really faulty? Why would the power be bad at two different pedestals? Was the EPO/EMS doing its job properly? Clearly, the transfer switch was picking up some electrical issue that the EPO/EMS did not, but why? Just different cut-offs/sentitivities to the “open ground”? What exactly is the N to G sensitivity on the transfer switch? On the EPO/EMS? We contacted both companies, and neither Southwire nor Hughes could give us definitive answers. If you have some insight about what was going on, please let us know.
We do know that when we got to our next campground, Kasie reconfigured the transfer switch to its original condition (i.e., reversed the bypass configuration). This time, the transfer switch worked perfectly fine and we were able to use shore power without any issues. The bottom line is that we think there was something wrong with the power supply at Pinnacles National Park. We’ve had no problems with our transfer switch (knock-on-wood) since our stay in Pinnacles National Park.
Should We Get a “Dumb” Transfer Switch?
Because we didn’t know whether or not our transfer switch was faulty/bad until we got to the next campground, we ordered a replacement to be shipped there. The replacement was a “smart” transfer switch that is also supposed to detect an “open ground” (Southwire Model 41261). We ended up returning that “smart” transfer switch. If we would have replaced the transfer switch with another “smart” one, we would have had the same issue at Pinnacles National Park.
All of this begs the question as to whether a “dumb” transfer switch might be the better way to go in the future. Does the EPO/EMS have enough smarts to tell us if there are major electrical issues with the pedestal? Or is the redundancy of a “smart” transfer switch good for some reason?
Channelling my inner Carrie Bradshaw, I kept asking myself: “When it comes to transfer switches, is “dumber” better?”
I would love to know what you think….
RV Travel Day (Teardown) Checklist: 50+ Things We Do Before Hitting the Road
Even though we now live in our RV, I don’t like travel days. Sure, it’s exciting to see a new part of the country. Yet, TRAVEL DAYS are incredibly stressful. I’m a worrier by nature, and the idea of barreling down the road in our home-on-wheels at 60 mph isn’t comforting. There are so many things that can go wrong, and we’ve learned from experience what some of those things can be. For me, a comprehensive RV travel day checklist for hitting the road is one way to help reduce the stress.
About Us
We’ve been RVing since 2019. We’ve owned (1) Sally, a travel trailer (2019 Coachman Spirit Ultra Lite 2245BH), (2) Birdie, a regular Class C RV (2019 Jayco Greyhawk 31F), and (3) Big Lady, a Super C RV (2022 Entegra Accolade XL 37L). Two years ago, we made a huge decision (HUGE, I tell ya!) and decided to travel the country full-time in our RV. We aren’t RV experts, but by now, we think that we have a pretty good system for preparing our RV for travel day.
About Our Approach to RV Travel Days
Even though we now live in our RV, I don’t like RV travel days. Sure, it’s exciting to see a new part of the country. Yet, RV TRAVEL DAYS ARE INCREDIBILY STRESSFUL. I’m a worrier by nature, and the idea of barreling down the road in our home-on-wheels at 60 mph isn’t comforting. There are so many things that can go wrong, and we’ve learned from experience what some of those things can be. For me, a comprehensive RV travel day checklist for hitting the road is one way to help reduce the stress.
Disclaimer: Please note that WE ARE NOT RV EXPERTS! WE ARE JUST TRYING TO SHARE WHAT WE HAVE LEARNED. DO YOUR OWN RESEARCH. WE ARE NOT RESPONSIBLE FOR YOUR RIG. We do get a very small commission at no cost to you if you use one of the Amazon Links (a/k/a beer money).
Do You Need an RV Travel (Teardown) Day Checklist
In our opinion, the answer is: Yes. Yes. Yes.
And more “yes” for good measure: Yes, you need an RV Travel Day Checklist.
Did you forget to lock that outdoor TV? How about tighten all of the windows? Even if you’ve been RVing for decades, you are bound to forget something if you don’t have a checklist.
I realize that people travel differently, and there’s no judgment if you don’t have a checklist. Some people are type A preppers, and others are go-with-the-flow. Moreover, there are hundreds of different types of RVs on the road. As such, there’s a wide variety of ways that RVers prepare their RV before hitting the road. Heck, we know couples who own the EXACT SAME RV that we do (same year, same make, same model), and they prepare much differently that we do. For folks who don’t use a checklist, I hope some of the information in this blog is useful as general travel tips.
How Do We Manage Our RV Travel Day Checklist
PRO TIP: At the top of our RV Travel Day Checklist, we also note things like when we last replaced the water filter, last lubed the slide seals, etc. The mobile app is a handy way to keep track of routine maintenance items. More importantly, we are reminded that we need to do them every time we tear down our campsite.
We know some people that have keep a written “to do” lists. Several high-profile YouTubers use steering wheel wrist bands. For us, we just use a simple Google “Keep” list that we share on our Android phones. As we complete each item on the checklist, we mark it off on our phones. It’s really just that simple.
What I like about the Google Keep mobile app is that it is easily editable too. We may not be at the RV when we think of something that needs to be on the RV travel day checklist. We just pull out one of our phones, and voila!
(Apple probably makes a similar sort of mobile app for folks with iPhones.)
Our RV Travel Day (Teardown) Checklist
We organize our RV travel day checklist by living area. For ease of reference, we will start in the rear bedroom and work our way up. Keep in mind that we use a short-hand notation for many items. For better context and more information, you may wish to watch our video. Plus, our video is just so darn entertaining!
BEDROOM: RV TRAVEL DAY (TEARDOWN) CHECKLIST
1. Bring bed up
a. Move clock to bed
b. Raise window shades
c. Clear items from shelf above bed
2. Close washer (we leave it open when camping
3. Secure bedroom TV
4. Close all cabinet doors
5. Wedge laundry basket and/or dog food container near bed (after slides are retracted)
6. Close bedroom slide
7. Move scale to bunk area
8. Latch bedroom door
BUNK AREA: RV TRAVEL DAY (TEARDOWN) CHECKLIST
9. Secure filament
10. Take down magnetic light
11. Move/secure electric bike batteries
BATHROOM: RV TRAVEL DAY (TEARDOWN) CHECKLIST
12. Move shampoo / razers & showerhead to floor (place towel on shower floor)
13. Latch shower door
14. Latch bathroom door
15. Address vanity items
16. Place treatment in toilet
17. Shut toilet seat lid
18. Close exhaust fan
KITCHEN: RV TRAVEL DAY (TEARDOWN) CHECKLIST
19. Place pool noodle in microwave
20. Switch Instant Pot lids
21. Take off paper towels
22. Place soap/bottles in sink
23. Organize refrigerator
24. Turn off ice maker
25. Lock refrigerator
26. Close all kitchen drawers properly
27. Place ottoman by bottom kitchen drawer (after slide is retracted)
LIVING ROOM: RV TRAVEL DAY (TEARDOWN) CHECKLIST
28. Secure living room TV
29. Velcro remotes
30. Close overhead cabinets
31. Move security cameras
32. Tape dinette drawers
33. Tighten windows
34. Pick up rugs
35. Move dog leashes
36. Place dog water in sink
37. Tear down baby / dog gate
38. Turn off lights, AC, heat, & tank heaters
39. Turn on water pump
40. Secure cabover bunk area for loose items
EXTERIOR: RV TRAVEL DAY (TEARDOWN) CHECKLIST
41. Check slides for loose bolts, etc
42. Check mudflaps for issues
43. Retract awning
44. Store Starlink
45. Lock tool chest
46. Lock exterior storage bays
47. Lock outdoor TV
48. Air up and retract jacks
49. Store wheel stops / leveling tools
50. Store electrical cord, sewer hose, water hose
51. Inspect tires
52. Check tire pressure (use TPMS once traveling)
53. Clean RV mirrors and windshield
MISCELLANEOUS: RV TRAVEL DAY (TEARDOWN) CHECKLIST
54. Blow main slide prior to retracting any slides
55. Count dog bones
56. Double lock main entry door
57. Take out trash
58. Medicate dogs (if needed)
59. Check campsite for items left behind
TOWED VEHICLE: RV TRAVEL DAY (TEARDOWN) CHECKLIST
60. Attach towed vehicle
61. Engage RVi Brake
62. Check lights & brakes on towed vehicle
63. Make sure tow bar engages
64. Watch towed vehicle roll properly
HOW DO YOU PREPARE FOR TRAVEL DAYS?
Hopefully our check list may be a useful starting point for your travel days. More importantly, did we miss anything? Any advice? Please leave a comment or email me (Lana) at ClassCBroads@gmail.com.
Anaheim Harbor RV Park near Disneyland: Is it Worth it?
If you are thinking of going to Disneyland while RVing, there’s no place closer than the Anaheim Harbor RV Park. Their slogan is “There’s nobody closer to the magic.” That’s true. There’re also some things that you should know before booking an RV site there.
If you are thinking of going to Disneyland while RVing, there’s no place closer than the Anaheim Harbor RV Park. Their slogan is “There’s nobody closer to the magic.” That’s true. There’re also some things that you should know before booking an RV site there.
We stayed at the Anaheim Harbor RV Park for 19 days in the spring of 2024. Here’s what we learned.
Pros of the Anaheim Harbor RV Park
1. Location
The Anaheim Harbor RV Park is just a 20-minute walk to Disneyland. On most evenings, we could see some of the Disneyland fireworks going off promptly at 9:30 pm from our RV site. Yes, fireworks are a “pro” for most people. However, for RVers traveling with dogs that don’t like thunderstorms or loud noises, that could be a problem.
Pro Tip: We walked over 34,000 steps on the day we visited Disneyland. Even though the Anaheim Harbor RV Park is close to Disneyland, it was struggle walking back to the park after such a long day. Uber or Lyft, anyone?
2. Competitive Rates
The rates at the Anaheim Harbor RV Park are competitive, ranging from $65/night (small; 25x14ft) to $80/night (40x28ft; deluxe+ parking+grass). (These are 2024 rates, and taxes/fees are not included))
We chose the $80/night deluxe option because we had a tow vehicle and wanted some grass for our pups. We were assigned two adjacent sites (sites 116-117) for our “deluxe” site.
3. Pet Friendly (Sorta)
The Anaheim Harbor RV Park is “sorta” pet friendly. Here’s what the RV park does right.
(a) The Anaheim Harbor RV Park did not charge an extra fee for pets. Thank you!
(b) The Anaheim Harbor RV Park provided pet waste bags near the office. These weren’t just any pet waste bags though. They were the NICEST ones I’ve ever used. Think of the difference between single ply toilet paper and some soft Charmin. These bags were like the latter, and the dispensers were always stocked! Thank you! Thank you! Thank you!
4. Security
As someone who grew up in the Midwest, I’m always nervous about staying in big cities with a reputation for crime. The Los Angeles metropolitan area seemed particularly concerning in that regard. I never felt unsafe during our stay at the Anaheim Harbor RV Park though. Most notably, a security guard manned a small guard house near the entrance to the RV Park at night, and we saw a couple of cars patrolling the area as well.
5. Amenities
The Anaheim Harbor RV Park isn’t a “resort,” but it does have some good amenities.
(a) The RV park has a modern laundry facility. Patrons must purchase a card to use the machines.
(b) There’s a small swimming pool.
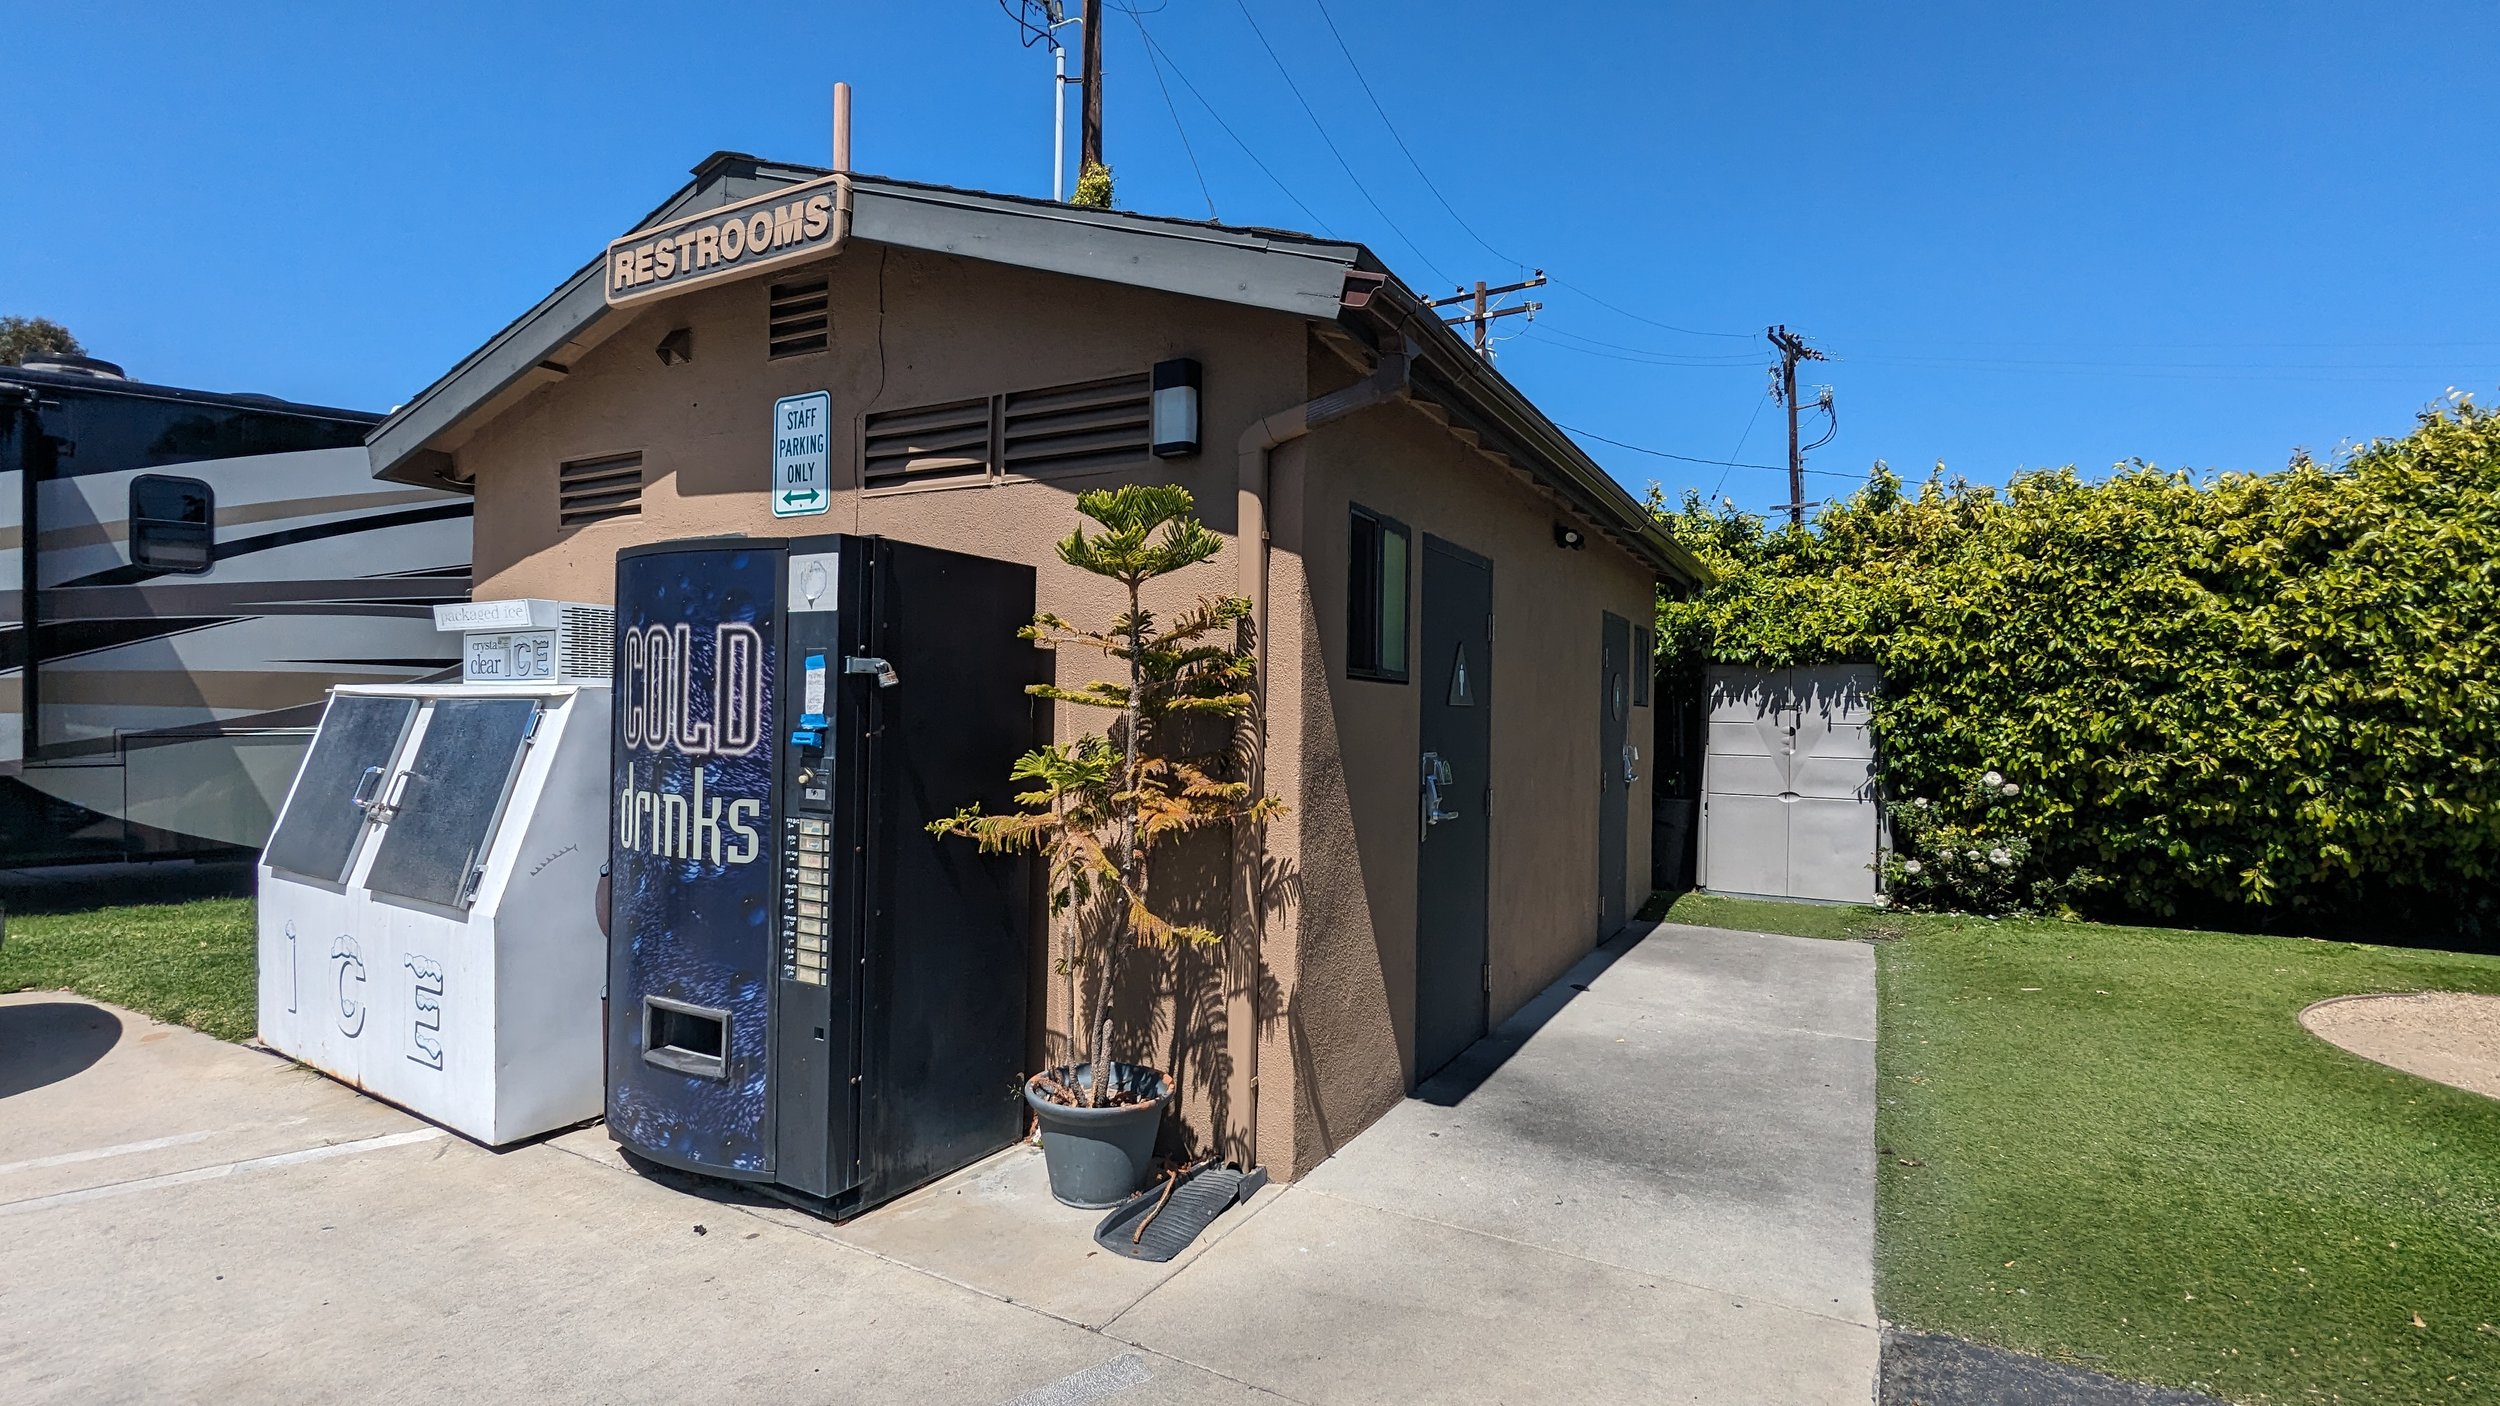
(c) The RV park has a couple of restroom facilities: one adjacent to the office and another a short distance away away.
(d) The RV park has a couple of very nice common spaces (one by the office and another by the pool) with a covered deck, grills, and chairs. We didn’t see any gatherings, but these spaces were well-maintained.
6. Great Staff
The folks working in the office at the Anaheim Harbor RV Park were nice, and made sure we got any applicable discounts for our stay. The office also let us receive mail and Amazon packages there. Lastly, for a small urban RV park, the place was very clean. The janitorial staff deserves a shout-out for keeping the place quite nice.
Cons of the Anaheim Harbor RV Park
1. Some Misleading Amenities.
The Anaheim Harbor RV Park boasts a “clubhouse” and a “five-hole putting green” on the website. Those aren’t want they sound like.
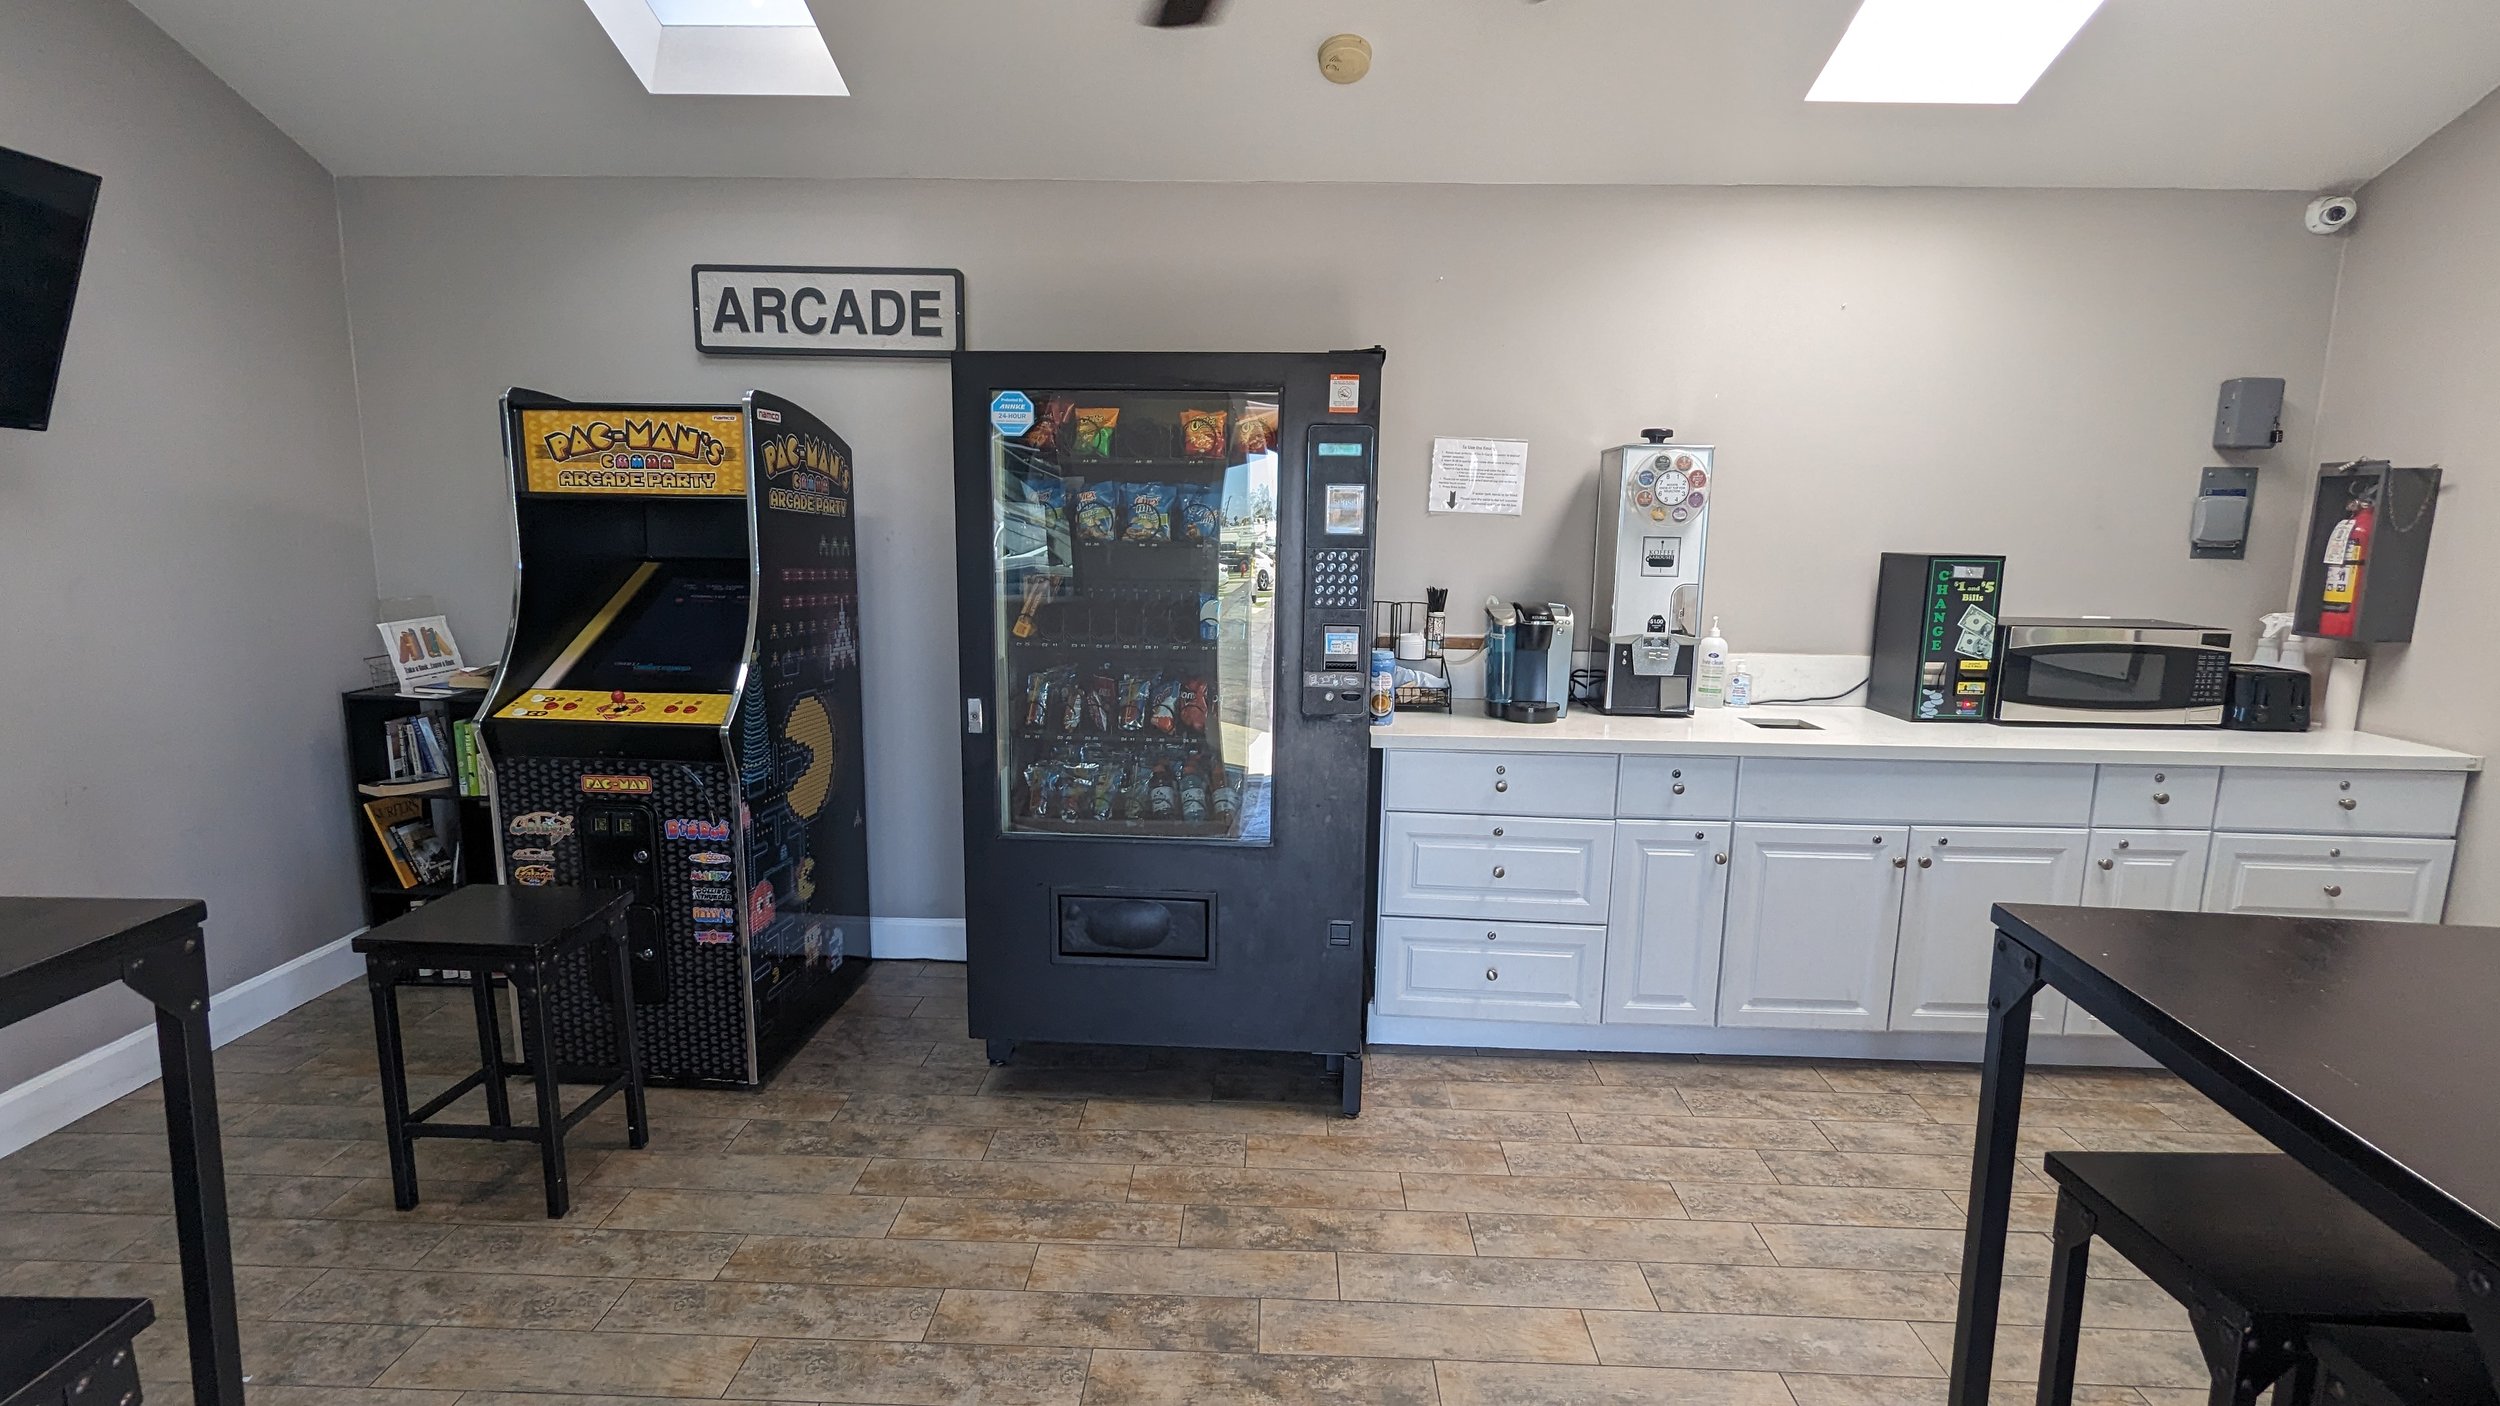
The clubhouse is an oversized shed with a 32-inch TV, PAC-man game, vending machine, and a Keurig machine ($1/pod). This isn’t a resort-style clubhouse.
The five-hole putting green is smaller than an RV site. We never once saw anyone playing the course…except when I air-golfed in the photo below. Look at that form!
2. Real Grass is a Premium
Remember how I said that the Anaheim Harbor RV Park was “sorta” pet friendly? The “grass” on our site (which we paid extra money for) was actually artificial turf. Moreover, the small turf pad was located waaaayyy at the back of our site. We had to purchase some extra fencing in order to be able to route a path from our RV door to the small area.
There’s also no dog park or good place to walk the dogs at the Anaheim Harbor RV Park. We often found ourselves walking the dogs just outside the RV park on South Harbor Boulevard. While that is a very busy street, there are a few patches of actual grass just outside of the RV park.
3. Lots of RV Newbies (and Permanent Residents)
This item isn’t a true “con” but just something that people staying at the Anaheim Harbor RV Park need to be aware of.
As you can imagine, many people who stay at the Anaheim Harbor RV Park are tourists going to Disneyland. We saw lots of RV rentals who were there for only a night or two, and we spoke to several couples who were RV-ing for the first time. Indeed, I’ve never seen so many Cruise America rented RVs in my life! There’s nothing wrong with that per se, but just be prepared to be patient as these “RV Newbies” get settled into their sites. On a few occasions, I was a little nervous about a newbie RVer running into something. No judgment…. We’ve all been there….
On the flip side, most of the Anaheim Harbor RV Park is reserved for permanent (long-term) residents. Those sites are farthest from the road, and they are very close together. There’s nothing wrong with that per se, but just know that people actually live there and short-term visitors need to respect that.
4. Sewer Locations are Not Ideal
The sewer access points for each at the Anaheim Harbor RV Park are located at the back of the site (not the side). Make sure and bring extra sewer hose if you have it around. Moreover, our site was oriented so that the sewer access point was “upstream” from our rig. We had to do the “sewer hose” dance to get all of the liquid to drain. If you don’t know what that means, watch this video excerpt.
Is it Worth Staying at the Anaheim Harbor RV Park?
The short answer is “yes.” If I had to do things over as far as accomodations go for our Disneyland adventure, we would stay at the Anaheim Harbor RV Park again. It’s not a “resort,” but the pros outweigh the cons. If you have stayed at the Anaheim Harbor RV Park, I’m curious to know what YOU thought!
My Visit to Slowjamastan: What YOU Should Know about this Micronation
I’ve always wanted to visit Slowjamastan. By “always,” I mean since about six months ago….Here’s what you need to know about Slowjamastan and our visit to the country.
I’ve always wanted to visit Slowjamastan. By “always,” I mean since about six months ago. My great love of the country began after reading this CNN article. When we decided to spend a month in nearby Ocotillo Wells at the Leaping Lizard RV Ranch, I was thrilled.
The motherland!
This was it!
But first….I had so many questions.
Here’s what you need to know about Slowjamastan and our visit to the country.
What is the Full Name of this Micronation?
The full name is The United Territories of the Sovereign Nation of The People’s Republic of Slowjamastan.
Let’s face it. That’s a lot of text for the official signs.
I call it TUTOTSNOTPROS for short (pronouced Too-TOT-Snot-Pros). Most people just call the place Slowjamastan.
When was Slowjamastan Founded?
The country was founded on August 18, 2021. Or maybe it was September 16, 2021.
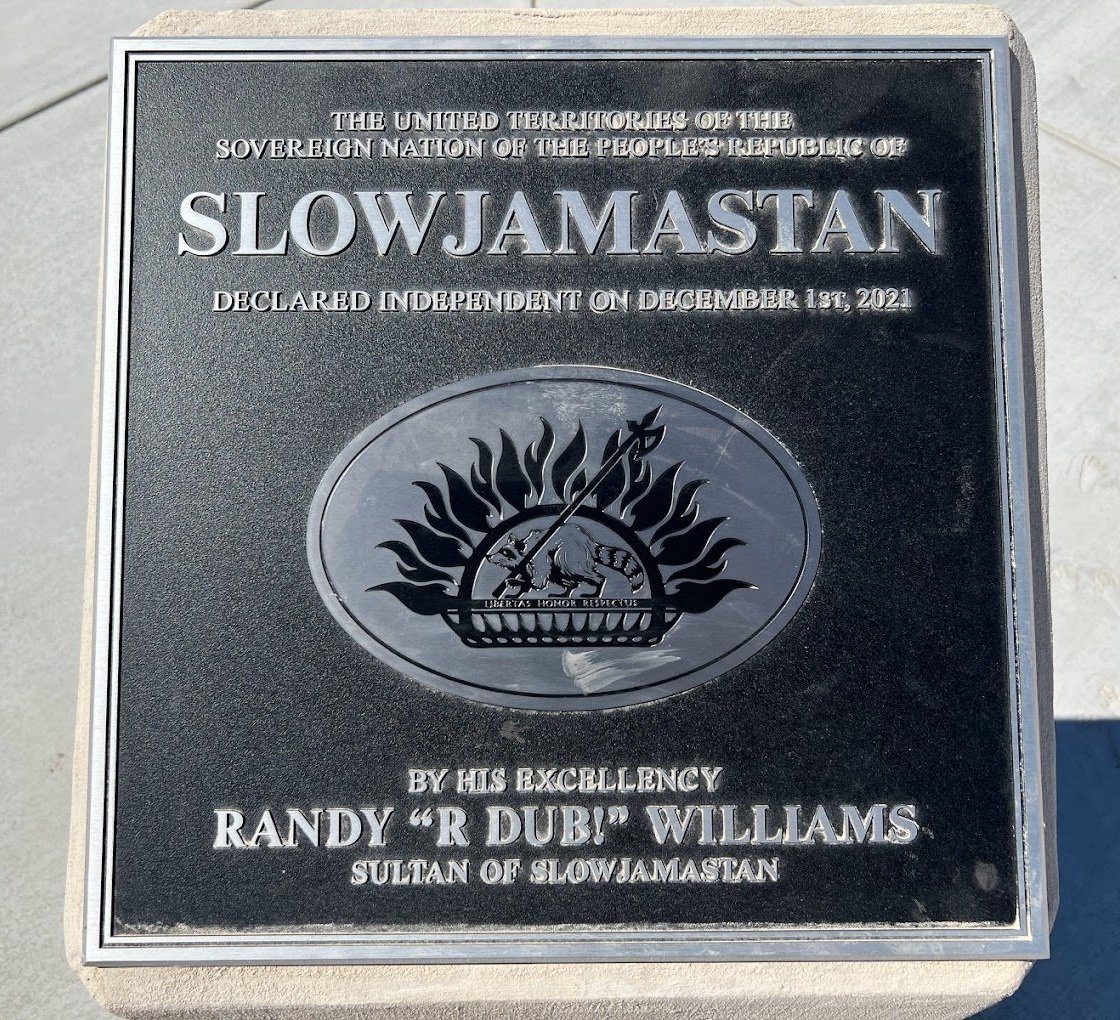
Slowjamastan celebrates Independence Day on December 1st each year. There’s even a plaque with this date so this must be true. (I didn’t just read it on the internet.)
Does Slowjamastan have a Government?
Yes, Slowjamastan has a government. Here’s the details:
Government System: Dictatorship
Leader: The Sultan a/k/a Randy Williams a/k/a R Dub!
Political Philosophy: Don’t start no sh*t, won’t be no sh*t.
Governors/Parliament/Ambassadors: Pay-to-play (more on that below).
Who Founded Slowjamastan?
Slowjamastan was founded by The Sultan. He’s some DJ from San Diego who likes Slow Jams and hates mumble rap.
The Sultan has reportedly visited every country in the world. That is why he started his own country.
The Sultan is also incredibly good looking. Here I am admiring his cartoon handsomeness.
Where is Slowjamastan?
Slowjamastan is located in the middle of nowhere.
In the desert.
Yes, the desert.
For reals.
Slowjamastan can be found off California Highway 78 about 10 miles east of Ocotillo Wells. It’s on Google Maps!
How Big is Slowjamastan?
Slowjamastan sits on about 11 acres. But the place is bigger than just geography. As of this blog (February 2024), over 16,000 people are listed as citizens of Slowjamastan.
Are all of these Slowjamastan citizens real people? Let’s ask citizen Sir Fringle DItz from the country of “That one.”
At this point, you are probably wondering “Are any of my friends listed as citizens Slowjamastan?” Or maybe you just want to know if you are a surreptitious citizen of Slowjamastan. To find out, you can search for Slowjamastan citizens in this database.
What is the Capital of Slowjamastan?
The capital of Slowjamastan is Dublândia. It is located right smack-dab in the center of the country.
Dublândia is famous for its tilde.
After visiting Dublândia, visitors may also travel to other states in Slowjamastan. These states currently include Palmerstan, Upper Palmerstan, Momopolis, Feeshissippi, Goodlandia, Snooklyn, Bucksylvania, Chuckfield of Dreams, TriviaLand (courtesy of Kid Corona), Higher Wadi, DonSam Wadi, and the Queendom of Hotdamastan.
Interstate travel is easy in Slowjamastan. You can transport all of the fresh fruit that you would like to over state lines. (Suck it, California!)
(PS: I want to live in Hotdamastan someday. I mean, who WOULDN’T want to live there? Look at that sign! Pee! Eh! Are! Tee! Why!).
What are the "Official Things" of Slowjamastan?
Official Currency: Duble (paper) and Dubloons (coin)
Official language: English with a General Foreign Accent
National Anthem: “Slowjamastan (I Think It’s Gonna Be an Awesome Place)” (Sound familiar?)
Official Slogan: Libertas. Honor. Respectus.
Olympic Sport: Red Rover
Time zone: SST (Slowjamastan Standard Time)
National animal: Raccoon (The country mascot is named SlowjamaStanley.)
National food: Tacos. (I’m just guessing.)
Does Slowjamastan have Laws?
Yes, yes, yes.
The most important law is “No wearing Crocs!”
The only exception is Wear Your Crocs in Slowjamastan Day (June 31). Mark your calendars!
Can You Visit Slowjamastan?
Anyone visiting Southern California can visit Slowjamastan. But here is what you need to know:
Border Crossing: A visa is required. Don’t worry; you can get instant visa approval here.
Border Security: There are land mines filled with confetti and possibly Mexican candy. Beware of Mark Corona, Porder Batrol Agent (no typos here, folks!).
Current Wait Time at Border: 0 seconds
Consulate Office: If you cannot make it to Slowjamastan, the Sultan maintains his Consulate Office at 6160 Cornerstone Ct E Suite 151, San Diego, CA 92121.
What is There to Do in Slowjamastan?
Slowjamastan is — how do you say it? — an up-and-coming country. If you like to read signs, this country is for you!
Major Export: Sand. Sometimes Wind.
Major Industry: Tourism
Major Infrastructure: Signs, desk, tarp over desk, flag pole, stockade, plaque, non-working pay phone, security camera (which may or may not work after I hit the pole with my drone)
Planned Infrastructure: Lazy River. Maybe a stationary boat.
Other Celebratory Assets: Flag, Porder Patrol truck (not a typo), Special Forces Cruiser, Firetruck (“Where the hose at?”), and a 2005 Dodge Neon Racecar. From what I can tell, these assets are only used for special events so you won’t find them in the country on most days.
It is REALLY REALLY HARD to find your way around Slowjamastan so I made an unofficial map of the major landmarks. You’re welcome. Not “Your Welcome".
How Much Does it Cost to Become a Citizen of Slowjamastan?
Here’s perhaps the best part about this country: citizenship is FREE!
Loyalists can opt for premium citizenship (which includes a photo on the website) for just $19.99. Registered animals of Slowjamastan also cost just $19.99. Our boy Earl decided to become a SlowjamaStanimal.
The government of Slowjamastan is mostly pay-to-play beyond that. Governorships and state naming rights range from $2K to $10K, but you get a cool sign for all of those American dollars. A parliament position will run you $35/month and allows you to pick a cool title like “Director of Pizza Affairs” or “Minister of Mediocrity.” Ambassadorships cost $25/month (exclusive) and $10/month (non-exclusive). Check out the Slowjamastan Patreon page to get more involved for as low as $2/month.
You can also support Slowjamastand by buying Slowjamastan merch here. The online store only accepts U.S. dollars.
Disclaimer: We are NOT affiliated with Slowjamastan. While Slowjamastan may be as corrupt as any other country, we receive absolutely no kickbacks or anything like that. So sad.
(Update: We may be receiving an honorary Slowjamastan raccoon sticker and t-shirt! We promise that will not compromise our journalistic integrity though.)
Is Slowjamastan for Real?
Depends on who you ask.
Slowjamastan is a certainly a place. (It’s on Google maps!)
Slowjamastan is not formally recognized by the United States or Germany or China or Australia or any of the other 193+ countries that The Sultan visited. Sometimes a country may stamp a Slowjamastan passport though..
Places like Slowjamastan are known as micronations. Slowjamastan is legit in that regard, but it’s also just a fun idea.
My advice? Don’t think about it too much.
Post-Script
After publishing this blog and video, we received a video thank-you from The Sultan himself. I did not think that the Sultan could be more handsome, but have you seen him in a black t-shirt? We are appreciative of his kind words and the many thank-you communications from other Slowjamastan leaders.
Keep livin’ the dream.
You all rock.
Jayco Seneca & Entegra Accolade Super C: Coach Separation Problems and Fixes
If you own a Jayco Seneca or Entegra Accolade Super C RV (or are thinking of purchasing one), you will probably want to read this!….The Jayco Seneca and Entegra Accolade Super Cs seem to repeatedly suffer from coach separation issues — namely, the Wing Wall problem and the Vertical Seam Separation problem. I wanted to better understand the what to look out for and how to fix the such issues so started doing some research. That lead to this blog.
If you own a Jayco Seneca or Entegra Accolade Super C RV (or are thinking of purchasing one), you will probably want to read or watch this!
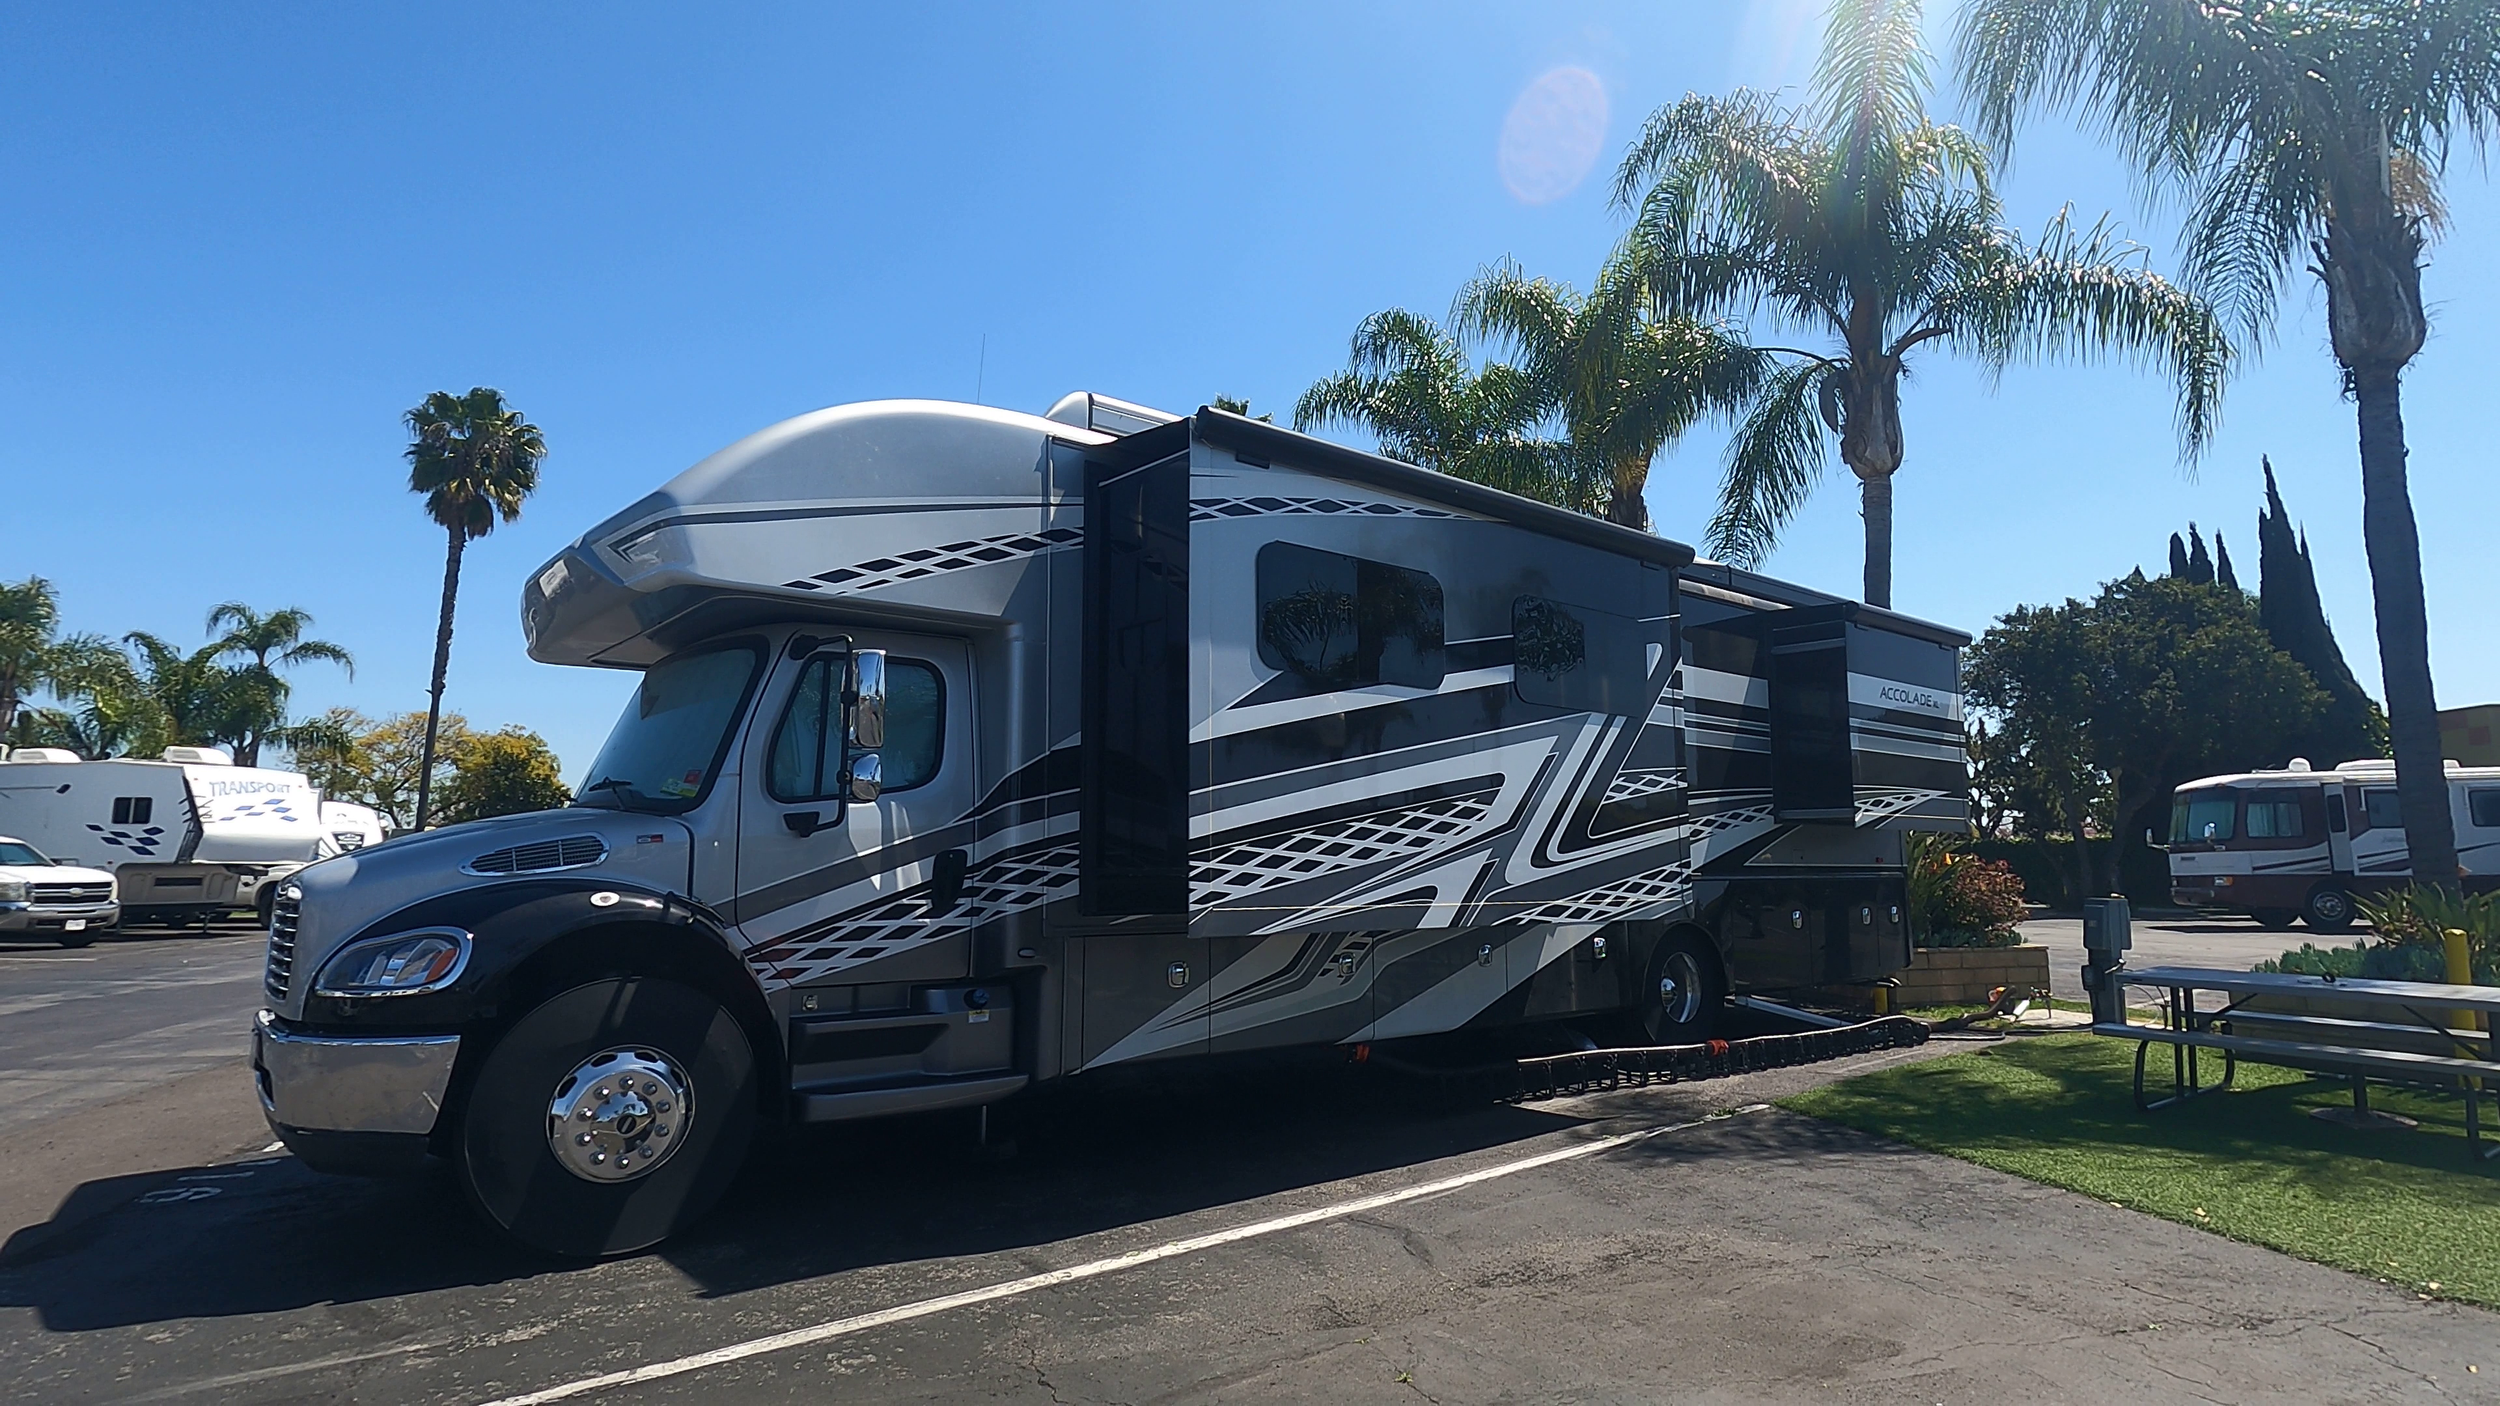
Let me start off by saying that we love our 2022 Entegra Accolade XL 37L. We call her BIG LADY (she’s an AccoLADE XL, get it?). She’s a big, bad-ass, tough-lookin’ gal.
Even though BIG LADY looks tough, we do pamper her. For example, we don’t camp in remote places with bad roads -- although truthfully, some highways feel like we are off-roading (Nebraska, Arizona, I’m talking to you!). We never raise our wheels of the ground when leveling. We aren’t overweight (I’m talking about the rig; we could both stand to lose a few pounds😊). We do regular maintenance on BIG LADY as well.
While we’ve had some issues with BIG LADY, they’ve all been manageable (knock on wood). For minor issues, we fix those ourselves. For more complicated issues, they fortunately have not required urgent attention, and so we’ve traveled to the Entegra manufacturing facility in Middlebury, Indiana for warranty work. For the most part, the company has been good to work with. RVs are not perfect, and people aren’t perfect. Based on our personal experience with BIG LADY, we repeatedly tell ourselves that if we had to buy another Super C, we would probably pick the same one.
In short, we’ve been pretty lucky with BIG LADY. Unfortunately, other owners of Entegra Accolades haven’t been. The Jayco Seneca and Entegra Accolade Super Cs seem to repeatedly suffer from coach separation issues — namely, the Wing Wall problem and the Vertical Seam Separation problem. Frankly, that scares me. I wanted to better understand what to look out for and how to fix such issues so I started doing some research. That lead to this blog.
Here’s what I’ll cover:
Special thanks to Brian Miller, Robert Ross, Don McPhail, Tim Barrett, Jim Stewart, Mark Silverman, Dave Poole, Justin Mix, Jeff Glowniak, and others for their help information and photos/videos.
Jayco Seneca vs. Entegra Accolade
The title of this blog is about the Jayco Seneca and Entegra Accolade Super C. Perhaps we should back up a bit and start with whether there are any differences between a Jayco Seneca and an Entegra Accolade.
Is there a Difference between a Jayco Seneca & Entegra Accolade Super C?
Short Answer: Not Really. Jayco Senecas and Entegra Accolade are basically the EXACT same RVs – just a different brand.
In fact, both brands say “Jayco” as the manufacturer on the RV title. For a given model, the MSRP is the same. The floor plans are the same.
Why are the brands basically the same? Entegra has been owned by Jayco since 2008. In 2016, Thor Industries acquired Jayco, and that sale included the Entegra coach lines.
The Jayco Seneca has been around for a couple of decades. From 2005-2011, the Seneca was manufactured on a Chevy Kodiak chassis. Starting in 2012, Jayco switched to the M2 Freightliner chassis, and then in 2018, Jayco began manufacturing the Seneca on a Freightliner S2RV chassis. Entegra launched the Accolade in 2020 on the S2RV.
Since 2021, both Jayco and Entegra allow buyers to purchase an upgraded model. Jayco calls their upgraded model the Seneca Prestige, while Entegra has named their model the Accolade XL. One important difference between the base model and the upgrade model is the factory lines where the units are made. Both are made at the Jayco manufacturing plant in Middlebury, Indiana. The upgraded Prestige/XL models are manufactured in the same building as the expensive Entegra Class A diesel pushers— reportedly because they all contain tile flooring. In contrast, the base models are made in the same building with other Jayco motorized units, including the Jayco Greyhawk. Put another way, the Prestige/XL models made on the same line as $500K-$800K RVs whereas the base model Accolades/Senecas are likely the most expensive rigs in their plant.
So, what is the difference between a Jayco Seneca (whether the base model or the Prestige) and an Entegra Accolade (whether the base model or the XL)?
The main differences between Senecas and the Accolades are the exterior paint schemes and the interior designs. The only reason that we picked and Accolade over the Seneca is that we liked the color schemes of the Accolade marginally better. We also THOUGHT (at the time of purchase) that Entegra offered a more robust structural warranty based on the language in the 2022 Entegra Accolade Owner’s Manual. More on that below….
Overview of Two Major Super C Coach Separation Issues
Many Jayco Senecas and Entegra Accolades have suffered from structural issues regarding the way that the font cab and front corner walls are connected to the rest of the coach. These generally manifest themselves in two ways:
The “Wing Wall” problem
The Wing Wall problem generally refers to “excessive flexing, squeaking, or cracking at the transition between the cab and house” of the RV.
The “Vertical Seam Separation” problem
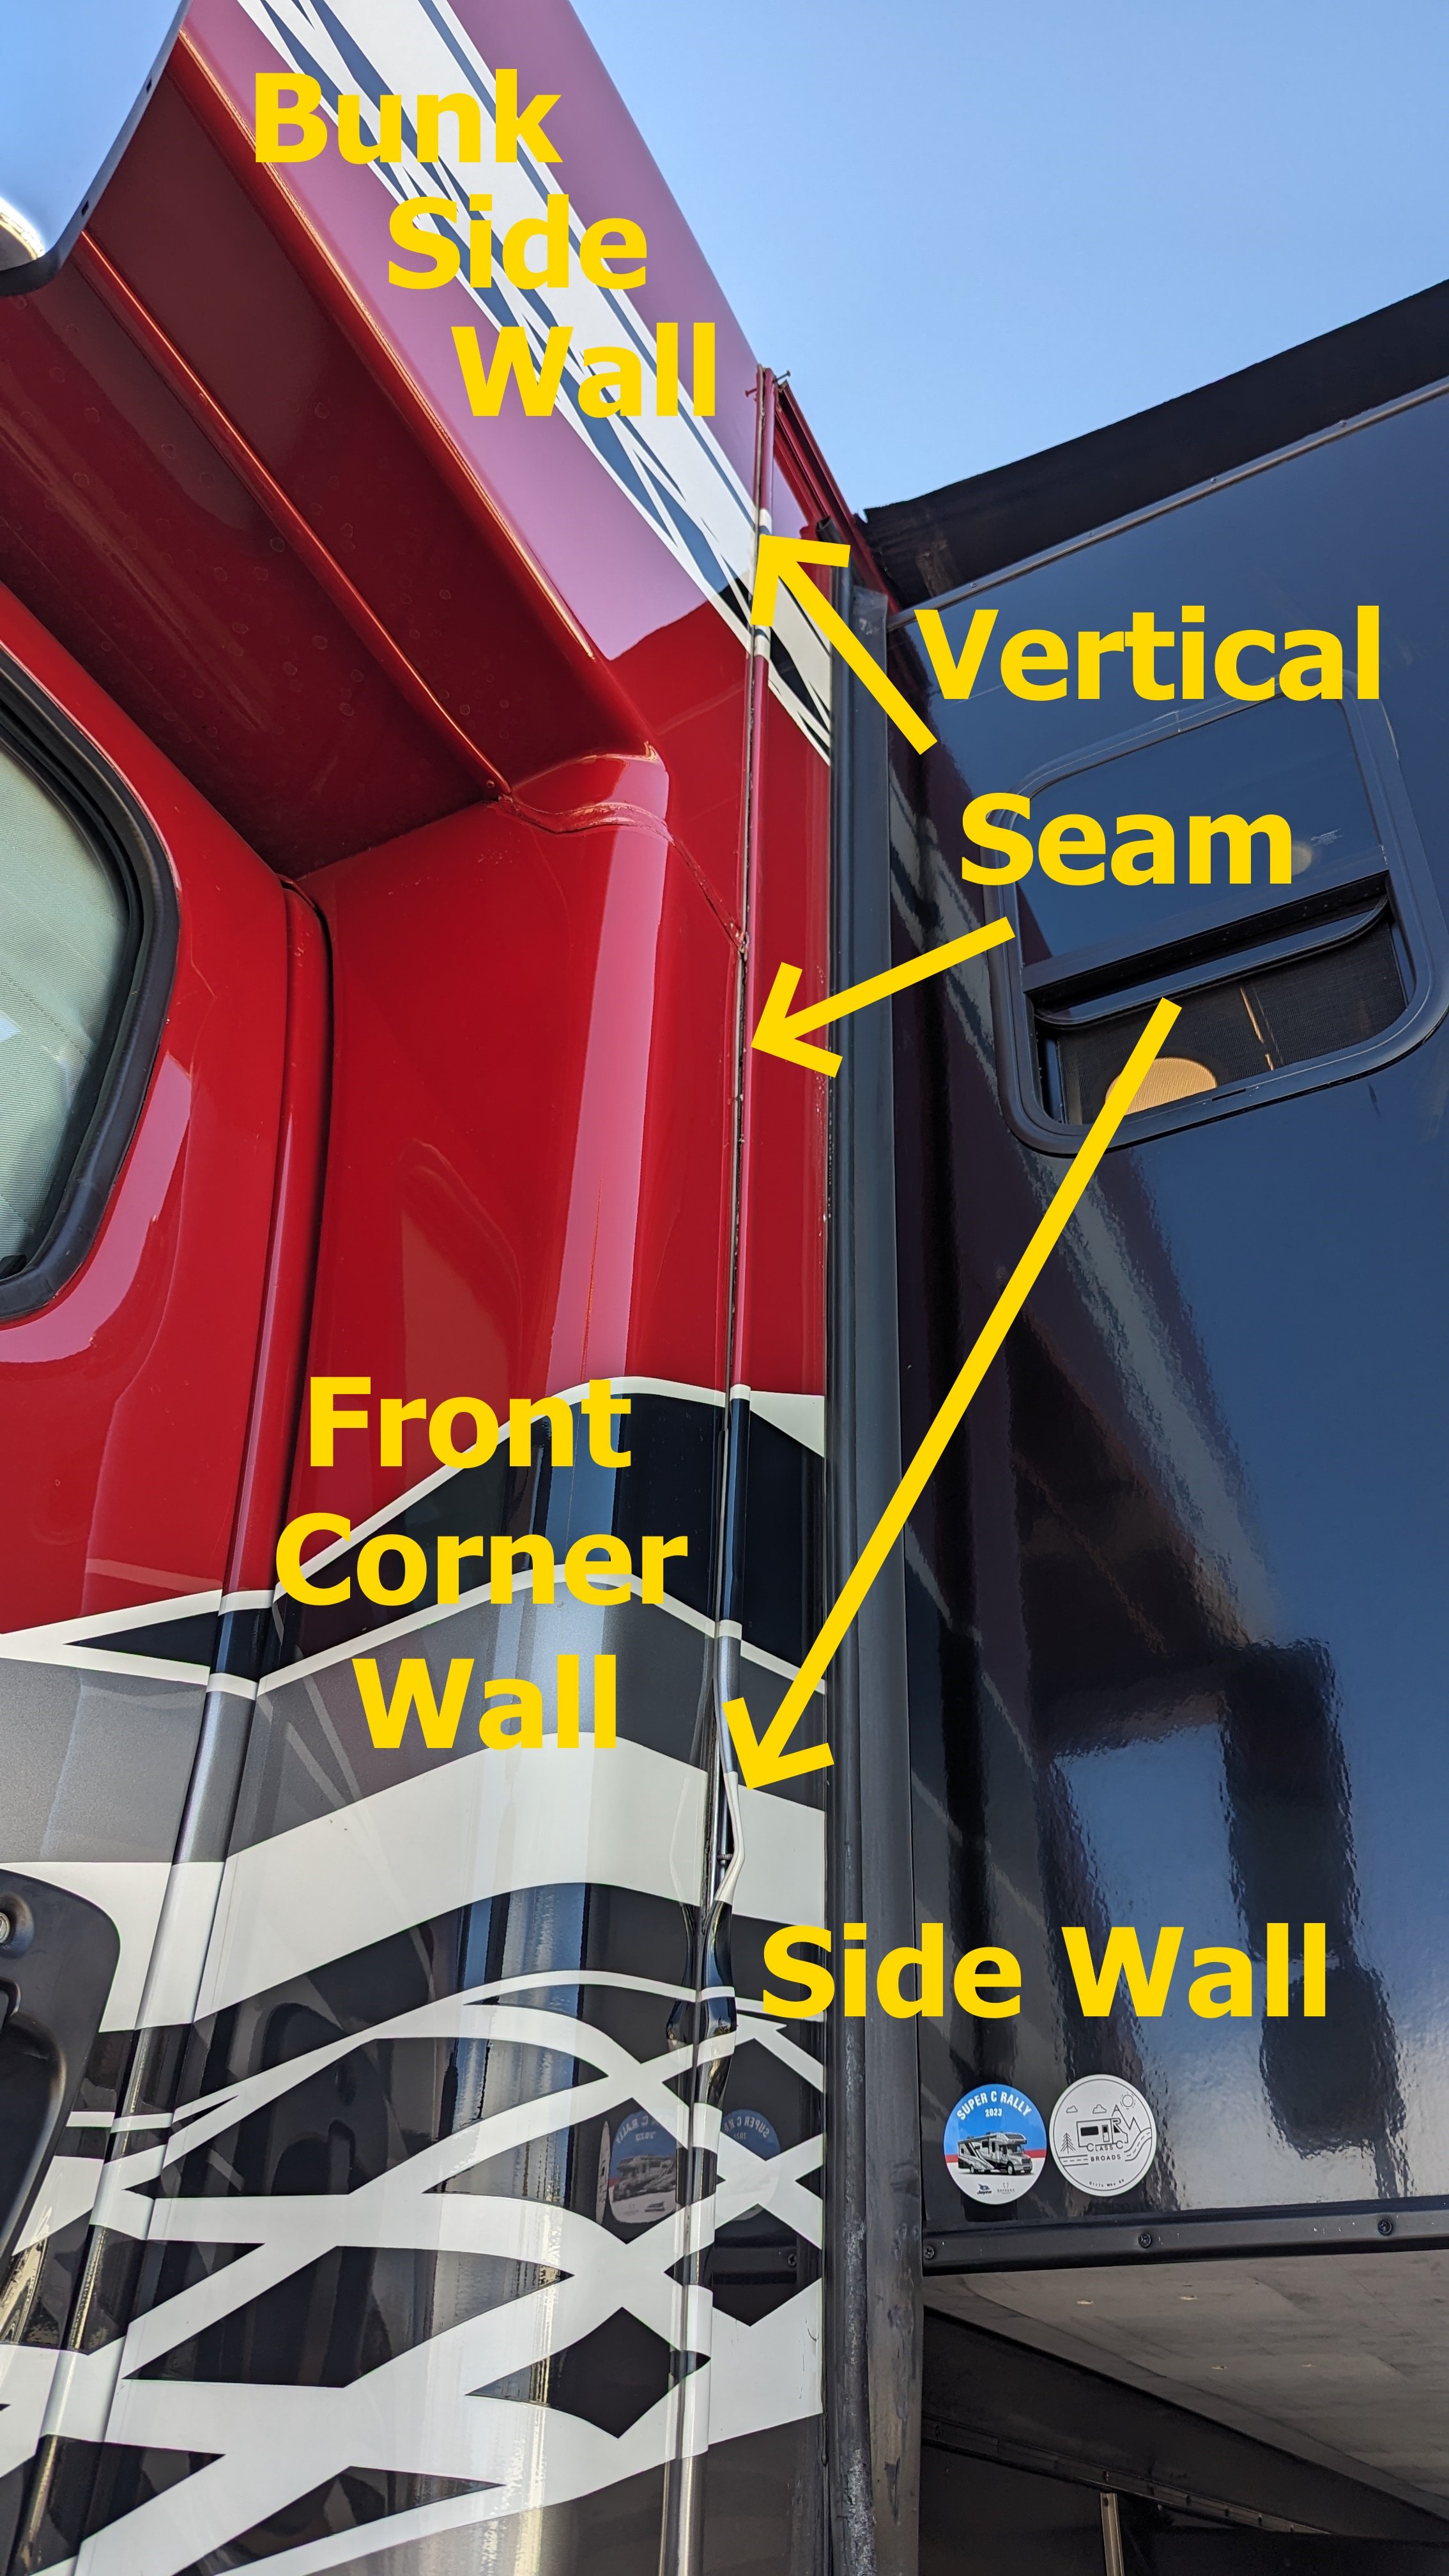
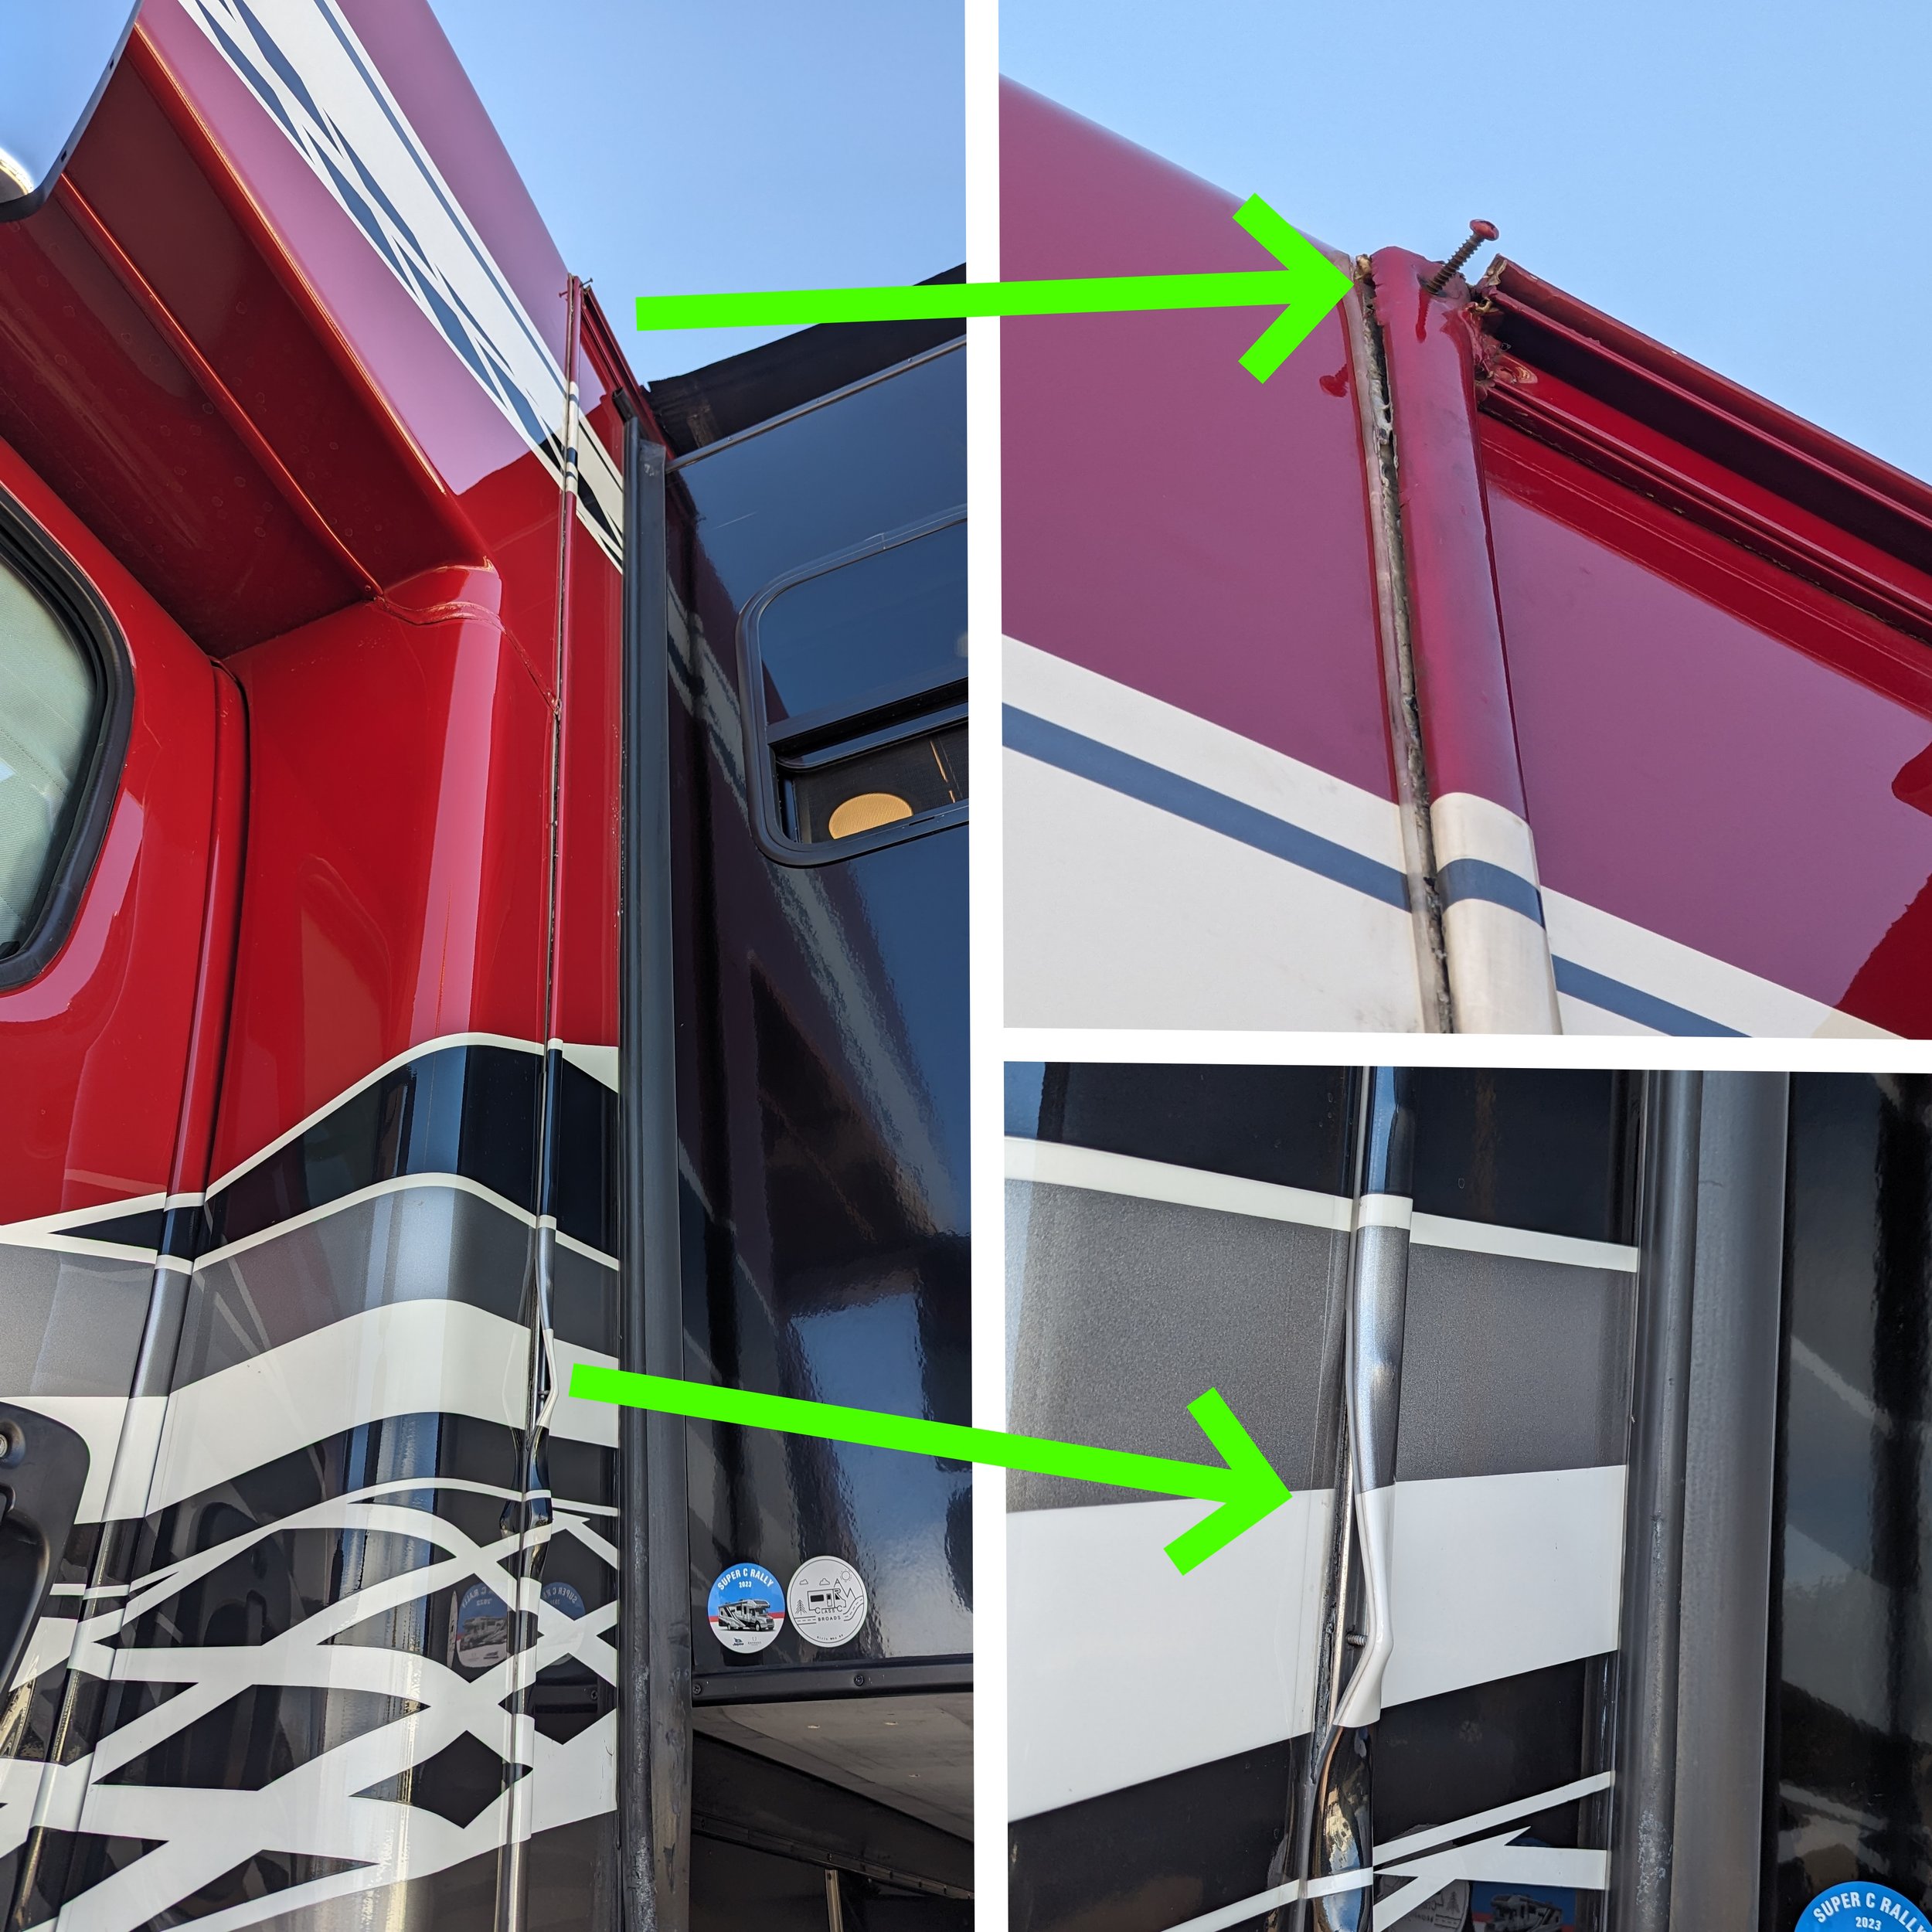
Each side of the Jayco Seneca and Entegra Accolade has a vertical seam that connects the house side wall to (1) an over-the-cab bunk fiberglass side wall and (2) a lower front fiberglass corner wall near the cab. The Vertical Seam problem occurs when the screws in the seam back out and the vertical seam starts to separate.
An RV may suffer from one or both of these problems, and it is possible that one problem may exacerbate the other. Moreover, these problems are what I would call “latent defects” insofar there is a structural design problem, but a purchaser of a Seneca of Accolade wouldn’t know about the problem by inspecting the rig.
We belong to several Facebook groups where these problems are often discussed. (If you own a Jayco Seneca or Entegra Accolade or are thinking about purchasing one, we’d recommend you join these groups).
Accolade group: https://www.facebook.com/groups/499457587362822
Seneca group: https://www.facebook.com/groups/451588071907676
Accolade/Seneca combo: https://www.facebook.com/groups/1266223780192936
Posts on social media platforms sometimes confuse these two issues and how to best fix them. I therefore wanted to try to summarize the issues and proposed fixes in a single easy-to-understand document.
Disclaimer: Please note that WE ARE NOT RV EXPERTS! WE ARE JUST TRYING TO SHARE WHAT WE HAVE LEARNED FROM OTHERS. DO YOUR OWN RESEARCH. WE ARE NOT RESPONSIBLE FOR YOUR RIG. We do get a very small commission at no cost to you if you use one of the Amazon Links (a/k/a beer money).
What is the Wing Wall Problem on a Jayco Seneca and Entegra Accolade Super C?
Perhaps we should start with “What is a Wing Wall?”
Short Answer: Depends on Who You Ask.
What is the Wing Wall on a Super C?
The “Wing Wall” is ostensibly located behind the driver and passenger seats of the RV. From what I can discern, many people use the term “wing wall” to refer to the wooden panels that are underneath a decorative panel on each side of the rig behind the seats. Until 2022, the long and angled wooden panel looked more like a broken bird wing than a wall. Sometime in 2022, the “wing walls” became larger and covered most of the area behind the driver and passenger seats (more on that below).
Old Wing Wall Design (a/k/a the Broken Bird Wing Wall)
New Wing Wall Design
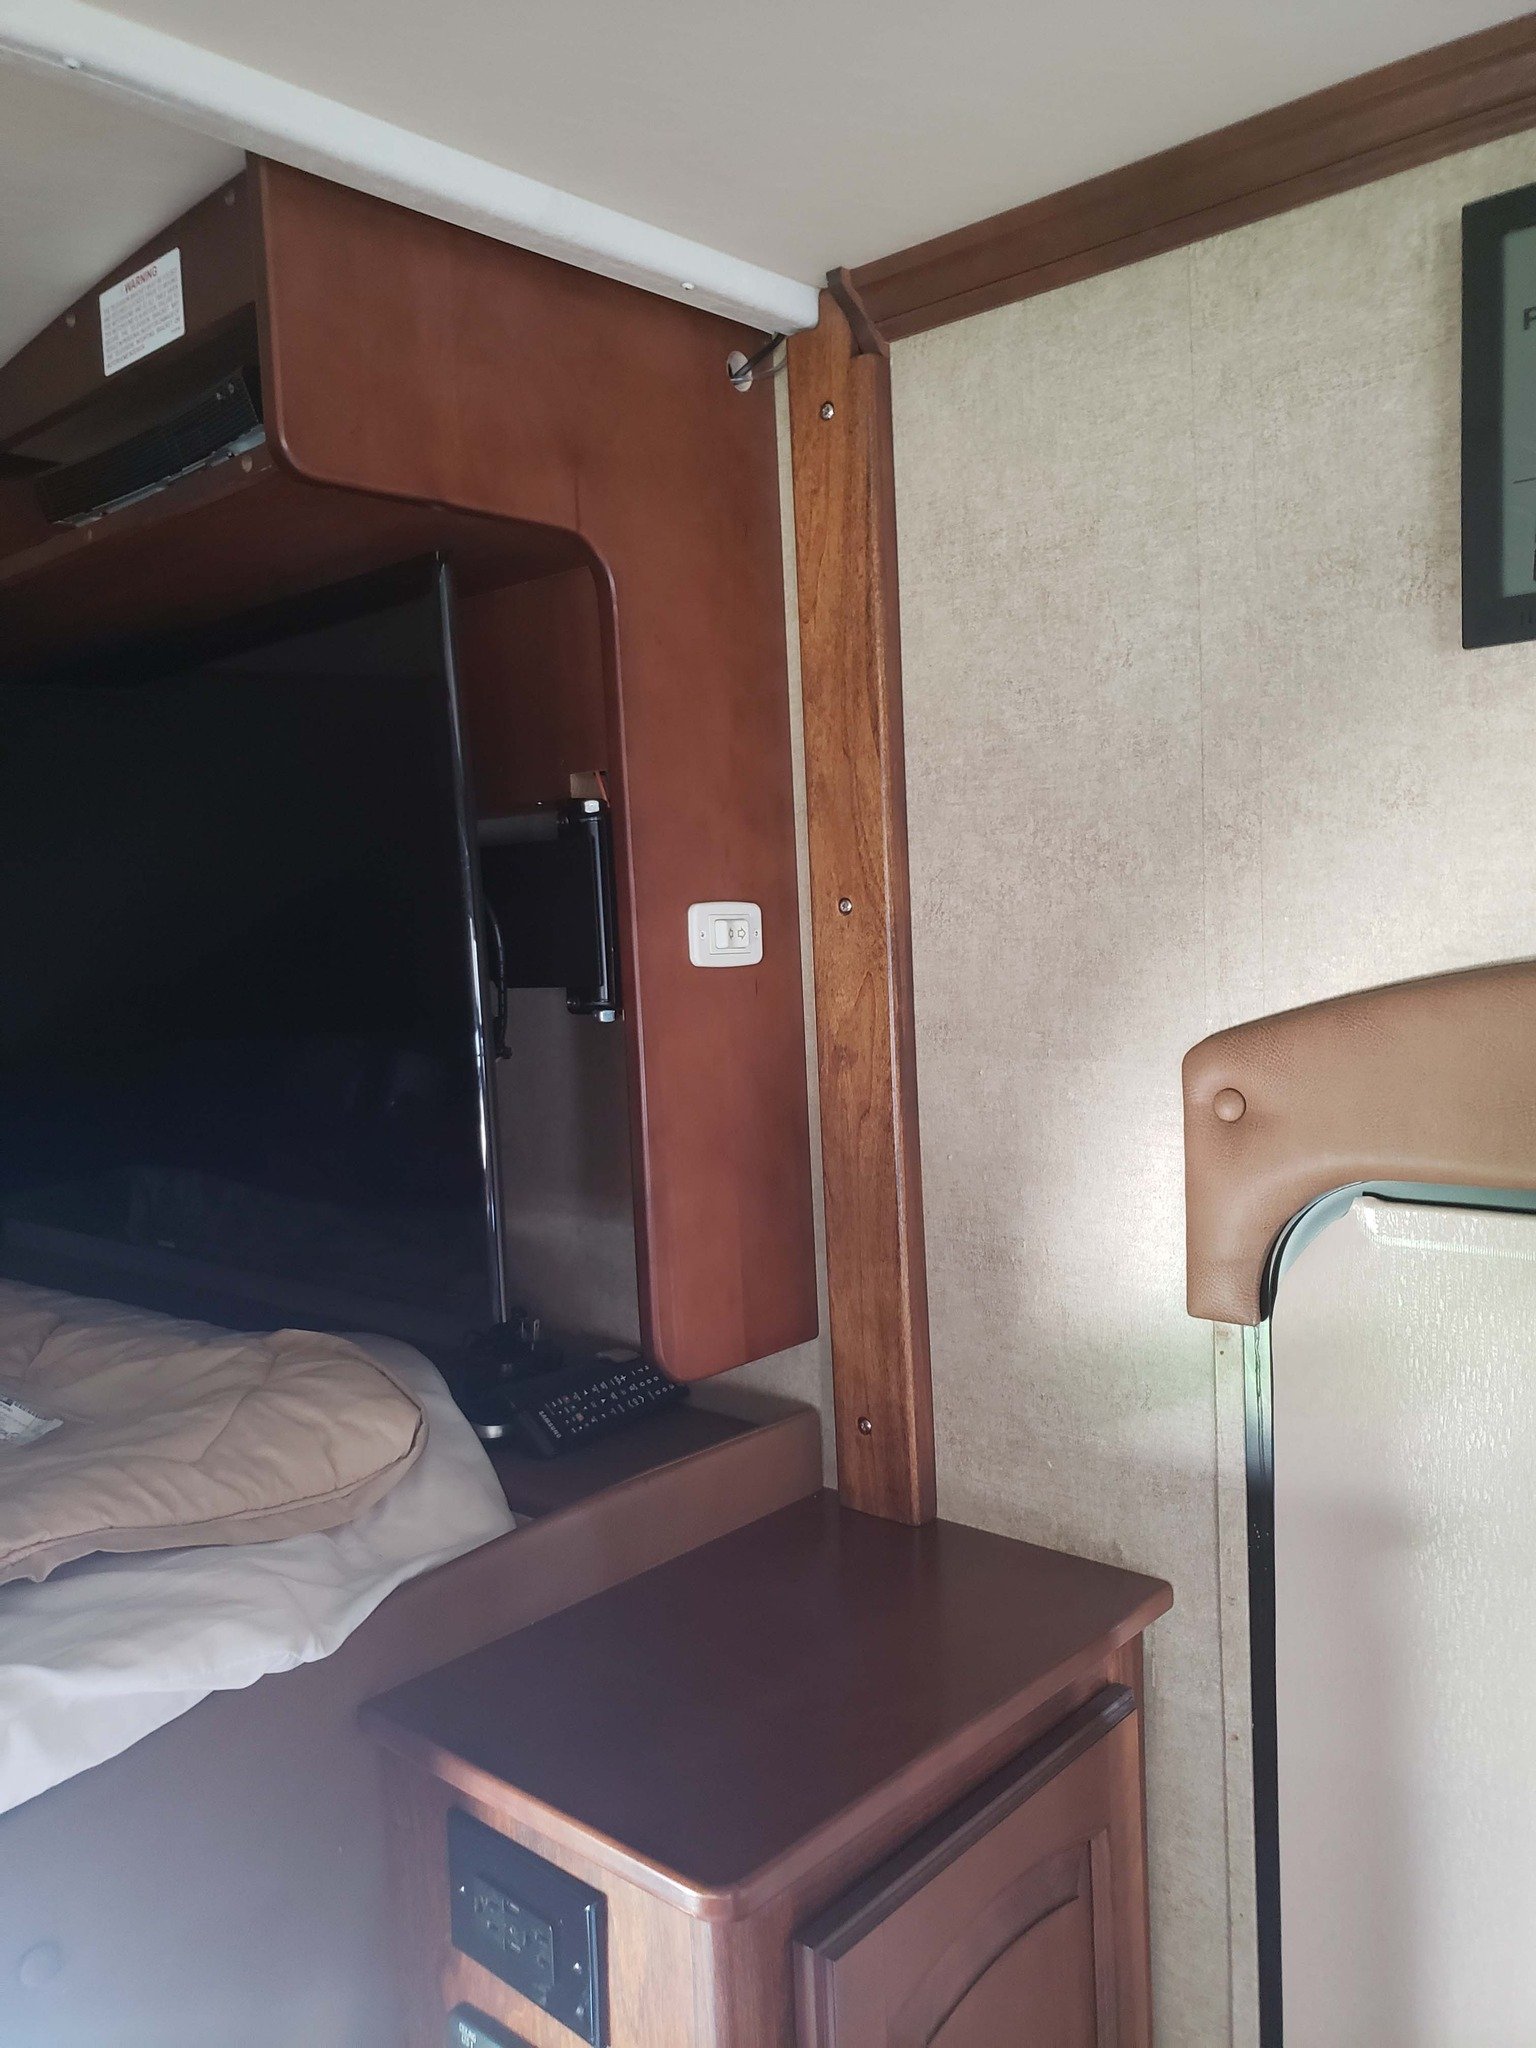
The Wing Wall perhaps more accurately refers to the interface between the cab and the house located (1) behind the driver and passenger seats of the RV and (2) near horseshoe-shaped cut-out area in the overhead bunk. According to Jayco/Entegra, “[e]xcessive flexing, squeaking, or cracking” in that area was generally labeled a “wing wall” problem. Here’s a video that might give you an idea of what things look and sound like.
How is the Wing Wall Problem Fixed?
Jayco/Entegra SRP Bulletin 22-062
For many years, there wasn’t a uniform solution to the Wing Wall problem. One RV owner who saw daylight in the wing-wall area the RV to the dealer, only to have the dealer just fill in the cracks and gaps with foam. Other RVers tore apart their rig and through-bolted the cab to the house to better secure them together.
Sometime in 2022, Jayco/Entegra began installing a “wing wall” fix to new RV builds. The fix is summarized in SRP Bulletin 22-062 (pdf), which is also reproduced below:
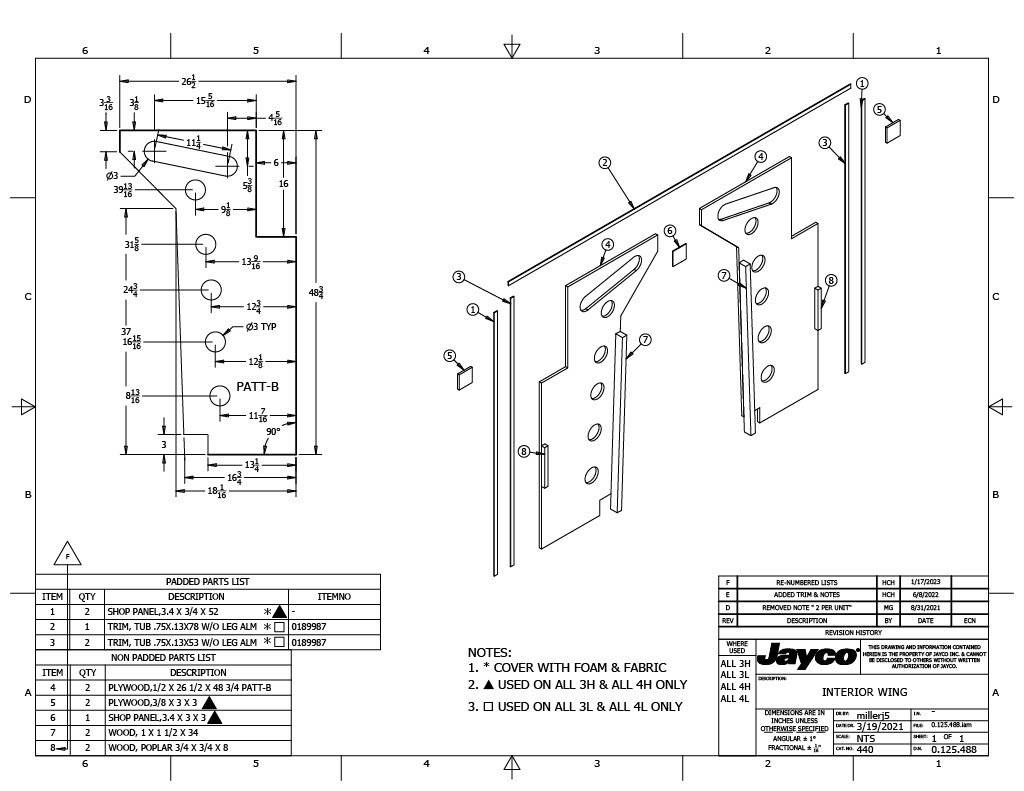
Jayco also released an “Interior Wing” schematic for the dimensions of the plywood wingwall itself. However, the dimensions don’t necessarily agree whose in SRP Bulletin 22-062. For example, wood backer (8) is noted as being 3/4” X 3/4” X 8” in the schematic, but in the but SRP Bulletin 22-062, the backer is described as being 1”x4”.
The Jayco/Entegra Wing Wall fix is not exactly a model of clarity. The basic idea is to attach full-sized plywood “Wing Wall” panels to new wooden backers to better onnect the coach to the cab via the Wing Wall. The backers themselves are fastened to the coach wall, bunk floor, cab using adhesive and screws.
The WIng Wall fix also involves he installation of adhesive and (many) more screws from the cab roof up into the bottom of the bunk floor platform overhead (about every 2'“). Although not entirely clear, the Wing Wall fix also appears to call for the addition of more self-tapping screws into the rounded fiberglass corners to better them to the metal cab.
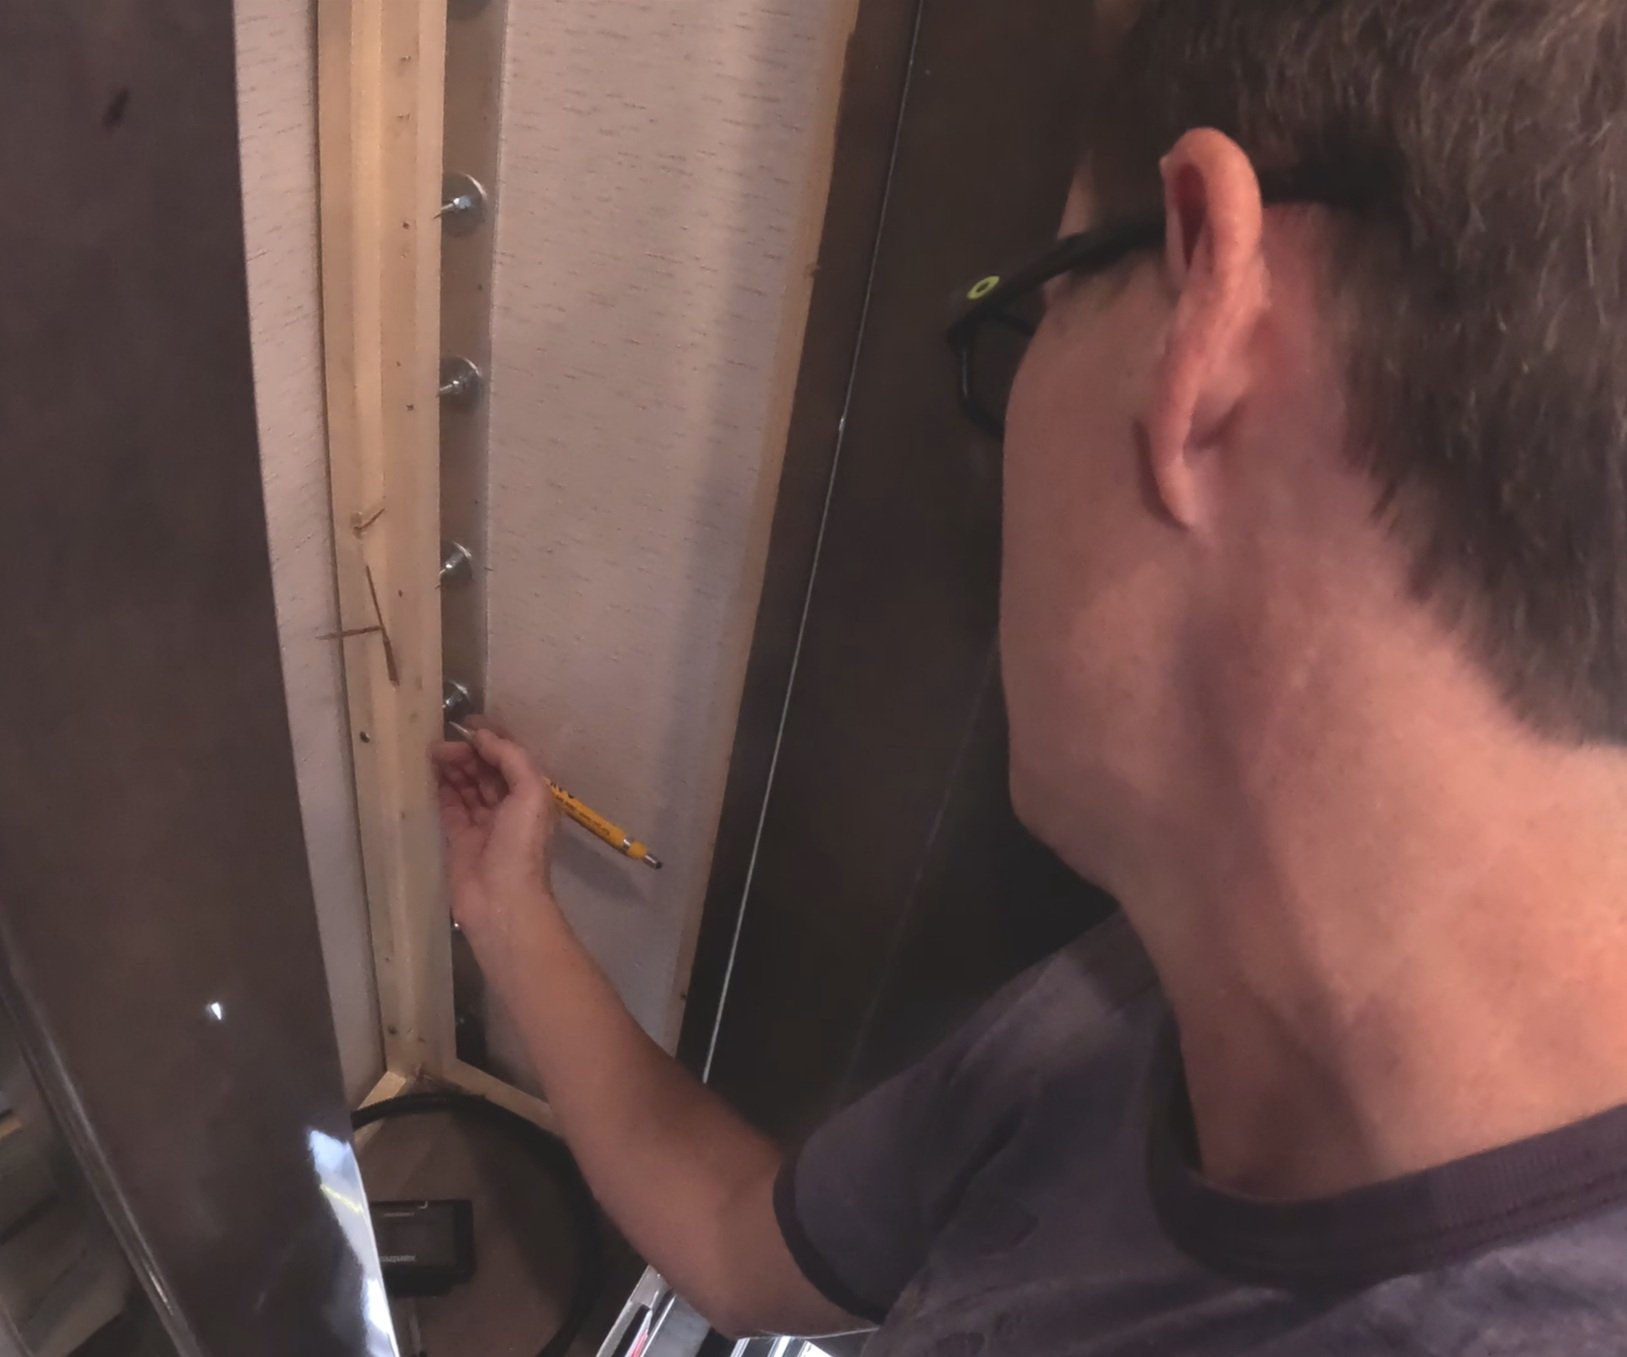
Pro Tip: A drill with a 90-degree attachment (like the Millwaukee 205-22 M12 shown above) may be useful for the Wing Wall repair project. In additon to using the drill to attach the new 1x4” backers near the house wall, the some Accolade/ Seneca owners have used the drill to add the new screws in the cab ceiling without the need to completely remove the cab headliner.
Are there Variations to the Wing Wall Fix in SRP 22-062?
Some Seneca and Accolade owners who had to perform the Wing Wall repair themselves made the repairs prior to the issuance of SRP 22-062 so they did not have the document as guidance. Other RV owners have modified the repair in one or more ways as well. Some of those variations include:
(1) Through-Bolting the Over-the-Cab Bunk
Let’s face it, RV manufacturers just l.o.v.e. self-tapping screws. These are not the most robust fasteners though. Here’s a photo from a Jayco Seneca owner who used bolts instead of screws to secure the over-the-cab bunk to the truck cab.
(2) Through-Bolting through the Fiberglass Cab Corner
Jayco recommends adding #10 x 1” 3/8” sheet metal screws (Jayco calls them “lags” in reference to FIG. 14 and 17 and “self-tapping screws” in the parts list and also in reference to FIGs. 15-18) to secure the fiberglass cab corner into the vertical B pillar of the cab. Other RV owners have decided to through-bolt instead.
(3) Better Securing the the Fiberglass / Metal Cab Corner Interface
One Jayco Seneca Owner also added adhesive to between the cab and the radius in the fiberglass where it wraps around the corner of the cab. Depending on the location of the existing screws, additional screws may be added to this area as well.
(4) Changing the Notches and Holes on the Wing Wall Plywood Panel
Because the Jayco plywood schematic is for actual floor production by Jayco/Entegra, there are 6”X16 and 3”X3.5” notches where electrical lines or other components may need to be run. These notches may not be necessary for RV owners attempting the Wing Wall Modification themselves, depending on the model. Moreover, by removing the notches, the Wing Wall can be secured around the entire perimeter of wall. Likewise, the location, size, shape of the holes (and even the necessity of making them) in the plywood panel might be different for older Jayco Senecas and Entegra Accolades, depending on the model. The main purpose of the circular holes are to enable to the plywood to lay flat against the fiberglass corners where screws connect the fiberglass corner to the metal cab B-pillar.
(5) Addressing the Horizonal Seam Behind the Wing Wall
Just behind the driver and passenger seat, there’s a horizonal seam that will be visible during the Wing Wall project. The seam is held together by….you guessed it….self-tapping screws.
Some RV owners have added adhesive (to the extent possible) to this area and through-bolted the connection.
(6) Adding Insulation and/or Sealing the Wing Wall Gaps
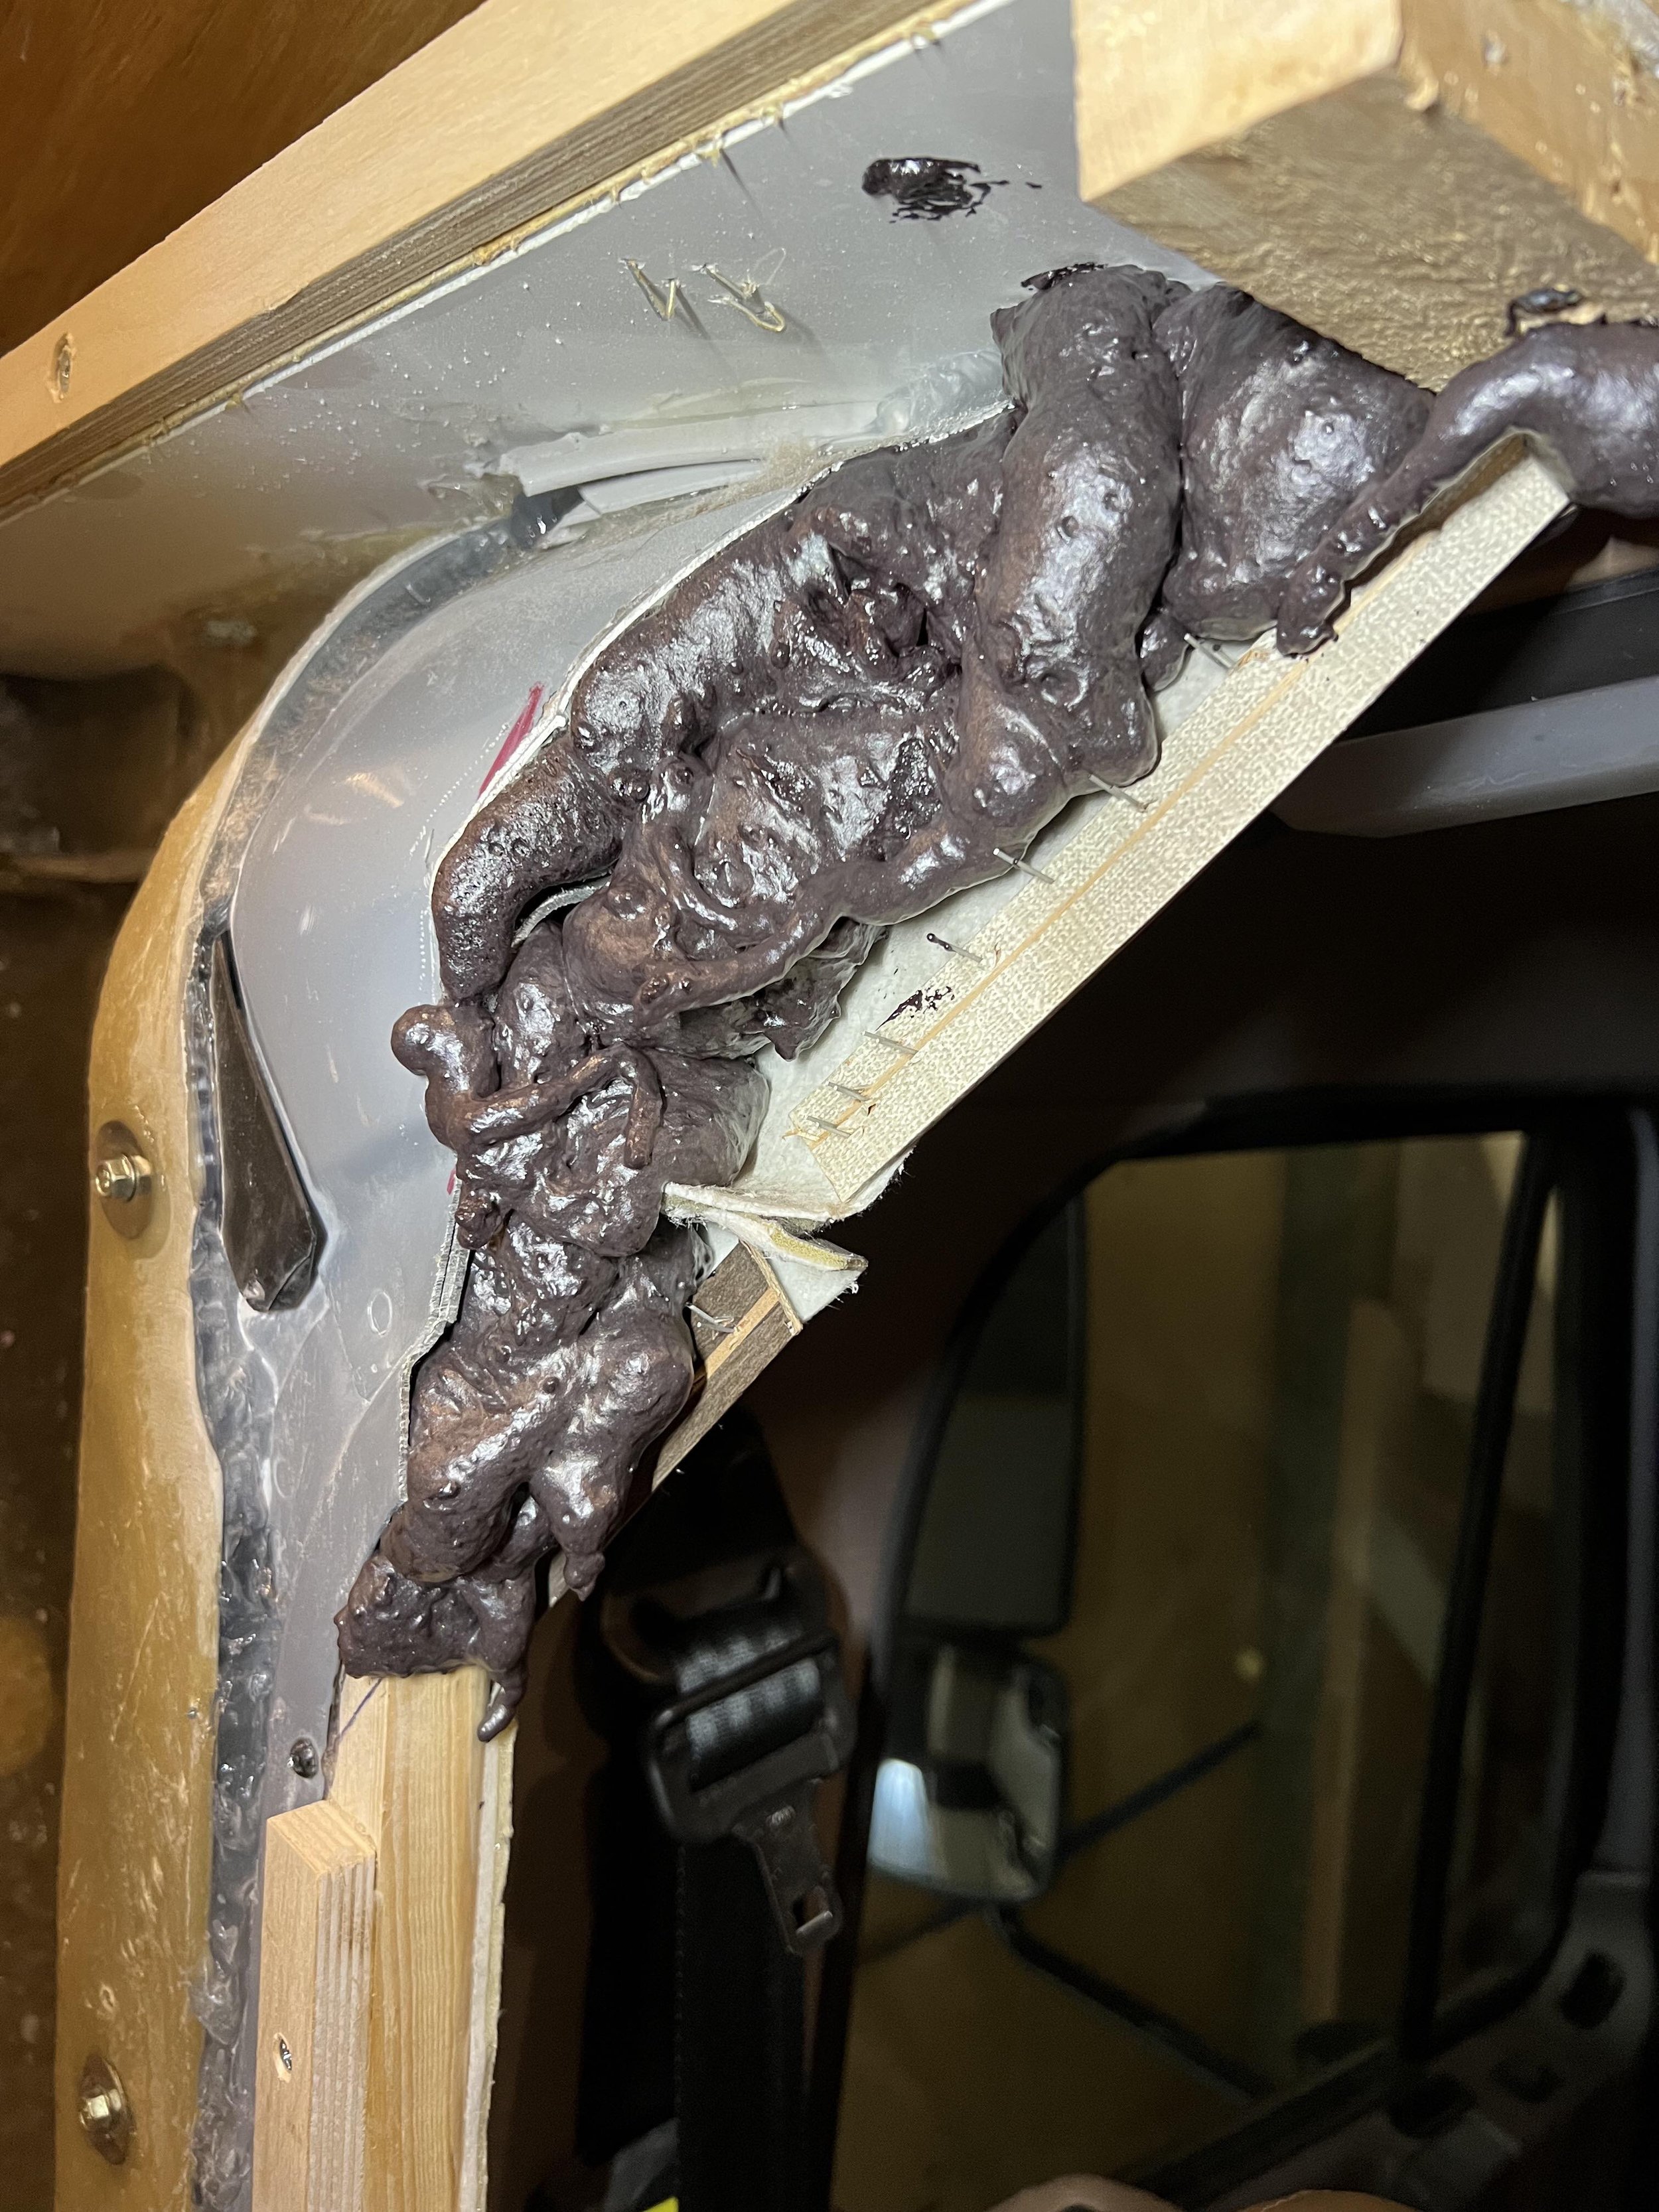
Once an RVer has torn about his/her Seneca/Accolade to do the Wing Wall repair, they may notice gaps or daylight in some places. May people have sealed those gaps with suitable sealant or spray foam. Others have added insulation to the space behind the Wing Wall and the fiberglass cab corner.
How Does an RV Owner Know if They Have the Wing Wall Fix?
Jayco and Entegra started installing the new Wing Wall design sometime in 2021 or 2022. Unfortunately, to our knowledge, neither Entegra nor Jayco kept any records to tell owners whether their RV had the wing wall fix. Some 2021 models reportedly have the fix. Some 2022 models reportedly do not have the fix. To ascertain whether a rig made in this timeframe has the wing wall fix, an owner of the RV will need to do what we did:
(1) Step 1: Remove the decorative panel over the Wing Wall.
The Wing Wall is covered by a decorative panel that sits behind the driver’s side of the RV. Once that is removed, the underlying plywood panel is the “Wing Wall.”
Pro Tip: Decorative buttons are often used to cover the screws that fasten the decorative panel to the underlying plywood panel. A putty knife or flat-head screwdriver can usually be used to remove the decorative buttons.
(2) Step 2: Inspect the underlying plywood panel.
For those RVs having the wing wall fix, there will be a “full” plywood wing wall panel with a series of circular-cut-outs where several screws have been used to secure the fiberglass to the font cab as generally shown above in the “New” Wing Wall photo.
What is the Vertical Seam Separation Problem?
Each house side wall of the Accolade/Seneca is connected to over-the-cab bunk area by a vertical seam. The seam actually extends below the over-the cab bunk area and connects the house side wall to a front cab corner wall. Over time, the exterior self-tapping screws in the seam back out.
Many people believe that the Vertical Seam problem is related to the flexing caused by the Wing Wall problem. I also believe that the Vertical Seam problem may be accelerated whenever the front wheels come off the ground due when improperly leveling the rig.
How is the Vertical Seam Separation Problem Fixed?
Jayco/Entegra do not have a service bulletin on how to fix the Vertical Seam problem. Some RVers have tried replacing the factory screws with larger screws and/or rivets in the seam, only to have the seal fail again.
To fix the Vertical Seam problem, several RV owners have recently resorted to what they call the “NUCLEAR OPTION.” ☢️☢️☢️. Sounds scary, right? This fix involves placing an aluminum strip on the interior and then through-bolting at the seam. The fix will look something like that below:
Two of our friends, Barbie and Mike, had a big Vertical Seam problem and we helped them fix it. Here’s what we learned.
Vertical Seam Separation Fix - “Nuclear Option” Parts List
The parts list for the Nuclear Option project include:
10-24 x 3” stainless steel machine bolts (~4 dozen)
3/16 x 3/4” stainless steel washers (~ four dozen)
10-24 stainless steel locknuts (~four dozen)
3/16” x 1.5” (can be wider, e.g., 3”) x 8’ aluminum strip (cut to fit) (2)
Drill with jobber bit (6” or more)
Sealant (e.g. Proflex RV)
Vertical Seam Separation Fix - “Nuclear Option” Steps
The main steps for this project include:
(1) Remove any cabinetry on the interior of the coach opposite the Vertical Seam.
This is perhaps the hardest part of the project because many cabinets by the door contain wiring for the main power switch, Xantrax, and/or lighting. Be sure and take photographs of the wiring to help with reassembly. One RVer had to remove an entire fireplace!
(2) Remove the exterior vinyl trim.
Use a knife to separate the exterior vinyl trim from the exterior wall of the coach.
Pro Tip: If the exterior vinyl trim is deformed, the material becomes quite malleable with just a little heat. We were able to reshaped the trim by laying it in the sun.
Pro Pro Pro Tip: At least one Jayco Seneca owner completely removed external aluminum strip as well as the underlying butyl caulk. The aluminum strip will likely need to be gently tapped back into shape and completely cleaned with solvent to remove all the old caulk tape. Before reassembly, the RV owner gently spread the body panels apart above the horizontal seam area up to close to the roof. He then applied Sikaflex 221 polyurethane adhesive in the joint and a new strip of 1" wide butyl tape where the external aluminum strip was to lay. Mike and Barbie elected to keep the aluminum strip in place and not remove it.
(3) Remove Three Screws.
These three screws should be located generally at the top, middle, and near the bottom of the exterior metal connector.
Pro Tip: The Vertical Seam will likely dip below the flooring of the coach. The “near the bottom” screw needs to be above the flooring in order to through-bolt it. For the screws below the flooring of the coach, most RVers have replaced those screws with larger screws instead of through-bolting.
(4) Drill Three Corresponding Holes.
Drill three holes through the entirety of wall where the three screws have been removed.
Make sure the drill bit is at least 6” long.
(4) Align and Fasten the Aluminum Strip to the Interior Wall where the Three Holes are Located.
Begin by placing the aluminum strip on the interior wall so that the three holes are centered on the aluminum strip.
From the exterior, drill though the middle hole into the aluminum strip. (Note: it may be easier to pre-drill the middle hole into the aluminum strip).
From the exterior, insert a bolt through the middle hole in the wall and aluminum strip.
From the interior, secure the bolt using a washer and locknut. Hand tighten.
Repeat the foregoing for the top and near bottom holes so that the aluminum strip is secured along the seam at the three points.
Pro Tip: Find a friend. This is definitely a two-person job.
(5) Keep on Drilling, Screwing, and Bolting.
Continue replacing all of original screws with the bolts/washers/locknuts.
Pro Tip: Use a board (not your hand) to secure the aluminum strip in place when drilling a hole through it from the exterior.
Torque the locknuts to approximately 20 inch-pounds. That’s INCH-lbs, not FOOT-lbs.
(6) Cover the holes from the exterior with sealant.
As a precaution, many RVers have covered the exterior bolt heads with sealant, such as Pro Flex RV, prior to re-attaching the vinyl strip.
(7) Re-cover the exterior seam with the vinyl trim.
The vinyl trim should be malleable enough that it can be reattached to the rig using a rubber mallet.
Seal the vinyl trim with caulk or a suitable sealant, such as Geocel Proflex RV.
Pro Pro Pro Tip: Mask the vinyl trim joints if you can. Tape one side (either the front or the rear first) so there is approximately 1/4" gap between my tape and the vinyl trim. After applying a bead of caulk, immediately smooth the bead into the joint with a finger wetted with soapy water. After smoothing, immediately and carefully remove the masking tape by pulling away from the new caulk bead. Let the RV sit overnight so that the bead can cure. Repeat the process on the other half of the vinyl trim the next day.
(8) Reattach the Interior Cabinetry.
Re-attaching the cabinetry maybe trickier than it sounds.
For Barbie and Mike’s Entegra Accolade (a 2022 Entegra Accolade 37L XL), we had to notch out part of the cabinetry where the new bolts/nuts were positioned in order for the cabinet to be flush with the RV wall.
Luckily, the interior of the cabinetry is made with cheap soft pine so it’s pretty easy to remove the wood with something like a putty knife. We just used a pencil to mark where the new bolts/nuts were going interfere with the cabinetry and then made all of the notches at one time.
(9) Trim Out Your Work
As pretty as that metal strip looks in the interior of the RV, you may want to cover your work with some decorative trim. We are yet to locate something that can be used off-the-shelf so you may have to custom-build the trim as others have done. If you know of a product that might work, please drop a comment or send a message to ClassCBroads@gmail.com so that we can update this blog.
(10) Celebrate
You’ve just completed the “nuclear option.”
Crack a beer. (Or sip on a nice Iced Tea).
Eat some good Mexican food.
Celebrate!
Are the Wing Wall Problems or Vertical Seam Separation Problems Covered by the Jayco/Entegra Warranty?
Jayco and Entegra both boast about their industry-leading 2+3 year limited warranties….. BUT…..(There’s always a but, right?)
BUT how good are the Jayco and Entegra warranties?
Short Answer: Not very good.
Jayco and Entegra will likely cover the Wing Wall problem or Vertical Seam Separation problem ONLY under the two-year / 24,000 limited warranty.
That means:
RV owners who make a claim outside of the two-year window will be denied coverage.
Because Jayco/Entegra only warrants the RV to the first owners, people who purchase a used Seneca or Accolade will not have factory-issued warranty coverage.
*The warranty language in the Owner’s Manuals may have changed over time. Please consult with the Owner’s Manual for your specific rig and your attorney to help understand the scope. This blog has been prepared for general information purposes only. The information on this website is not legal advice. Legal advice is dependent upon the specific circumstances of each situation. Also, the law may vary from state-to-state or county-to-county, so that some information in this website may not be correct for your situation. Finally, the information contained on this website is not guaranteed to be up to date. Therefore, the information contained in this website cannot replace the advice of competent legal counsel licensed in your jurisdiction.
Scope of the Jayco Seneca Limited “Structural” Warranty
In 2019, to much fanfare, Jayco announced that it would offer a three-year ""Limited Structural Warranty” to certain 2020 RV models, including the Jayco Seneca. One would think that the Jayco “structural” warranty should cover the Wing Wall problem given that it involves, among other things “cracking” at the transition between the cab and house. Likewise, one would think that it would cover the separation in the Vertical Seam. Those things sound pretty “structural,” right?
Let’s take a quick look at the “limited structural warranty” language.
The Jayco Seneca Owner’s Manual defines the “Structural Components” of its three-year structural warranty as follows:
Structure Components means materials and/or workmanship directly attributable to Jayco relating to the lamination of the fiberglass sidewall assembly, the lamination of the rear wall assembly, the lamination of the fiberglass front wall (wrap) assembly, sidewall/end wall/front and rear wall frame assembly (wood and aluminum), roof frame assembly (wood and aluminum), and floor frame assembly (wood and aluminum).
See, e.g., 2024 Jayco Seneca Owner’s Manual, at page 10. The manual then tries to clarify:
Structure Components specifically excludes front and rear fiberglass caps and any other cosmetic fiberglass attachments, sidewall metal (unless the root cause is the wall structure); exterior roof material (EPDM rubber, TPO, etc.); floor covering (carpet, linoleum, hardwood tile, etc.); all sidewall, end wall, front and rear wall, roof and floor attachments, and delamination caused by water intrusion from lack of required exterior seal maintenance or other maintenance.
Id. at page 10.
Are you confused yet? Doesn’t the Wing Wall involve the front wall assembly? Doesn’t the Wing Wall fix also involve the floor frame assembly of the overhead bunk area? And isn’t the Vertical Seam part of the side wall assembly? Maybe Jayco is trying to escape warranty responsibility because of the “fiberglass cap” exclusion, “other costmetic fiberglass attachments” exclusion, or the “attachment” exclusion? I really don’t know. Regardless, the scope of those exclusions is by no means clear. Shouldn’t any ambiguities be construed against the drafters of the warranties? For whatever reason, Jayco has made it clear that they believe the Wing Wall problem and Vertical Seam Separation problem are not covered by the three-year “structural” warranty.
I’ll leave it to the lawyers to sort this out.
Personally, I think that to call something a “structural warranty” (even if “limited”) that does not cover the Wing Wall problem or the Vertical Seam Separation problem seems deceptive and misleading. For example, to sell consumers an RV where the living space (both the “box” and the over-the-cab bunk area) is not properly fastened to chassis cab itself (“excessive flexing, squeaking, or cracking at the transition between the cab and house”) seems to be inherently “structural.” To make matters worse, both Jayco and Entegra repeatedly boast that the overhead bunk capacity is 750 lbs (which apparently beats the industry standard by 300lbs). That’s all nice and good to hear in their promotional literature, but if the bunk area is properly fastened to the rest of the coach after a couple of years, that just seems like false advertising.
Of note, beginning in 2023, the Owner’s Manuals for Entegra Accolades contains this same limited structural warranty language. In the next section, I’ll briefly discuss the language in the Entegra Accolade Owner’s Manual prior to that time (2020-2022).
Scope of the Entegra Accolade “Structural” Warranty (2020-2022)
From 2020-2022, the Entegra Accolade / Accolade XL Owner’s Manual promised consumers a limited structural warranty, which mirrored that of the Entegra luxury Class A RVs (Aspire, Anthem, Cornerstone). The limited structural warranty covered:
(iv) only the steel or aluminum frame structure for the sidewalls (excluding slide outs), roof and rear and front walls.
See, e.g., 2022 Entegra Accolade / Accolade XL Owner’s Manual, at page 14. Entegra takes the position that the structual warranty basically only covers “metal welds.” Since the Wing Wall problem and Vertical Seam Separation problem do not involve a metal weld per se, Entegra believes these problems are not covered by the limited structural warranty.
Of note, the Entegra Accolade (2020-2022) limited structural warranty in the Owner’s Manual was different from the Jayco Seneca limited structural warranty in at least two other ways.
First, the Entegra Accolade limited structural warranty was applicable not just to the first retail purchaser, but also the the second retail owner of the motorhome. That’s right, the warranty was transferable to a second retail owner!
Second, the Entegra Accolade limited structural warranty was for FIVE years!
Despite the language in the Entegra Accolade Owner’s Manual (2020-2022), Entegra won’t honor that. Entegra takes the position that the expanded warranty (five year period / transferable to a second retail owner) is only for its luxury diesel models and does not cover the 2020-2022 Entegra Accolades.
Wait…What? Why in the heck is that expanded warranty language in the Entegra Accolade Owner’s Manual? How does the language magically get re-written by Entegra? Did consumers sign something at the time of purchase that told them that they cannot trust or rely on the Entegra Accolade Owner’s Manual? Even though anyone can STILL download the 2020-2022 Owner’s Manuals from the Entegra website, why hasn’t Entegra conspicuously informed anyone downloading the manuals that Entegra won’t honor the black-and-white structural warranty language at the time of download or on that website page? If this structural warranty language doesn’t apply, then which one does? The Jayco Limited Structural Warranty discussed above?
I’ll leave it to the lawyers to sort this out.
Personally, I think that to provide written warranty in an Owner’s Manual to consumers but then say “oh, we didn’t mean that” is deceptive and misleading.
Entegra updated the Owner’s Manuals in 2023, and as noted above, the Accolade warranty now appear to be the same as the Jayco 2+3 year limited warranty.
Final Thoughts
I’ll end this blog where I started, which it to say that we really like our rig. But…and there is always a “but,” right?….
BUT, I don’t like how Jayco and Entegra interpret their structural warranties. The lawyers can debate the legalities, but I think their stance is bad business. I think that people looking to purchase an Entegra Accolade or Jayco Seneca (new or used) need to better understand what they are getting into. The Wing Wall problem and the Vertical Seam Separation problem are known issues, but may not manifest themselves until after the two-year limited warranty is over. Based on what I’ve learned, neither Jayco nor Entegra seem to care. I’m hoping that the higher-ups at Jayco and Entegra reconsider how they’ve approached things and start doing things differently. We don’t expect RV manufacturers to be perfect, but when rigs that costs $250K+ repeatedly fail after a couple of years and the manufacturer won’t do something about it, something needs to change.
Jayco, you can do better.
Entegra, you can do better.
Until then….
Buyer beware.
Christmastime Song
Merry Christmas, fellow RVers! Lana’s got the holiday spirit again, but this time, she's poking fun of herself and all of the Christmas consumerism with the “Christmastime Song.”
PS: She is clearly not a professional singer or musician. Be kind.
Merry Christmas, fellow RVers! Lana’s got the holiday spirit again, but this time, she's poking fun of herself and all of the Christmas consumerism.
PS: She is clearly not a professional singer or musician. Be kind.
Lyrics to the Christmastime Song
VERSE 1:
It’s that
Time of year
When Influencers hock
Their RV gear.
We’ve got
A website too
With pages of stuff
We recommend and use.
Like TPMS, EMS,
A good sewer hose
We are Amazon affiliates
We’ve gotta disclose
If you use our link
We get a commission
So please click away
For all your Christmas wishing
CHORUS:
Christmastime
Time for Elf on the Shelf
Christmastime
Time to Treat Yo Self
Christmastime
Time to have all the feels
Christmastime
Time for Deals Deals Deals
VERSE 2:
Like space savers
Try this collapsible chair.
Or this bathroom rack
For towels that are spare
Leveling tools like
Level Mate Pro
We’ve even made
A 9-step video
But best gifts
Are memories
Like spending time
In the RV
For a gift idea,
Here’s a start
Give an annual pass
to a State park.
CHORUS 2:
Christmastime
Sing this silly carol
Christmastime
Don your gay apparel.
Christmastime
Buy some fire logs
Christmastime
Dress up the dogs
VERSE 3:
Tis the Season
For gift giving
Gadgets and Tools
For RV living
We don’t make anything
Except videos
About RV stuff
And the places we go
I’m retired
It’s just something I do
And you can follow along
If you choose
YouTube is free
Don’t have to buy nuttin’
Just hit that like
And subscribe button
CHORUS 3:
Christmastime
Put up the tree
Christmastime
Means friends and family
Merry Christmas
From the Class C Broads
And Happy New Year
From the dogs
VERSE 4:
Here’s Percy, Sophie
Billie, Earl, and Earlene
They are why we
Bought our first RV
We couldn’t bear
To travel without them
But we must admit
It’s a little bit of mayhem
We love campgrounds
With a good dog park
Don’t tell on us
If you hear them bark
They are saying hello
When they wag their tails
But if you want one
There’s a Sale Sale Sale
CHORUS 4:
Christmastime
Hear the bells chime
Christmastime
Get on Amazon prime
Christmastime
Eat taters and pie
Christmastime
Buy, Buy, Buy
VERSE 5:
We feel so blessed
For this past year
Filled with hiking, biking,
And lots of craft beer
We thank the Lord
And stars above
For guiding us on
This journey we love
And there’s nothing like
A Freightliner Chassis
Pullin’ that horn
Yep, we classy.
Super C gals
Class C broads
Here’s to our rig, Big Lady
And the travel gods.
CHORUS 5:
Christmastime
Watch Die Hard
Christmastime
Light up our yard
Christmastime
Give Holiday cheers
Christmastime
Drink Festive beers
Music Credits:
(1) The music is a song called “Rock N Christmas” by the Grand Project
https://pixabay.com/music/christmas-rock-n-christmas-medium-177549/
(2) The Lyrics/Vocals/Remix/Video were created by Lana Knedlik.
The lyrics/vocals/remix are what constitutes the "official music video" (not the underlying music).
©️ Copyright 2023 Class C Broads
All Rights Reserved
Desert Camping Tips at Organ Pipe National Monument
There are some no-brainer tips for camping in the desert — bring plenty of water, fuel, sunscreen, food etc. I’m not going to reiterate the obvious tips that you’ll read about in every other blog. Instead, I’m going to focus on the things that we learned while camping at Organ Pipe National Monument.
In 2022, only 133,317 people visited Organ Pipe National Monument. One reason why it probably doesn’t get much traffic is that the park is in the middle of nowhere. The closest “real” grocery store is about 40 minutes away in Ajo, and the monument borders Mexico. Yet, if you are looking for a true camping experience in the desert surrounded by mountains and home to cholla, prickly pears, saguaros, and park’s namesake cactus, there’s no better place. In fact, Organ Pipe National Monument is the only place in the United States where you can see the Organ Pipe cactus growing in its natural habitat.
About the Organ Pipe Cactus
What is the Difference between an Organ Pipe and Saguaro Cactus?
It's easy to tell the difference between a Saguaro cactus and the Organ Pipe cactus.
The Organ Pipe cactus starts its life as a single “trunk” from which additional stems branch out near the ground. In contrast, the Saguaro branches anywhere along its trunk.
Pro Tip: A large population of the Senita cactus (a/k/a Old Man Cactus because of the “beard” at the tips) can be found in Senita Basin within Organ Pipe National Monument.
How did the Organ Pipe Cactus get its name?
The scientific name for the Organ Pipe Cactus is Stenocereus thurberi. “Stenos" means "narrow" and "cereus" means "candle." Personally, I think that the Organ Pipe cactus looks more like a candelabra than a set of organ pipes. Yet, the cactus got is common name when European settlers looked at exposed skeleton and were reminded of the pipe organs in the cathedrals back home. As for “therberi,” that part of the name comes from George Thurber, an 19th century American botanist who studied the cactus.
How does the Organ Pipe Cactus Bear Fruit?
During one of the evening Ranger Talks near the outdoor seating area near the Twin Peaks campground, we learned all about the importance of bats to the Organ Pipe cactus life cycle. Interestingly, the creamy white flowers of the Organ Pipe cactus only bloom at night (usually in May-June), and a colony of lesser long-nosed bats are the main pollinators of the flowers. The spiny fruit ripen just before the summer monsoon period. The bats eat the fruit and also help disperse the seeds throughout the area.
The Organ Pipe cactus is lucky if it can survive the first few years of its existence. For the first 10 years, the cactus may be no bigger than a few inches and is prone to being trampled by animals or being washed out by heavy monsoon storms. It’s not until age 30 that the organ pipe cactus will grow its first stem. Each stem grows from the tip, rarely branching, and grows approximately 2.5 inches per year. Remarkably, the cactus can live for over 150 years. Although the typical cactus may be 16ft tall and 12ft wide, we definitely saw older specimens that were much taller and wider.
Where is the Best Place to See the Organ Pipe Cactus?
While Organ Pipe National Monument boasts a couple of scenic drives and several hiking trails, I think that the best place to see the Organ Pipe Cactus is at the Twin Peaks campground located just a mile or so from the Kris Eggle Visitor Center. Organ Pipe cacti adorn many of the campsites themselves.
Several trails start near the campground – including those that lead to the Victoria Mine (2.1 miles), Lost Cabin Mine (3.9 miles), Senita Basin (3.2 miles), Red Tank Tinaja (5.5 miles), and Backer Mine (7.2 miles). A partially paved permiter trail also snakes around the campground. However, for visitors short on time, the 1.5-mile Desert View loop (which starts over by the group campsites) is probably the best to see several organ pipes and learn about the ecosystem. In addition to having several interpretive signs, the trail offers amazing views of the campground and even Mexico!
What is the Most Unique Thing about Organ Pipe Cactus National Monument?
Aside from the Organ Pipes themselves, my favorite section of the park was the Quitobaquito (rhymes with Frito Burrito), an oasis that is home to a natural spring that has been a water source for wildlife and indigenous peoples for thousands of years. The Tohono O'odham, a Native American tribe, have a long-standing connection to the area, using it for sustenance and cultural activities. The endangered Quitobaquito desert pupfish, Quitobaquito spring snail, and the Sonoyta mud turtle aren’t naturally found anywhere else in the United States.
To get to Quitobaquito, visitors must drive along the US-Mexico border for several miles on South Puerto Blanco Drive. Much of the monument was closed between 2003-2014 because of the operations of violent drug-smuggling cartels. Park anger Kris Eggle was shot and killed in pursuit of drug smugglers in 2002, and the Visitor Center was named in his honor the following year. The park reopened with enhanced security, increase border patrol agents, and vehicle barriers.
Today, there are several signs telling visitors to watch out for illegal immigration and drug activity. And of course, The Wall now separates Organ Pipe National Monument from Mexico. We never felt unsafe during our time in the park. If anything, I developed greater compassion when we would encounter the rare shirt, shoe, suitcase, or other item that once belonged to someone seeking a better life here. While people can debate the pros/cons of The Wall, seeing it in person for the first time up close was something that I will never forget.
What are Some Tips for Camping in the Desert?
There are some no-brainer tips for camping in the desert — bring plenty of water, fuel, sunscreen, food etc. I’m not going to reiterate the obvious tips that you’ll read about in every other blog. Instead, I’m going to focus on the things that we learned while camping at Organ Pipe National Monument.
Tip #1: Open Your Hood if You Know What is Good.
Everyone – I mean everyone – raised the hood of their RV and tow vehicle at night. That’s because Organ Pipe National Monument is filled with desert packrats. These packrats build houses, called middens, which are large collections of sticks, cactus parts, pebbles, bones, and garbage filled with softer nesting material – and all held together with the packrat’s highly concentrated urine. Unfortunately, these packrats love to come out at night and next in the dark cave-like space of a vehicle’s engine compartment. Moreover, those little stinkers like to chew on wires and cause all sorts of damage.
A park ranger told us that they’ve never had packrat problem with any vehicle that had its hood raised for the night. Moreover, he suggested that the packrats are less likely to feel comfortable if there the space is lighted. We placed a couple of rechargable puck lights in the engine compartment of our RV and tow vehicle and opened the hood each night. (The puck lights can flash and change color too — which is supposed to be an added deterrent).
We had no problems. Whew.
Tip #2: A Black Light May Save You.
My next tip is to bring a black light to Organ Pipe National Park. All sorts of creepy crawly things come out at night in the desert. A park ranger told us that scorpions love to crawl under rocks and attach themselves underneath things like camping chairs and the amphitheater benches. Because a scorpion glows under ultraviolet light, we got in the habit of using a blacklight to check areas if we were going to be out at night.
Kasie photographed this scorpion near one of the water spigots by our campsite. A park ranger told us that the scorpion in the photo is the Arizona Bark Scorpion is the most venomous in North America and one of the fastest in the world (up to 1 meter/second). Yikes!
Tip #3: Beware of Dogs (and Cactus).
Pets are only allowed on three trails in at Organ Pipe National Monument.
The Palo Verde Trail – 1.3 miles one way
The Campground Perimeter Trail – 1 mile one way
The Visitor Center Nature Trail – 1/10 mile one way
My tip is: AVOID WALKING YOUR DOGS ON ANY OF THE TRAILS.
Many species cactus have microscopic, overlapping scales that function as barbs. In particular, the Cholla and prickly pear cacti have evolved so even a light brush against the plant may cause a little segment of the plant to break off – which can attach to you or your dog’s coat. This is one way that the cactus spreads itself to new areas.
Our dogs (and in particular our shih tzu, Billie) seemed to be cactus magnets when we took them on the trails. Every time we would try to walk the dogs on the Twin Peaks perimeter trail, Mr. Earl or Miss Billie ended up with part of a cactus in their fur and skin. Very painful. Very hard to remove.
We quickly learned that it was better to just walk the dogs on the paved part of the trail and/or the asphalt roads between campsites. (The asphalt might not be much of an option with hotter temperatures though).
HOT LIST? The SKP Saguaro Co-Op RV Park in Benson Arizona
When we pulled in to the SKP Saguaro Co-Op RV Park in Benson Arizona…, I was thinking that we would just spend a week and a half there relaxing. We had just been to three national parks, and we were both looking for some downtime… I wasn’t planning on making a video or writing a blog about the RV park. But within a few days, both Kasie and I became enamored with the place. And (spoiler alert), we joined the Hot List!
What is the HOT LIST?
Are WE on it?
SHOULD we be on it?
Should YOU be on it?
Does it COST anything to be on the Hot List?
For starters, when we pulled in to the SKP Saguaro Co-Op RV Park in Benson Arizona in November 2023, I was thinking that we would just spend a week and a half there relaxing. We had just been to three national parks, and we were both looking for some downtime. Plus, at just $156/week (plus electric), the place was a pretty good deal. I wasn’t planning on making a video or writing a blog about the RV park. But within a few days, both Kasie and I became enamored with the place. And (spoiler alert), we joined the Hot List!
Before I jump into why and how, let’s talk a little bit about how the SKP Saguaro Co-Op RV Park came about and who exactly owns and operates it.
Who Owns and Operates the SKP Saguaro Co-Op RV Park?
“SKP” is short for Escapees, which is membership club for RVers. So…does Escapees own the SKP Saguaro Co-Op RV Park? The short answer is “no.” Back in the 1980s, Escapees wanted to help create something that would help RVers live more comfortably and affordably in their RVs so it started creating co-ops, which have their own legal idenity. Under the co-up rules, only members of Escapees can become members of the co-ops or stay at them. The Saguaro Co-Op RV Park in Benson opened around 1990 with 242 lots. Today, the SKP Saguaro Co-Op RV Park is one of 11 Co-Op RV parks that Escapees helped start and is authorized to use the Escapees RV Club brand.
If Escapees does not own the SKP Saguaro Co-Op RV Park, then who does? The Co-Op owns the RV Park. And, it’s a non-profit. More on that below.
Who owns the Co-Op? Basically, just RVers! The Co-Op is managed and maintained by individual members of the Co-Op who each have purchased lifetime leases on a site at the park.
Why could we stay at the Co-Op? The leaseholders have the option of subleasing out their sites to folks like us if they aren’t using their site. We joined Escapees in 2019 to take advantage of its roadside assistance program, but had never stayed at one of the Co-Ops before.
Pro Tip: The SKP Saguaro Co-Op compiled a multi-volume history of the RV Park. If you stay there, take a few minutes to thumb through the binders and learn about the park’s creation and evolution over the years.
Where the Heck is Benson Arizona?
The SKP Saguaro Co-Op RV park is located in Benson, Arizona — which is on I-10 less than an hour southeast of Tucson. It’s a small town (5355 people; 2020 census) with a good grocery store (Safeway), great mexican joint (Mi Casa), and a Walmart. Karchner Caverns, the Coronado National Forrest, and the tourist towns of Tombstone and Bisbee are nearby.
The RV park backs up to some BLM land, there are several trails around the park to explore. The RV park itself is slightly terraced so that many leaseholders have some nice view of the mountains.
Is the SKP Saguaro RV Co-Op Worth Staying at?
Because the RV Park was built by actual RVers who wanted to live there, we immediately noticed just how much thought went into the design of the RV park itself. The streets are wide, the lots are huge (~52 by 75 feet), and most of the sites have small casitas on them that can be used for storage and entertaining.
Some of the RV park’s facilities include:
The Clubhouse
A central clubhouse contains a huge dining/gathering space, commercial kitchen, laundry facility (a wash is just $1!), gym – not to mention a number of smaller rooms (library, game room, pool room, etc.) for activities.
Founders Park
In 2015, the Co-Op installed wonderful communal outdoor space called “Founders Park” where happy hour occurs from 4-5 pm each day. Yes, each day. Woo! Hoo!
The Shop
Need to borrow a tool? The shop has more tools than Home Depot that can be used by anyone staying at the RV park. There’s also a selection of screws, bolts, and other fasteners that are free for the taking (or you can leave your spares). Near the door, there’s a washer just for dog beds and other bulky items (a wash is just $1 and is on the honor system!).
Want to work on your rig at the shop? There’s space to pull in just next to the shop building.
Dog Park
Not only is there a well-stocked pet waste station at the dog park, there’s also a few pooper scoopers, dog toys, and a small agility ramp.
RV/Vehicle Storage
Each leaseholder can also store his/her RV (or other vehicle) in a large storage lot. The lot has several container units that can be rented by leaseholders for an additional fee, depending on availability, as well.
Hoe House
Best name ever for a place to store lawn equipment? The equipment used by the Landscaping Committee is housed here, but most of it (like rakes, shovels, etc.) can be borrowed by anyone staying at the park.
On-Site Propane
The propane is reasonably priced too!
Recycling/Trash
We are always excited when RV parks recycle!
In my opinion, about the only thing missing from the RV park is a pool. I mean…come on…this is Arizona….
Pro Tip: Volunteers are eager to give tours of the RV park, and I highly recommend taking the tour. During the tour, you will get to go inside a couple of casitas. Make sure and grab Mary Ann and the Skipper because the tour can last up to three hours!
What is this about a Casita?
As noted above, many of the RV lots have casitas. Importantly, the casitas are zoned (and taxed) as storage units because of their size and designated use. For example, the maximum casita size is 288 square feet, and the maximum casita height is 12 feet. While the building may include a full bathroom and laundry, major electric appliances (such as clothes dryers, hot tubs, and kitchen ranges) are not allowed. Most importantly, members must live in their RV, not in the casita.
All improvements to a lot must be approved by the Co-Op, including the construction of a casita or upgrades to it. Permits are also required from the City of Benson for some things. I get the sense that most people don’t want the hassle or expense of building a casita on a bare lot nowadays so many people buy a lease for a bare lot and then hope to trade it for one with a casita.
What I loved about the casitas is that each seemed unique; no cookie-cutters. There’s even one that looks like an outhouse (we aren’t sure what is going on there)!
Who Runs the SKP Saguaro RV Co-Op?
The Co-Op has just a handful of paid staff, some maintenance workers and a couple of front office workers who work with non-leaseholders like us who want to stay at the park. The vast majority of the work at the park gets done by the leaseholders themselves, as well as RVers who decide to stay at the park. In essence, everyone who stays in the park is expected to volunteer on various committees. The committee list below was pretty insightful about what goes into running the RV park as well. In short, it takes A LOT of volunteer work to run an RV park as good as this!
Audio-Visual Set-up and Maintenance
Architectural
Audit
Bingo
Budget
Bylaws
Cactus Wrens
Channel 5
Channel 43
Chorus
Christmas Auction
Clubhouse
Coffee
Computer Club & Clinic
Crafters
Election
Electric Bill Distribution
Electric Meter Reader
Entertainment Coordinator
Excursions
Exercise
Fish Frys
Fitness Room
Food Auction
Founders Park
Grievance
Happy Hour Announcements
Helping Hands
Holiday & Special Events
Honor System
Kitchen Landscaping
Laundry Coin Collection
Library
Long Range Planning
Marketing
Movie Night
Nieman Marcus Table
Newsletter
Office Volunteers
Opening and Closing
Clubhouse
Outtakes Talent Show
Parking
Pathway Lighting Maintenance
Photographers
Pool Room Upkeep
Propane
Recycling
Security & Safety
Tables and Chairs
Technology
TV System Maintenance & Troubleshooting
Video Library
Website Management
Welcome
Work
Volunteer Committee List at the SKP Saguaro Co-Op RV Park
The leaseholders also elect a board of directors, who are responsible for major decisions and expenditures. Like any self-run organization, that can sometimes get political and personalities can clash. However, I watched one of the board meetings (which are streamed on “Channel 43"), and everyone seemed to be quite respectful of one another.
How Much Does It Cost to Purchase a Lifetime Lease for an RV Site at the SKP Saguaro Co-Op RV Park?
This is where things really get interesting. Remember that the SKP Saguaro Co-Op is a non-profit. Escapees did not want people buying a lease/membership in the co-op for investment purposes. Under the rules and regulations governing the Co-Op, leaseholders can only sell a site for what they paid for it plus the cost of any approved capital improvements to the lot and park. In other words, the price for a site is NOT market-driven. Instead, the price is set by what money the leaseholder actually spent. Escapees designed the co-ops so that people who bought a membership/lease in any SKP Co-Op are able to use the assigned lot for their entire lifetime, or any part thereof, and get their money back if they chose to withdraw. A leaseholder won’t make money or lose money. That is one of the things that makes becoming a leaseholder at the SKP Saguaro RV Co-Op so affordable.
How Much Does It Cost Annually to Live at the SKP Saguaro Co-Op RV Park?
Once someone becomes a leaseholder at the SKP Saguaro Co-Op RV Park, the annual cost to live there is also remarkably inexpensive. Chris and Cherie from Technomadia wrote a detailed blog on what it costs to purchase and maintain a site since they became leaseholders. Make sure and check that their blog for more information.
As of 2023, the cost for a bare lot (no casita) is $17,539. In 2023, leaseholders each incurred around $1768 in maintenance and operating costs (“M&O” —which can be offset with money from the rental pool), general assessments ($60), special assessments ($400), and property taxes (under $200). The M&O expenses cover all utilities except electric (water, sewer, cable, wi-fi, etc.), as well as help fund the activities and day-to-day maintenance of the park. One reason why the M&O costs are so low is that, as noted above, much of the work on the park is done by volunteers.
The bottom line is that it costs just a few thousand dollars (at most) annually to be a leaseholder at the SKP Saguaro Co-Op RV Park.
What is the Hot List?
Well, the Hot List is NOT a listing of the world’s sexiest people who RV. ‘Cause, you know, we are already on that.
The Hot List is essentially the waiting list to become a leaseholder at the SKP Saguaro Co-Op RV Co-Op. There’s currently over 350 people on the hot list. Yes, the RV park is that popular.
When someone decides to no longer be part of the co-op (or perhaps passes away), the lifetime lease is terminated and the lot essentially reverts to the co-op itself. Lots are first offered to existing leaseholders, and if no one at the RV park wants a particular site, then the site is posted on the Co-Op’s website as being available to those on the Hot List.
How Does the Hot List Work?
To get on the Hot List, an Escapees member must pay a $500 refundable deposit (which is credited towards the lease purchase) and a $20 nonrefundable processing fee. To get a site, you have to be diligent.
FIrst, you must monitor the Co-Op’s website to know that a lot is available; there’s no email or other formal notification to the Hot List.
Second, you must call in (yes call) the next Saturday to express an interest in a particular site. You must then call back at a certain time that day (yes, you call twice). If you are the lowest number on the Hot List who calls in, then you become a lifetime leaseholder of that lot within a couple of weeks.
Whether someone on the Hot List wins a lot/lease sometimes requires a little bit of luck in terms of who else calls in on that particular Saturday. The #1 guy on the hot list has been there since 1999 so he could trump everyone else if he wanted to. Yet, someone could theoretically be #200 on the Hot List and still win a lot/lease if no one with a lower number called in.
Is the SKP Saguaro Co-Op RV Park Right for Us?
The more time we spent at the SKP Saguaro RV Co-Op, the more we thought that this would be a great place to come in the winter once we’ve finished up our full-time RV travels. That won’t be anytime soon, and we still consider South Dakota our home base. But, the idea of being a part of this community in 5-10 years seemed quite appealing.
One thing that I haven’t mentioned so far are THE PEOPLE! Amazing. Friendly. Hard Working. The PEOPLE make the RV park what it is.
Many of the leaseholders are retirees, and much older than us. I was continually amazed at the energy and vibrancy of this community though. My hand got tired of waving at everyone. And, I kept thinking “this is how I could see myself living someday.”
It’s a good thing we are thinking that far in advance. We have several years before our number will be low enough on the Hot List to make it worth our time to call in. Also, the Co-Op limits the number of dogs to three. We did not know that when we booked the site, and nobody ratted us out during our 11-day stay. However, that is another reason why we won’t be leaseholders any time soon.
In the meantime, we look forward to going back to the SKP Saguaro Co-Op RV Park next time we are in Arizona to see if the magic is still there. We hope it is, and we wish the folks who live there long, healthy, and happy times at the park.
Thank you to Escapees for their vision in creating the co-ops and to all of the folks we met at the SKP Saguaro Co-Op RV Park!
Alamogordo & White Sands National Park: 10 Tips!
When planning our travels through New Mexico, I knew that I wanted to spend a couple of hours sledding in White Sands National Park. I didn’t know exactly where the national park was located or if there was anything more to the area. Well, nearby Alamogordo turned out to be one of my favorite “national park” towns so far. Here’s 10 tips on what I learned.
When planning our travels through New Mexico, I knew that I wanted to spend a couple of hours sledding in White Sands National Park. I didn’t know exactly where the national park was located or if there was anything more to the area. Well, nearby Alamogordo turned out to be one of my favorite “national park” towns so far. Here’s ten tips on what I learned.
Where RVers Should Stay in Alamogordo: the KOA
White Sands National Park does not have any overnight RV camping. If you are looking for a great RV park, check out the Alamogordo KOA. The campground has a nice dog park, swimming pool, and other amenities that we’ve come to expect with KOAs. Most of the campsites have a nice privacy fence, grill, and table/chairs. We even had our own little lamp post that we could turn on at night (convenient for late night doggie potty breaks). At around $45/night, the KOA in Alamogordo is also reasonably priced.
The main reason you should stay there is FREE SLEDS! That’s right – the KOA has several sleds that guests can borrow for free. The KOA will also loan you some wax for $1, and you get that dollar back when you return the wax to the campground.
Keep in mind that White Sands National Park charges around $25 to purchase a new sled, and used ones are around $21. The sled can be sold back to the national park for measly $5 in “sled bucks” that can be used at the gift store. Because we borrowed two sleds from the KOA instead of buying them, we saved at least $40!
Tips on Visiting White Sands National Park
Although sledding in White Sands National Park is probably one of the most popular and most Instagrammable things to do in the park, here are some other things and activities worth noting.
Tip #1: It’s Hot Hot Hot.
White Sands National Park is located in the northern end of the Chihuahuan Desert within an internally drained valley called the Tularosa Basin. The desert. So yes, it can get extremely hot.
Hot. Hot. Hot.
That means bring water. More water. And more water.
We visited the park in November when the temperatures were in the mid-70s. The weather felt perfect, but there is still a dry heat that can lead to dehydration pretty quickly. A sign by the Dune Life Natural Trail warned us that it is dangerous to hike above 85 F. There’s no water supply on the dune fields either. We took all of that to heart, and brought lots of water for our adventures in the park.
Tip #2: The Sand is Cool Cool Cool.
While normal “beach sand” is made of silica, the sand at White Sands National Park is made of gypsum. That’s the stuff that is used in sheetrock and drywall. Have you ever felt that? It’s usually quite cool to the touch.
Just like drywall, the gypsum sand does not absorb much heat, even when the temperatures are over 100 F! Touch the sand with your hands, and you will be amazed how cool it feels. Don’t be afraid to take off your shoes and feel the sand in your toes either. Kasie did!
(I am one of those weird people who always wears tennis shoes, if I can. I don’t even like flip-flops! I hate anything getting between my toes, especially the strap that goes by the big toe.)
Tip #3: Sock it to Me.
While many people wear sandals or go barefoot at White Sands National Park, everyone else who wears shoes/socks (like me!) will soon realize that the gypsum sand gets everywhere faster than a rumor in a small town.
I wish that I had brought a spare set of socks. Don’t be like me, and consider bringing some extra socks (and perhaps other clothes).
Tip #4: Stroll at Sunset or Sunrise.
White Sands National Park is bordered by the San Andres Mountains to the west and the Sacramento Mountains to the east. The sunsets and sunrises are absolutely spectacular. Each evening, visitors can take a ranger-guided Sunset Stroll, where they can learn more about the unique features and history of park. The stroll is about a mile and lasts about an hour. We stayed a little longer to watch the complete sunset and take photos, while the temperatures seemed to keep dropping (about 20 degrees total) by the time we got back to the truck.
Aside from sledding, the Sunset Stroll was my favorite thing at the national park.
Tip #5: Uncover the Tracks.
White Sands National Park is not only a mesmerizing sea of gypsum dunes but also a unique habitat for a variety of wildlife. While the stark whiteness of the dunes might seem uninhabitable, several animals have adapted to blend into this distinctive environment. Most of the creatures only come out at night. Indeed, we didn’t see any creatures during the day (other than a few darkling beetles), but we did see various animal tracks, offering glimpses into the lives of the wildlife that call White Sands home. These included the Apache pocket mouse, horned lark, and roadrunner.
Tip #6: Look Harder.
One reason why we probably didn’t see any animals is that many of them have adapted to blend into the white sands. White lizards, white mice, and white scorpions all call White Sands National Park Home. Talk about camouflage!
(PS: The lizard shown at the Visitors Center is NOT the actual size. Whew!)
Tip #7: When Life Gives You Sand, Make an Angel.
If you looking for another activity besides sledding or hiking in the park, don’t forget to make a “snow angel.” Technically, these are sand angels. Just be prepared to have a dune-shaped outline on your backside for the rest of the day.
(We didn’t make the sand angel in the photo. Duh.)
Tip #8: Mirage Magic.
Embrace the optical illusions! White Sands plays tricks on your eyes, making distances seem shorter than they really are. If you suddenly find yourself feeling like you're walking in a desert mirage, fear not – you're not hallucinating; it's just the magic of the gypsum.
Tip #9: There’s Water Everywhere (But Don’t Drink It!)
One of the park rangers dug a hole about 2-3 feet deep to show us the water table beneath the white sand. The water is extremely important to the ecosystem. Not only does the water help keep the sand in place so that it doesn’t blow all over the state, it is also an important resource for the plants and animals in the park. The water is quite salty (brackish) so it NOT for drinking!
The photo shows me with a stick in the hole. It was pretty cool to just hear the water slosh around. This desert certainly wasn’t anything like I had imagined it would be.
Tip #10: Bombs Away.
White Sands National Park is located within the White Sands Missile Range. About 60 miles north of the park is the Trinity Site – where the world’s first atomic bomb was detonated on July 16, 1945. Tests are still conducted in White Sands Missile Range, when that happens the park is closed. So be sure and visit the national park website before your visit to check for upcoming closures.
(PS: The Trinity Site is only open a couple of times a year to the public, usually just on the first Saturday in April and the third Saturday in October).
What Else is there to do in Alamogordo NM?
While White Sands National Park is probably the big attraction in the Alamogordo area, we found several other museums and fun things to do.
Our top three favorites were:
#1: Pistachioland
Who knew that this part of New Mexico is ideal for growing pistachios? And, even better, Alamogordo is home to the World’s Largest Pistachio. We tried some homemade pistachio ice cream, and brought home bags of Habanero Lime and Cocoa pistachios from McGinn's Pistachioland. Visitors can take a free tour of the nut farm throughout the day. And the place is also a winery!
#2: The Alameda Park Zoo
The Alameda Park Zoo was established in 1898, making it one of the oldest zoos in the southwestern United States. Today, it is home to a number of wonderful creatures that make it fun to visit. The cost is just $4/person, and we spent about two hours exploring the zoo. Near the entrance, we became enamored with two East African Crowned Cranes doing some sort of mating dance (check out the video). While the zoo is home to many non-exotic animals (like racoons, foxes, and bobcats), we also saw a few endangered species — like the Addax — for the first time. We had fun spotting Limu Emu from the Liberty Mutual commercials and Li’l Sebastian from Parks and Rec. JK.
One of great things about this zoo was the signage – which included some “fast facts” or “fun facts” about the animals, their average size, and weight, lifespan, and how endangered they are. If you are an animal lover, this place is a must stop!
#3: 575 Brewing
Last but not least, be sure and check out the local craft brewery in Alamogordo. 575 Brewing Company has a comfy outdoor patio area, great beer, and is dog friendly. Mr. Percy loved the Grindstone Coffee Milk Stout!
Carlsbad Caverns: What to Know
I’m sure you have heard of Carlsbad Caverns National Park. It’s been on my “bucket list” to visit for some time. When we rolled into Carlsbad New, Mexico, I was giddy to find out that the town was home to TWO national parks!
Okay, technically the second national park — Guadalupe Mountains National Park — is about an hour drive south from Carlsbad. And yes, that park is in Texas (not New Mexico). Details. Details. Whatevs. Yet, because Carlsbad Caverns is actually adjacent to Guadalupe Mountains National Park, we knew we had to visit both when in the area. Here’s what we learned about Carlsbad Caverns.
Carlsbad Caverns: What to Know
How Do You See the Bats at Carlsbad Caverns?
No Bat-signal needed here, folks. Instead, just enjoy the nightly bat flight! Yes, just like the Caped Crusader has his Batcave, Carlsbad Caverns has its own underground spectacle – the nightly Bat Flight viewing! During the warmer months, Carlsbad Caverns becomes a significant roosting site for a HUGE colony of Brazilian free-tailed bats.
The bats migrate to the caverns in the spring, typically arriving in April or May, and stay until late October. With temperatures hovering around 56 F all year long, the caverns provide an ideal environment for the bats, offering stable temperatures and high humidity levels.
Just how large is the bat colony? According to the NPS, the colony is estimated to be around 400,000 bats. When we visited Carlsbad Caverns in late October, the park ranger told us that there were still around 100,000 at the national park!
Spectators can watch the bats emerge (in evening) and come home to roost (in the morning) from a large outdoor seating area near the Natural Entrance to the caverns.
Photography and videography are prohibited during the Bat Flight viewing. I took the liberty of taking a couple of photos of the Natural Entrance and then super-imposed some bats to give you an idea of what it might look like. The first photo is more realistic, and the second photo is a complete fabrication. The bats don’t come anywhere close to spectators.
What are the Tour Options at Carlsbad Caverns?
At the time we visited Carlsbad Caverns in October 2023, the tour options at Carlsbad Caverns were as follows:
King's Palace tour
Ranger-guided
1.5 hours
1 mile
12 person groups
Extra fee
NPS calls the King’s Palace Tour “easy to moderate”
Big Room Tour
Self-guided
1.25 miles
Can take the elevator down to the starting point
NPS calls the Big Room Tour “easy to moderate”
Natural Entrance Tour
Self-guided
1.25 miles
75-floor (750 foot) decent
NPS calls the Natural Entrance Tour “steep and strenuous”
Pro Tip: Visitors Can Walk Multiple Tours in a Single Day.
As for the guided tour, reservations are required, and the slots book up several weeks in advance. One park ranger told us that several people show up on “stand-by” each day in case those with reservations are no-shows. We didn’t have our act together enough to make advance reservations and did not have any luck on “stand-by.”
We started with the Natural Entrance Tour, took the Big Room tour, and then used the elevator to exit -- all in a single morning. I would rate both as “easy” walks. Sure, the Natural Entrance tour would be “steep and strenuous” if someone crazily decided to go up the 75 flights, but the path finishes near the cavern elevator so there’s no need do that.
What Can You Expect to See on the Carlsbad Caverns Tours?
The caverns took us on a mesmerizing journey through a subterranean wonderland, showcasing an array of stunning rock formations that have been sculpted over millions of years. Our photos and videos don’t do the place justice. Carlsbad Caverns is just one of those places that you need to experience in person.
After descending about 200 feet on a series of switchbacks, the Natural Entrance Tour took us right by the main bat cave. We couldn’t see or hear them though. Other notable features on the Natural Entrance Tour include Devil’s Spring, Whale’s Mouth, Natural Bridge, Devil’s Den, Witch’s Fingers, Iceberg Rock, and the Boneyard.
Pro Tip: Take a flashlight to Carlsbad Caverns. Although the paths are all paved with guardrails in most places, the path is sometimes hard to see. A flashlight is also helpful for illuminating some of the rock formations. However, remember to be courteous in using the flashlight when others are around.
The Big Room Tour included the magnificent Hall of Giants (including the Giant Dome and Twin Dome), Fairyland, Temple of the Sun, Caveman Junction, Statue of Liberty, Totem Pole, Mirror Lake, Bottomless Pit, Top of the Cross, Crystal Spring Dome, Rock of Ages, and Painted Grotto.
Pro Tip: We have a lot of fancy video and camera gear and experimented with what worked best at Carlsbad Caverns. The winner? Our Pixel phones on the “night sight” setting took the best photos in the dark caverns.
What Happened (to us) in ROSWELL?
Greetings, fellow earthlings and extraterrestrial enthusiasts! Confession time. I have to admit that when I wanted to spend TEN DAYS in Roswell, New Mexico, my wife thought I was from another planet. Turns out, I WAS RIGHT! Roswell is filled with plenty of alien-themed activities in Roswell. Yet, there are also several places with earthly creatures that are worth visiting.
Here’s our ranking of the BEST THINGS to do in Roswell.
Greetings, fellow earthlings and extraterrestrial enthusiasts!
Confession time. I have to admit that when I wanted to spend TEN DAYS in Roswell, New Mexico, my wife thought I was from another planet. Turns out, I WAS RIGHT! Roswell is filled with plenty of alien-themed activities in Roswell. Yet, there are also several places with earthly creatures that are worth visiting.
Here’s our ranking of the BEST THINGS to do in Roswell.
Pro Tip: Start your Intergalactic Roswell Journey at the Roswell Visitor Center for a walking map and guidance on things to do. At the Roswell Visitor Center, we were treated to a complimentary old-school photograph with some aliens. Then, a 10-stop scavenger hunt for aliens took us through most of downtown Roswell, and that helped us finalize our itinerary. Plus, we got a prize!
What exactly is the Roswell Incident?
Okay, there have been thousands and thousands of pages written on the Roswell Incident. In preparation for our trip, I read the Roswell Incident Wiki page, watched a couple of YouTube documentaries, and skimmed the Government's Roswell: Case Closed Report. Here’s my two-minute summary:
Way back in July 1947, a rancher named Mack Brazel discovered some debris scattered across his ranch located about 75 miles north of Roswell. Mack contacted the local sheriff, who in turn contacted the Roswell Army Air Field. Major Jesse Marcell was dispatched to the site. Before you could say "ET phone home," the military issued a press release that they had captured a “flying disc. "
The press went wild, but the next day, the military issued a retraction that was faster Captain Kirk could say “warp speed ahead!” The object, according to the government, was just a weather balloon. The story died down and didn’t get much attention until the 1970s when various books and documentaries began to question the official explanation. Witnesses, including Jesse Marcell, came forward claiming that the debris was not from a weather balloon. Some believed that not only was there an alien spacecraft crash, but also that extraterrestrial bodies were recovered from the wreckage and that the weather balloon-story was just a government cover-up.
Finally, in 1994, the government issues an official report, which stated that the debris was from a classified project known as "Project Mogul." Project Mogul was designed to monitor Soviet missile and bomb tests by detecting sound waves in the upper atmosphere. A second USAF report in 1997 reviewed testimonies about aliens and found them to be baseless, made up, or inspired by parachute dummies who confused them with later events. Despite this, the controversy still continues. Is the truth really out there?
What Are the Top Alien-Themed Things to Do in Roswell?
#1. Roswell International UFO Museum & Research Center
A must-stop on any intergalactic journey in Roswell is the Roswell International UFO Museum & Research Center. From photographs to eyewitness accounts, this museum explores the mysterious 1947 Roswell incident, providing visitors with an abundance of information to help decode the alien conspiracy theories. I came away from the museum believing that some sort of cover-up really did happen. The timeline displays did a great job of highlighting the key witness statements and artifacts.
The museum is not just about the Roswell Incident though, and there are several displays about other major UFO sightings throughout the world and space travel generally. As the name implies, the place is a “Research Center” too. The building houses an impressive library filled with UFO and space-themed books, periodicals, and Roswell memorabilia. Lastly, there’s also a gift shop filled with all sorts of alien objects, clothing, and souvenirs.
Cost: $7 for adult ($5 military/seniors/first responders)
#2. Alien Zone Area 51
Alien Zone isn’t your average gift/souvenir shop. In addition to some fun shirts and alien-themed knick-knacks, the front part of the store also contains a few aliens in caged displays. However, for folks like us wanting some awesome alien selfies, we paid a small amount to travel to the store’s Area 51. There, we posed with aliens in scenes ranging from a probe abduction to a backyard barbeque. Some of the aliens look like they’ve seen a few crashes though; many are missing fingers and other body parts. Area 51 could use some updating, and we felt like we needed to enter a decontamination zone after our visit.
Cost: $0 (gift/souvenir shop) / $5 (Area 51)
#3. Spaceport Roswell
This was my first time donning a headset for a virtual reality experience, and I thought it was out of this world! Literally. At Spaceport Roswell, we witnessed the the Roswell Incident firsthand….from the perspective of the aliens! The experience took us aboard the alien spacecraft, part of the crash-landing site, and the secret place where the government stored our bodies!
Cost: $14.50 ($12.50 military/seniors)
#4. Bricktown: Aliens Attack
Despite having an engineering degree, I was not a “LEGO-kid” growing up. However, Kasie had quite the LEGO collection and couldn’t wait to visit Roswell's Bricktown . One exhibit featured the Apollo moon landing, Saturn rocket launch, and the podium where President Kennedy made his famous moon speech. I geeked out the most on the “Aliens Attack” display – since I was now thoroughly convinced that they are really coming for us. The experience includes some non-alien/space displays (like Big Ben, the Coliseum, and the Syndey Opera House) as well.
Cost: $12.00 ($11.00 military/seniors)
What the Top Things to Do in Roswell (That Don’t Involve Aliens)?
#1. Bitter Lake National Wildlife Refuge
Located just a few miles northeast of Roswell, the Bitter Lake National Wildlife Refuge is home to up to 40,000 sandhill cranes in the fall. We marveled as these magnificent earthly creatures come to roost each evening and then departed each morning. The sounds and sights of these migrating birds was truly amazing! We also saw some of New Mexico’s other wildlife, including a rattlesnake, tarantula, and coyote.
Cost: Free
#2. Spring River Zoo
I’m not normally a “zoo” person, but because the Spring River Zoo was right next to our RV park, I decided to check it out. I liked it so much that I went back on a couple of other days. Maybe I just lucked out, but the llamas, lemurs, foxes, buffalo, and other earthly beings were quite active and visible during my visits.
Cost: Free (donations accepted)
#3. Black Cock Brewery
We love craft beer, but because Black Cock Brewery only brews its own ciders and seltzers, we almost did not stop there. Luckly, the brewery had a good selection of other New Mexico beers (mostly from Santa Fe Brewing, Bosque Brewing, and Siera Blanca Brewing). A Mexican food truck was parked outside, and the brewery really had the Halloween spirit. They were getting ready for their “Cockoberfest” on the mural-filled patio and karaoke stage.
With a name like “Black Cock,” the puns on their merch pretty much wrote themselves. The fun-loving bartender tried to sell us one of their shot glasses with slogans like “Spitters are Quitters” and the classic “I heart Black Cock.”
Cost: Thirst and hunger dependent
Concluding Thoughts on Roswell
Roswell, New Mexico is not just a city with a mysterious past; it's a city with a playful, alien-themed present. Whether you're a UFO enthusiast or just someone looking for a galactic good time, Roswell has plenty of extraterrestrial and terrestrial experiences to offer. Here are just some of the Alien sightings in the town:
S2RV Chassis: Hidden Storage Space
If you don’t have a rear bath in your S2RV chassis, you MAY have some hidden EXTRAS STORAGE SPACE in the rear exterior storage compartment on the passenger side.
If you don’t have a rear bath in your S2RV chassis, you MAY have some hidden EXTRAS STORAGE SPACE in the rear exterior storage compartment on the passenger side. In our 2022 Entegra Accolade XL 37L (bunk model), we removed the carpeted panel, cut about 1.25 inches from the panel, and repositioned it towards the center of the rig. See photos below. It increased the usable space in that compartment by 50% or more. Although I’m not entirely sure, I think that Jayco/Entegra uses this space for a black/gray tank in models with a rear bath so if you don’t have a rear bath, the extra space is probably there. This is just one of the things learned during our factory tour while getting some warranty work done at Jayco/Entegra in Middlebury, IN.
DISCLAIMERS: PLEASE DO YOUR OWN RESEARCH. WE ARE NOT RESPONSIBLE FOR YOUR RIG! We are NOT affiliated with any of these manufacturers and just want to share our experiences about this modification so that you can help judge for yourself whether this is a project you want to tackle.
Miami Oklahoma - Famous Things and People
Miami, Oklahoma (population ~13,000) is located on historic Route 66 and just of I-44 in northeastern Oklahoma. The town boasts several attractions to enjoy when traveling through this charming part of the Mother Road. Perhaps more importantly, Miami is also famous for being the hometown of my wife, Kasie. In this video and blog, we outline some things all travelers should to know about Miami – including some of the FAMOUS THINGS to do in Miami and FAMOUS PEOPLE from Miami.
Miami, Oklahoma (population ~13,000) is located on historic Route 66 and just of I-44 in northeastern Oklahoma. The town boasts several attractions to enjoy when traveling through this charming part of the Mother Road. Perhaps more importantly, Miami is also famous for being the hometown of my wife, Kasie. In this video and blog, we outline some things all travelers should to know about Miami – including some of the FAMOUS THINGS to do in Miami and FAMOUS PEOPLE from Miami.
How do you say Miami Oklahoma?
First, and foremost, Miami is pronounced MI-AM-AH. Not Mi-am-ee.
The locals are 100% in agreement on how to say Miami. In contrast, neighboring Missouri can be pronounced as both Missour-ah and Missour-ee.
What is a Wardog?
Miami, Oklahoma is home to the Miami Wardogs. Fun fact: the Miami high school has the only wardog mascot in the nation! Many of the games are played at nearby by Northeast Oklahoma A&M College or “NEO” for short. (Btw, the college acronym is pronounced En-EE-Oh, and not Nee-Oh).
During our last trip to Miami, Kasie was inducted into the Wardog Athletic Hall of Fame, along with five other girls on the 1989-1990 girls golf team. Their golf coach, Harley Turner or “HT”, was also inducted in to the Wardog Athletic Hall of Fame. The induction plaque reads:
1989 & 1990 Miami Lady Wardogs Golf Teams
The 1989 & 1990 Girls Golf Teams at Miami High School won back-to-back state championships in 1989 and 1990. Both state championships took place at Lake Hefner Golf Club in Oklahoma City, Oklahoma. The team placed in every tournament they played in during these two years and won the 1989 & 1990 regional championships on their way to both state titles. This same group were also state runner-up in 1987, and finished third in 1988.
The teams were both comprised of the same six ladies: Shawna (Fitzgibbon) Geiger, Jennifer (Gatewood) Davis, Jan (Haney) Dominguez, Lori Lillard, Paige Parrott, and Kasie Sly. Paige Parrott and Kasie Sly were both all-state golfers. Paige Parrott won the individual state championship in 1990. This was before female golfers were separated by class, so she was the best female golfer in the state of Oklahoma that year.
The teams were led by head coach Harley Turner, who was also inducted into the Miami Athletics Hall of Fame on October 6, 2023, the same day as the girls' golf teams
Look at that! My wife, Kasie, is truly FAMOUS!
What Famous People are from Miami Oklahoma?
Well, aside from the 1989-90 Wardog girls golf team, there are other famous athletes from Miami, Oklahoma.
One of the major roads in Miami is named for Steve Owens, the 1969 Heisman Trophy winner and Pro Bowler who played for the Detroit Lions.
Tinker Owens, Steve’s little brother, also played in the NFL for the New Orleans Saints. Tinker’s also has a street named after him, but it’s not as prominent as Steve’s street.
Mickey Mantle (a/k/a the Commerce Comet) grew up just north of Miami in Commerce, Oklahoma. More on that below…
Other famous people once called Miami Oklahoma home. Those folks include:
Charles Banks Wilson was world renounced artist. Several of Wilson’s portraits and murals are on display in the Oklahoma state capital building.
Steve Gaines (guitarist) and Cassie Gaines (vocalist) were a brother-sister duo who were part of the Lynard Skynyrd Band. They tragically died in a plane crash in 1979.
Moscelyne Larkin became a famous ballerina in the 20th Century and was inducted into the Oklahoma Hall of Fame in 1978.
David Osborne was known as the "Pianist to the Presidents" for having entertained several spanning U.S. Presidents Jimmy Carter to Barack Obama.
What Famous Things Are There to See In Miami?
#1: Coleman Theatre
Located on Route 66, the Coleman Theatre is an architectural gem in the heart of Miami and a must-visit for history and culture enthusiasts. Built in 1929, this beautifully restored theater, which includes gorgeous Wurlitzer pipe organ, is a testament to the golden age of cinema and vaudeville. Even if you're not attending a show, you can take a guided tour to appreciate the stunning Spanish Revival architecture and learn about the theater's rich history and its reconstruction. The story of the Coleman is really a story about the Miami community coming together to save this iconic landmark.
#2: Waylan's Ku-Ku Burger
No visit to Miami would be complete without a stop at Waylan's Ku-Ku Burger on Route 66. This iconic diner is a beloved local institution that has been serving up delicious, old-fashioned burgers and shakes for decades. The interior is currently closed but there are a few picnic tables outside to enjoy the drive-through meal.
#3: Miami's Murals
One of the most striking aspects of Miami is its vibrant and diverse collection of murals that adorn the town's buildings. These murals tell the story of Miami's history, culture, and spirit. These works of art located mostly along Route 66, and they provide fascinating insights into the community's past and present.
#4: Newell Coach
For those interested in luxury motorhomes or just have $1M+ to spend, stop by the Newell Coach factory in Miami. These custom-built motorhomes are some of the most opulent and technologically advanced on the market. We took a private tour a few years ago, and it was so much fun to dream!
#5: Donut Palace
Located on E. Steve Owens Boulevard, the Donut Palace is home to the BEST DONUTS ever! Seriously, I hate to say “best ever” about anything, but these donuts are truly the best ones I’ve ever eaten. Make sure and get a blueberry donut or an apple fritter with your order.
Another great thing about the Donut Palace is ordering. The owner, who has a thick Asian accent, always remembers us, even if we haven’t been to Miami in over a year. She will always try to make us buy more donuts as well, which is part of the fun of going there. “You like more donut? You big girl. You need more donut?” Sure, we’ll take another dozen.
How much do I love these donuts? I have dozens of donut photos on my phone. And yes, I did just post a photo of my food in this blog.
#6: The Stables Casino
Miami (and Oklahoma in general) is home to lots of casinos. I don’t enjoy gambling, but I like cheap beer and good food. While there’s no craft beer at The Stables Casino (unless you count Blue Moon, which I don’t), there are several cheap domestic drafts on tap to help wash down a really tastey and generous helping of nachos. They aren’t the best ever, but they may be the best bang for the buck at just $9.95.
Did I take ANOTHER picture of my food? Yep, I did. #ClassCBroad #ClassyBroad
#7: Mickey Mantle's Childhood Home
Disclaimer: Okay, this stop is admittedly not in Miami.
Keep driving a little north on Route 66 and then take a left on Avenue C in nearby Commerce, Oklahoma to see the childhood home of the legendary baseball player Mickey Mantle. Visitors cannot go inside the home, but you can picture Mickey’s dad throwing a few pitches to Mickey between the house and the tin barn that served as Mickey’s backstop.
I got chills just walking through the yard.
Is Miami Oklahoma worth visiting?
The short answer is “yes.” On your next road trip through Oklahoma, be sure an plan to stop in Miami Oklahoma. It’s a small town with several famous attractions for out-of-town guests to enjoy. If Kasie is in town, she’ll also give you her autograph.
Buffalo Roundup in Custer State Park: What to Know
The Buffalo Roundup in Custer State Park is a time-honored tradition that combines the thrilling spectacle of bison herding with the rich history of conservation efforts in the American West. It's not just about managing the buffalo herd anymore; it's a celebration of the American West's heritage and an opportunity for visitors to connect with nature and history.
In short, the Buffalo Roundup in Custer State Park is a “bucket list” experience.
About Me
I grew up in Belleville, Kansas – a town of about 2000 people and home of the Battlin’ Buffaloes. Yes, the Buffaloes were the grade school and high school mascot in my hometown. “LET’S GO, BUFFALOES! Let’s GO BuffaLOES” I proudly wore one of my dozens of “Buffs” t-shirts to school on most days, and I even had a buffalo stuffed animal next to my bed.
Despite growing up in “Buff Country,” I don’t recall seeing a live buffalo until adulthood. Even then, my buffalo sightings were limited to just a handful of buffalo at some preserve.
But Custer State Park? It’s home to nearly 1500 buffalo!
In my opinion, there’s no better place to see buffalo than at Custer State Park in western South Dakota.
Early History: The Plight of the American Buffalo
In the 19th century, the American buffalo (also called bison) roamed the plains of North America in the millions. These iconic creatures were crucial to the livelihood of Native American tribes, providing sustenance, shelter, and materials for various purposes. However, westward expansion, overhunting, and the construction of the transcontinental railroad led to a dramatic decline in buffalo populations.
By the late 1800s, the buffalo were on the brink of extinction, with only a few hundred remaining in the wild. Recognizing the urgent need for conservation, a handful of visionaries took steps to protect this majestic species and its habitat. One of them was Peter Norbeck.
Buffalo and the Founding of Custer State Park
Peter Norbeck was a South Dakota conservationist who would later become the state’s Governor and U.S. Senator. He fell in love with the rugged terrain of the southern Black Hills, and in 1912, Norbeck helped establish the Custer State Forest. In 1914, three dozen buffalo were purchased from the Scotty Philip’s herd near Pierre, South Dakota. Just five years later, Custer State Park was officially made a state park. By 1924, the buffalo herd had grown to about 100 animals. As the herd grew, park officials would round them up periodically (every 2-5 years). In 1965, the roundup became an annual event with the first annual auction held in early 1966.
About the Buffalo Roundup
Custer State Park’s expansive grasslands and diverse ecosystem provides an ideal environment for buffalo to thrive. The primary objective of the Buffalo Roundup is to manage the growing buffalo herd, preventing overpopulation and preserving the ecological balance of the park. By managing the buffalo population, Custer State Park ensures that the ecosystem remains in balance, preventing overgrazing and resource depletion. Depending on the herd size, 300-500 bison will be sold at the park's annual auction later in the fall. The park also uses the roundup as an opportunity to vaccinate, brand, and perform health assessments (such as pregnancy tests) on the buffalo.
The Buffalo Roundup in Custer State Park is now a time-honored tradition that combines the thrilling spectacle of bison herding with the rich history of conservation efforts in the American West. It's not just about managing the buffalo herd anymore; it's a celebration of the American West's heritage and an opportunity for visitors to connect with nature and history.
In short, the Buffalo Roundup in Custer State Park is a “bucket list” experience.
When is the Buffalo Roundup?
The Buffalo Roundup is typically held on the last Friday in September. An auction is later held in the fall, usually in early November.
The celebration for the Buffalo Roundup takes place over a period of three days (Thursday-Saturday).
How many people attend the Buffalo Roundup?
The three-day Buffalo Roundup at Custer State Park reportedly attracts close to 30,000 spectators annually. The official count for the Friday roundup in 2023 was 22,590 spectators.
That’s a lot of “Buff” fans like me.
What are the Parking and Viewing Options for Spectators at the Buffalo Roundup?
There are two viewing areas for the Buffalo Roundup.
North Parking and Viewing | Head south from the Game Lodge area on Wildlife Loop Road. (See teal path on map.)
South Parking and Viewing | Head east on Wildlife Loop Road near Blue Bell campground. (See green path on map.)
Both viewing areas are reportedly equally good for seeing the buffalo herd. The buffalo herd goes by the South Viewing area first and then heads towards the North Viewing area as generally shown in the map below.
Two important things to note about parking:
First, Wildlife Loop Road is closed in the area near Lame Johnny Road. Therefore, all vehicles must depart the way they entered.
Second, the parking lot for the South Viewing area is smaller so if it fills up, park rangers and volunteers will make vehicles backtrack and send vehicles up and around to the North Viewing area.
We chose the watch the Buffalo Roundup from the North Viewing area because (1) it was closer to our campground near Rapid City and (2) we did not want to worry about not getting a parking spot in the South Viewing area.
What Should Spectators Bring to the Buffalo Roundup?
When attending the Buffalo Roundup, here’s what we recommend bringing:
Patience. Lots of patients. You can expect to wait up to two hours to get into Custer State Park on the day of the Buffalo Roundup.
Viewing Gear. Cameras and binoculars are a must. We could spot the buffalo coming down a hill way way way in the distance, and could see the herd gathering speed as they kept going.
Sittin’ Gear. Most people sit in camping chairs or spread out a blanket on the ground. The north viewing area is one big hill so personally, I think that a blanket works a little better than camping chairs.
Appropriate Attire. Depending on the weather, it’s a good idea to bring layered clothing, rain gear, and sunscreen. If you have any buffalo-themed hats or other garb, wear it!
Provisions. Lastly, bring drinks, snacks maybe even pack a lunch. There are limited food/drink options at Custer State Park (see below), and because of the crowds, there are usually long lines for provisions.
What Else Goes on at the Buffalo Roundup?
Education. The Bison Center is located just across from the corrals. This $4M+ facility (constructed in 2022) is worth a stop to learn more about the buffalo as a species, the Buffalo Roundup, and herd management practices.
Breakfast (sorta). Volunteers serve a Cowboy Breakfast (pancakes) for spectators. Unfortunately, by the time we arrived to the North Viewing area, the pancakes were sold out.
Lunch. The park also serves Cowboy Lunch near the Bison Center (white tent in the photo). In 2023, our lunch consisted of baked beans, a bag of chips, cookie, soda/water, and of course, buffalo brisket! The cost was $20.
Work. After the buffaloes are herded into a large fenced-in pasture area at near the Bison Center, the park rangers and volunteers herd the buffalo into corrals for health checks and population management. This process starts roughly at noon and finishes up (just for the day) by mid-afternoon. The park rangers continue their work for the weeks an months following the Buffalo Roundup.
Culture. An art fair is also held near the Custer State Park Visitor Center on Thursday-Saturday. The art fair has food trucks.
Should You Go to the Buffalo Roundup?
Well, I certainly think the Buffalo Roundup is a must-do experience. If you want to get really good feel for what goes on, please check out our video.
Exploring Western South Dakota in the Fall
We have spent a lot of time in western South Dakota, but mostly in the summer during the heavy tourist season. This time, we wanted to experience the breathtaking beauty of the Black Hills in the fall. The rugged and picturesque landscape transformed into a kaleidoscope of colors during the fall season. We also experienced some of the local fall festival culture. Here are our favorite finds:
We have spent a lot of time in western South Dakota, but mostly in the summer during the heavy tourist season. This time, we wanted to experience the breathtaking beauty of the Black Hills in the fall. The rugged and picturesque landscape transformed into a kaleidoscope of colors during the fall season. We also experienced some of the local fall festival culture. Here are our favorite finds:
Spearfish Canyon - A Tapestry of Colors
Spearfish Canyon is often considered the crown jewel of fall foliage in South Dakota. We explored the Spearfish Canyon Scenic Byway and discovered why it's one of the most sought-after spots for leaf-peeping. In addition, Spearfish Canyon is home to three major waterfalls:
(1) Spearfish Falls.
Located near Savoy, this 0.6 out-and-back trail to Spearfish Falls leads to a majestic 80-foot waterfall.
(2) Roughlock Falls.
Even though Roughlock Falls is accessible via a short hike from a small parking lot on Roughlock Road, we recommend doing the more scenic 2.1-mile out-and-back trail to Roughlock Falls starting near the Spearfish Canyon Lodge.
(3) Bridal Veil Falls.
Drive north from Savoy towards Spearfish on 14A to a pull-over area to see Bridal Veil Falls.
Custer State Park - Wildlife and Autumn Splendor
Custer State Park, known for its bison herds and scenic drives, is another fantastic place to soak in the autumn beauty. Needles Highway (Highway 87) and Iron Mountain Road (Highway 16A) are both stunning routes that wind through towering granite spires, dense forests, and narrow tunnels. The South Dakota Park, Fish & Game maps aren’t always in agreement about the tunnel dimensions, but one recent map provides the following information:
|
Tunnel |
Highway |
Width |
Height |
|
Needles Eye Tunnel |
Highway 87 |
8’4” |
11’3” |
|
Iron Creek Tunnel |
Highway 87 |
9’0” |
11’4” |
|
Hood Tunnel |
Highway 87 |
10’6” |
9’10” |
|
CC Gideon Tunnel |
Highway 16A |
13’0” |
11’0” |
|
Doane Robinson Tunnel |
Highway 16A |
13’2” |
12’2” |
|
Scovel Johnson Tunnel |
Highway 16A |
13’2” |
12’4” |
Mount Rushmore is framed in the Doane Robinson Tunnel when traveling north on Iron Mountain Road (Highway 16A), which is pretty cool.
The best place to find wildlife alongside the fall colors is on the aptly named Wildlife Loop. We got our fill of mountain goats, pronghorn, prairie dogs, and buffalo – all with a variety of yellow and orange leaves in the prairie background. I fell in love with prairie dogs as part of my visits to Custer State Park, and even wrote a song about them! The best place to see prairie dogs in Custer State Park is on the Seven Mile Draw just off the Wildlife Loop Road.
As for the buffalo, there’s no better place to see them than during Custer State Park’s annual Buffalo Roundup!
Pumpkin Festival in Rapid City
For the past 15 years, downtown Rapid City has hosted a Pumpkin Festival. The event featured a giant pumpkin weigh-off, pumpkin carving contest, live farm-to-table cooking demonstration, the Pumpkin Pub Crawl, drum line performances by Rapid City Central and Stevens groups, vendor booths, farmers market and kids activities. The best part was the Pumpkin Catapult a/k/a Pumpkin Chunkin’ a/k/a Punkin’ Chunkin’ – where about a half dozen teams from the South Dakata School of Mines & Technology created an array of devices to launch pumpkins across an open field!
I even made the Rapid City Journal trying to film all of those flying pumpkins!
Octoberfest at a Rapid City Brewery
Rapid City is home to several breweries, and we’ve been to all of them on multiple occasions. During this trip to the area, our favorite brewery was Lost Cabin, who hosted a phenomenal Octoberfest on one Saturday. Kasie tried her best to follow the rules in a Beer Stein Holding Contest, and we made a few new friends. Most of the breweries in the area hold October celebrations so be sure and make that a part of your fall visit to western South Dakota.
Why Every RVer Should Own a 3D Printer
Are you someone who loves doing “mods” to your RV?
Are you a “tinkerer”?
Do you like having FUN?
If you answered “YES” to any of these questions, then consider getting a 3D printer for your RV.
Are you someone who loves doing “mods” to your RV?
Are you a “tinkerer”?
Do you like having FUN?
If you answered “YES” to any of these questions, then consider getting a 3D printer for your RV.
Hear me out. When my wife, Kasie, bought her first 3D printer a couple of years ago, I was skeptical. “Aren’t they expensive?” “Why don’t you just buy whatever you need?” Seems like a lot of work, I said. Looks daunting, I told her.
Turns out, 3D printers have come a long way since I first heard about them during undergrad in the 1990s. Today, 3D printing (and the FREE software that people use to 3D-print things) is cheap, easy, functional, and fun. In other words, today’s 3D printers are not your grandma’s 3D printer.
When we decided to live full-time in our RV over 16 months ago, we each got to choose a couple of hobbies that we could take with us. I chose a guitar and a keyboard. Kasie chose her 3D printer and some golf clubs. Of all of those things, we use the 3D printer the most. In fact, of all the RV tools, gizmos, and gadgets that we carry with us, the 3D printer might be the one that we use the most.
Let me say it again: 3D printing = Cheap + Easy + Functional + Fun
What Type of 3D Printer the Best?
You can spend a lot of money on a 3D printer, but you can also spend just a few hundred dollars. Kasie’s favorite 3D printer (and the one that we currently have in our RV) is the Ender 3 V2 Neo (Ender). It costs about $250. She’s owned more expensive 3D printers, but we think this one from Creality is the best bang for the buck. The Ender has an auto-leveling function, but Kasie recently purchased a bed leveling tool. Given that the printer giggles down the road after every trip, she’s gotten into the habit of using the bed leveling tool if we have moved campgrounds between print projects.
Keep in mind that our Ender 3D printer is really a “beginner” 3D printer. It will only print in one color, it’s relatively slow (compared to some high end printers), and the size of the objects that it can print is limited by the size of the device. Yet, it’s done the job admirably for the projects we’ve needed. Moreover, the Ender fits nicely in the top bunk of our RV, and the size is a plus as far as we are concerned.
Of course, to print something, you have to have some filament. PLA, ASA, TPU, and PETG are all popular options. After experimenting with all of these filaments, we think that PLA works for most applications. So, if you are just getting started, we suggest trying PLA as your filament.
Of course, there’s all sorts of gadgets that can be used with a 3D printer. Kasie recently purchased an electronic bed leveling tool, and she re-levels the bed each time we move campgrounds. A deblurring tool is also handy to remove supports. Supports are material that is used to support the desired item during the print, but the material is removed and discarded after the print.
2024 Update: Kasie upgraded to the Bambu Lab X1 Carbon 3D Printer (~$1200). She also bought the AMS to make printing multiple colors easier. SHE LOVES THIS PRINTER! It is much easier to use, especially because she doesn’t have to level the bed all of the time. Plus, she can even take video of her prints! If you have money to burn and KNOW that you are going to like 3D printing, she highly recommends just starting with this 3D printer.
3d print of a Super C
Why Should RVers Own a 3D Printer?
RVs come in all shapes and sizes. The way people camp or live in an RV is just as varied. The best part about owning a 3D printer is you have the ability to create something that works for you and your space. Every RVer knows that space is limited, and organization is at a premium. In my view, there’s nothing better that having the ability to create an object that fits into the space and functions just the way you want it to.
In short, a 3D printer is all about CUSTOMIZATION! We live in just a few hundred square feet, and it’s SO WORTH it to be able to use the space properly.
Also, if you are looking for a GREAT GIFT for someone who has an RV, I personally think that a 3D printer should be at the top of your list. A 3D printer is perfect for someone who likes to tinker (or just get organized in a small space). Plus, one benefit of giving a 3D printer to someone is that you usually benefit from all of the cool stuff that he/she prints.
What Can You Print with a 3D Print for Your RV?
Kasie has printed dozens of things that we use daily in our RV (a 2022 Entegra Accolade XL 37L). Many of these designs are freely available on Thingiverse. To make modifications to these designs, she uses Tinkercad and Utilimaker Cura, both of which are also free to use. I decided to play around with the software as part of writing this blog. All of this software is pretty user-intuitive. Within couple of days of playing around with the software, most people will get the hang of it.
This blog is not intended to be a tutorial on how to use a 3D printer or 3D printer software. Instead, we just hope that after seeing some of the neat things Kasie has 3D printed, that might inspire you to start 3D printing on your own. In alphabetical order (drum roll, please):
Fan Extender (for short people!) (MY FAVORITE a/k/a “THE KASIE”)
Where possible, I’ve tried to include the .STL files for the items that Kasie has 3D printed. Just click on the Tinkercad drawing of the object, and the .STL file should be there. If not, shoot me an email at classcbroads@gmail.com, and I’ll see what I can do.
DISCLAIMERS: EVERY RV IS DIFFERENT. THESE DESIGNS MAY NOT (AND PROBABLY WILL NOT) WORK FOR YOUR SPECIFIC NEED. YOU MAY (AND PROBABLY WILL) NEED TO MODIFY THESE DESIGNS OR CREATE YOUR OWN. PLEASE DO YOUR OWN RESEARCH AND CHECK ALL MEASUREMENTS AND DESIGNS. WE ARE NOT RESPONSIBLE FOR YOUR RIG OR ANY OF YOUR 3D PRINTING PROJECTS! We simply want to share some of the things that we have successfully 3D printed for our RV to hopefully inspire people pick up 3D printing. Also, we do get a very small commission at no cost to you if you use one of the Amazon Links (a/k/a beer money).
**All .stl files are licensed pursuant to CC-BY 4.0 so if you share or modify them, please provide attribution to ClassCBroads.com and the original designer, if applicable.
Good luck, and may the 3D-print gods be with you!
Baby Gate End Receptacle
We don’t have a baby, but we have FIVE DOGS! Because a couple of our pups are “runners,” we usually set up a baby gate near the door to keep the dogs in the RV. To help with the baby gate placement when we get to a new location, Kasie 3D-printed these receptacles for the baby gate ends. The receptacles are screwed into the wall.
Click on the image above for the .STL file
Charging Box: Organizer for Cords, Phones, Batteries
Charging cords and spare batteries seem to multiply like bunnies. We have them for phones, GoPros, camcorders, drone, security cameras and other devices. To better organize the chaos, Kasie designed this 3D-printed charging bank organizer. The drawers are filled with the spare batteries and their charging devices.
Clip / Carabiner (for securing our pet fence to lattice)
As noted above, we RV with five dogs. Whenever we can, we set up a pet fence around our campsite. One problem is that the metal pet fence is too tall such that the panels won’t fit underneath the RV door. In that area, we’ve custom-cut a couple of sections of plastic lattice that fit snuggly underneath and around the RV door. The plastic lattice is fastened to the wire pet fence with these 3D-printed carabiners. In my opinion, the 3D-printed carabiners are much easier to use than regular carabiners because they are sized just right.
Click on the image above for the .STL file
Of note, these clips / carabiners are handy for other things too. Kasie found this design basic design from Mr. Dooo on Thingiverse (shared under CC-BY 4.0).
Closet Rod End Cap
We don’t have a lot of hanging clothes so we decided to use a small part of our bunk area for those. We didn’t want the closet rod to extend the entire length of the bunk. Kasie 3D-printed this closet rod end to keep the closet rod from moving latterally. The rod is also secured by a metal bracket screwed into the top of the bunk area. Kasie modified a design from Thingiverse from mmerrill80 (CC-BY 4.0)
Click on the image above for the .STL file.
Cup Holder Ring Adaptor
I’m not sure why, but many of the cup holders (in the console, in the sofa) in our RV are just too wide. Our drinks tend to wobble around in them. Dave Jensen on the Renegade Facebook page posted the design and the .STL file. That’s another thing about 3D printing; people always seem willing to share their designs. It’s a wonderful community!
Cup Holder / Snack Holder (for Cooler Lid)
We keep a cooler in the driving area of our RV. It’s basically a white-trash console.
We bought the cooler with two goals in mind: (1) to store extra soda, beer, and other drinks that don’t fit in the refrigerator and (2) to hold our drinks with the cup holder in the cooler lid on travel days. The problem is that the cup holder was a little too shallow and wide such that our water bottles would topple over on a bumpy road. To solve this problem, Kasie 3D-printed this combination cup holder / snack holder that fits snugly into the cup holder of the cooler lid. The cup holder portion is fairly deep and is sized to our water bottles so that our drinks don’t topple over as easy. And, we get a snack holder as well!
Click on the image above for the .STL file.
Fan Extender (for short people!)
Most RVs have an exhaust fan in the bathroom. Unfortunately, the knob to open the exhaust fan is on the RV’s ceiling so that many people have to stand on something (like the toilet) to turn on the bathroom fan. Because I’m vertically challenged, this “fan extender” is MY FAVORITE thing that Kasie ever 3D printed.
Kasie got the basic idea from Brian Miller in the Jayco Seneca Facebook group. Because the fan extender is so long, it had to be made in sections (at least with the Ender 3). The print project includes three parts: (1) a bottom section that you grab onto to turn the knob, (2) a middle section, and (3) an adaptor (in red) that is customized to attach to the exhaust fan knob.
The three sections of the fan extender.
The type of adaptor needed will vary depending on the fan knob. In our old RV (a 2019 Jayco Greyhawk), the knob was cog-shaped. As such, we used different design which is shown above (click on it for the .STL).
Funny Fact: Kasie 3D printed a fan extender for some friends. They affectionately call the device “THE KASIE.” I think it’s hilarious that they think of Kasie every time they have to take a sh*t.
“Feet” for Cutting Board
Like many RVers, we have an induction cook-top, which takes up a lot of usable kitchen counter space. We place a cutting board over the cook-top to provide us with a larger kitchen prep area. We originally used some rubber bumpers (like the ones shown here) to raise the cutting board above the cook-top surface, but those rubber bumpers kept falling off. Kasie decided to design these 3D-printed “feet,” which are screwed into each corner of the cutting board.
Click on the image above for the .STL file
Hook for Over the Shower Door
Places to hang things in an RV are are always great. While 3M Command Hooks are usually a great option, they all have flat adhesive backs that require a corresponding flat service to adhere to. Unfortunately, some surfaces, like our shower door frame, are contoured so that 3M Command Hooks don’t work very well.
So what do you do? 3D printer project to the rescue!
Below is a towel hook that Kasie designed to fit over our shower door frame. It may be a little hard to tell from the photo, but there’s a slight contour to the surface shower door frame’s surface.
Click on the image above for the .STL file.
Level Bracket
Level. Level. Level. We take great care to make sure that our RV is properly leveled each time we set up camp, and we have a 9-step process that we follow. One of those steps includes checking whether the RV is level with an old-school three-foot level. Because we use the level so often, we wanted to store the level somewhere inside where we could easily access it. Our bunk area is the perfect place to store the level.
Kasie 3D printed two level brackets to make sure that the level stays in place on travel days (and isn’t otherwise in our way when we are stationary).
Want to more about how we level our RV? Check out our video above.
Medicine Cabinet Cubbies / Medicine Cabinet Organizers
The medicine cabinet in our RV came from the manufacturer with one shelf. ONE. Uno. Eins. Jeden.
No matter what language you speak, ONE shelf is not enough. Moreover, we quickly learned that stuff in our medicine cabinet tended to shift around A LOT on travel days. To solve this problem, we added another shelf to our medicine cabinet, and Kasie 3-D printed some little cubbies (examples below) where we store all of our bottles, jars, toiletries, and cleaning products. We now make great use of the medicine cabinet’s space, and nothing falls out when we open that cabinet door!
I love being so organized! But please tell me why we need TWO nail clippers and TWO tweezers!
Rivets
Kasie removed the macerator from our RV, which left some holes in the bottom of the wet bay area. She 3D printed these rivets to fill in the holes.
RV AC Air Flow Device
A few years ago, Kasie decided to improve the air flow in our old RV (a 2019 Jayco Greyhawk). RV Air Flow sells a bunch of kits that cost $150 or more, but she decided to do-it-herself for a little under $20. Keep in mind that dimensions for the inserts will vary depending on the specific a/c unit that comes with your RV. The one that she used for the Greyhawk can be found here in another blog.
While 3D printing the inserts is fun, it’s worth noting that using another substrate like styrofoam is probably quicker and easier. Kasie opted for that when doing a similar a/c airflow mod to our 2022 Entegra Accolade.
Sewer Wrench
Kasie had trouble getting the sewer hose connections disconnected. She found this design from daginator on Thingiverse (CC-BY 4.0). It is similar to the Camco Rhinflex sewer wrench.
S2RV Cubby / Divider for S2RV Console
Our RV (an Entegra Accolade XL 37L) is built on a Freightliner S2RV chassis. Unfortunately, there’s no good place to store our phones an other gadgets in the driving area. Kasie create this design and 3D printed this for extra storage where the ashtray used to be.
Starlink Clip for Ethernet Cord
Kasie was worried about our Starlink ethernet cord getting run over by a campground mower or some varmint trying to eat it. She 3D printed these clips that attach to the RV’s frame and hold the ethernet cord off the ground. Quite clever!
Click on the image above for the .STL file.
Tooth Brush and Tooth Paste Holder (Electric Tooth Brush)
I’m telling you, 3-D printed toothbrush and toothpaste holders are the rage. In the following design, a removable “catcher” that rests between the electric tooth brush and the 3-D printed base or the charger (see red arrows). The idea is that the water / tooth paste mixture that inevitably runs off the tooth brush flows into the “catcher” so that the base stays relatively clean.
Your RV (But it’s hard!)
One of Kasie’s first 3D printing projects was to print a model of our RV, which was then a 2019 Jayco Greyhawk 31F. The project was challenging because she started with a Ford F150 model and then built the rest around it. She printed some of the components (like the wheels and ladder) separately. She made over a dozen itterations of the design, and frankly, we’re not sure which ones she actually used for the final print job so I’m not including the .STL file for this one. The video below shows the printing process.
As part of researching for this blog, I decided to make a 3D drawing of our 2022 Entegra Accolade XL 37L in Tinkercad. I started with a container semi-truck from SirSpankie (CC-BY 4.0), cut it up to use for most of the Freightliner chassis, and then built the Jayco portion pretty much from scratch. I think it turned out nicely on the computer. But getting it to print is another story….
Like Kasie, I’m going to have to deconstruct some of the components and print them separately. But this was a fun project, and got me hooked!
DISCLAIMERS: PLEASE DO YOUR OWN RESEARCH. WE ARE NOT RESPONSIBLE FOR YOUR RIG! We are NOT affiliated with any of these products and just want to share our experiences about these 3D printing projects. We do get a very small commission at no cost to you if you use one of the Amazon Links (a/k/a beer money).
Lawrence KS — Biking, Beer, and Basketball
In my opinion, the best town in Kansas to live or visit is Lawrence, Kansas***. This “free state” town is rich in history, basketball tradition, good beer, and biking. The downtown area (usually referred to as “Mass” to reflect the street of the same name) is a vibrant mix of unique retail stores, restaurants, and housing.
I wrote this song and blog after a trip to Lawrence in 2020, and then added some of the video footage after another trip to Lawrence in 2023.
When: Thursday, June 25, 2020 to Sunday, June 28, 2020 (three nights)
Where: Clinton Lake Corp of Engineers, Bloomington East, Walnut Campground (site 289)
Cost: $20/night for water and electric
Biking: Lawrence Loop; Burroughs Creek Trail
Beer Rankings: (1) Free State Brewing, (2) Lawrence Beer Company (two locations), (3) Fields and Ivy, (4) 23rd Street Brewery, (5) Black Stag Brewery
Bucket Lists: KU Hall of Athletics/DeBruce Center; Walk down Massachusetts Avenue
In my opinion, the best town in Kansas to live or visit is Lawrence, Kansas***. This “free state” town is rich in history, basketball tradition, good beer, and biking. The downtown area (usually referred to as “Mass” to reflect the abbreviation for the street of the same name) is a vibrant mix of unique retail stores, restaurants, and housing. Lawrence is also just a 40-minute drive to Kansas City. Not surprisingly I’ve known several people who live in Lawrence but do that commute every day.
I had the good fortune to live in Lawrence for four years – three for law school and a bonus year for a federal clerkship. After graduating, I would go back to Lawrence every few years, usually for a law school event that my law firm was sponsoring. I was even an adjunct professor for the patent law class one semester when the “real” professor was on sabbatical. The city keeps sprawling each year, but a lot of the charm and character is the same.
Since moving to mid-Missouri 7+ years ago, my trips to Lawrence soon ended. In the summer of 2020, I wanted to few days there in the RV so that I could re-explore the town. Things were just starting to open up from the covid-19 lockdown, but we still felt like we could make the trip in a responsible way. Our plan was to bike and visit breweries if they had an outdoor patio, which all seemed (and was) very low risk.
Clinton Lake COE
We opted stay at the Clinton Lake Corp of Engineers campground, which was conducive to social distancing. As with nearly all COEs, this one was very nice, well-maintained, with large sites. The campground, however, was located nearly 20 minutes by car from the closest biking trailhead to the Lawrence Loop. It’s yet another 5 minutes by car to part of town. Thus, for exploring the city of Lawrence, it may make more sense to stay in an RV park in town. However, we were happy to stay at the COE, which made for easier social distancing.
Biking – The Lawrence Loop
Lawrence is in the process of completing a 22-mile paved trail around the city called the Lawrence Loop. On the northeast side of Clinton Lake is Overlook Park, which provides trail access. Thus, we parked our car there, and headed eastward. The southern part of the loop contains mostly prairie-like and natural landscape but the path occasionally meanders through residential neighborhoods and crosses K-10 a couple of times. Around Haskell Avenue, the loop starts northward and ultimately becomes the Haskell Rail Trail, which then turns into the Burroughs Creek Trail. The latter runs all 20+ block north to the east side of downtown Lawrence.
Speaking of routes, I grew up near the Pony Express trail in north central Kansas, and so I’ve always had an interest in old trail routes that our ancestors used. Our Lawrence Loop bike route took us over the Oregon Trail a couple of times. Lawrence is situated between the Santa Fe and Oregon Trails and so if you are history buff, there is lots to do in the area.
For me, the most interesting piece of Lawrence’s history is the key role it played in the abolitionist movement. I grew up hearing stories from my Kansas-born-and-raised dad about Quantrill’s raid on Lawrence (a/k/a the Lawrence Massacre), John Brown, and “Bleeding Kansas,” and the border war with Missouri. He would talk about Lawrence’s role as the “Free State Capital”, in which anti-slavery Jayhawkers from Kansas battled pro-slavery Bushwhackers from Missouri. According to my father, we were supposed to hate Missouri (especially the University of Missouri in sports). He still despises Missouri to this day.
Beer (Craft Breweries)
Free State Brewing is a beer institution. This landmark opened in 1989, making it the first legal brewery in Kansas in over 100 years. It is located in the heart of downtown on Mass. I’m a fan of the Stormchaser IPA, but nearly all of the beers are good. Their motto is my motto as well: “Because without beer, things do not seem to go as well.” The brewery gives credit to this saying to a monk. If so, perhaps I will join the monastery some day.
Not only does this 14-barrel brewhouse bottle some great beers, it also has food! Back when I was in law school, the black bean quesadilla was my favorite, and I was glad to see that this dish was still (nearly 25 years later) still on the menu. Why change perfection? The only downside to Free State (especially during a pandemic) is that outdoor seating is very limited.
One new kid on the brewery block is Lawrence Beer Company. Opening in just 2017, LBC now has two locations: one close to downtown (“north”) and one just of 15th Street and Wakarusa (“west”). With one sip, it is easy to see why LBC quickly expanded. I liked the Big Peach Saison and the East Side Session IPA in particular. Both venues have ample outdoor seating. And, both venues serve food. Other thing that makes LBC amazing is their dog-themed logo. Dogs and beer. Perhaps two of my greatest loves in life!
During our stay, we tried out the other breweries in Lawrence. They are all good, and worth a stop if you have time. However, if you are in the area for a limited amount of time, my recommendation is that you try out Free State or LBC (north).
Bucket Lists (spoiler: It’s Basketball!)
A trip to Lawrence would not be complete without a trip to Allen Field House and the adjoining Booth Family Hall of Athletics and DeBruce Center. The venue highlights all current 18 KU athletic teams highlights traditions such as crimson and blue, cheerleading, and the marching band. The focus, however, is basketball. The inventor of the game, Dr. James Naismith, was KU’s first coach. His original rules are housed at the facility, along with a museum that explores KU’s greatest athletes and NCAA championships (by coaches Phog Allen, Larry Brown, and Bill Self). Lawrence is known as the “Cradle of Basketball” for good reason.
Because I attended undergrad at Kansas State University, I was taught to despise KSU’s in-state rival. However, by my 2L year at KU, I was already a convert. The players during those early to mid-1990s were incredible. Even though they never won the big one, the 1996-97 team is in my opinion the best ever – Jacque Vaughn, Paul Pierce, Raef LaFrentz, and Scott Pollard in particular.
My favorite KU basketball player is Lynette Woodard, who still is the all-time collegiate women’s basketball’s leading scorer (3,649 points). I have vague memories of her playing on the 1984 Olympic gold medal team, but I remember very well her being a Harlem Globetrotter. The idea that this woman was even playing with a bunch of guys was inspiring to me as a young girl. I can still remember trying to spin the basketball on my index finger for hours on end.
(Unfortunately, my basketball “bucket” list will have to wait until next season since these venues were closed because of covid-19. )
As odd as this sounds, the other “bucket list” item to do in Lawrence is simply walk around downtown on Mass and some adjacent streets. There are bookstores (Dusty Bookshelf), art galleries, gift shops, an antique mall, clothing stores, hair salons, live music venues (The Granada, The Bottleneck), and a variety of pubs (Red Lyon) and restaurants (Papa Kenos, Free State Brewing). The links I’ve included are all venues that were around 25+ years ago. The nostalgia is incredible, and it is nice to see these institutions thriving for decades. This is what every downtown in America should be.
***Fine Print: My home town of Belleville will always be #1. Thus, Lawrence is actually second best town in Kansas.
