
Rear Air Bag Dump Valve Installation in Our Super C RV (S2RV Chassis)
Our 2022 Entegra Accolade XL 37L is built on the S2RV chassis with rear air bags. Leveling the rig requires many steps as we explained in our 9-step leveling blog/video. Perhaps the most time-consuming step in the leveling process involves releasing the air from the rear air bags. It’s a long hhhhsssssss-ing process. As such, many Super C owners have added air bag dump valves to their rig. We decided to do the same.
THANK YOU! Special thanks to Dave Poole, Amy and Rob Taft, and Kraig and Rachel Pike — all of whom completed the project on their rig and gave us the confidence to do this project ourselves!
Some RV owners have installed automatic rear air bag dump valves like the ones in this forum. We opted to install a manual system instead because it just seemed more straight forward.
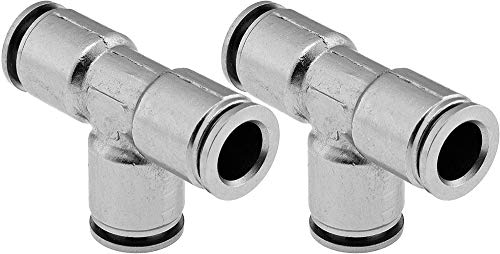
Parts List for Super C Rear Air Bag Dump
Here’s the parts list for the rear air bag dump system that we installed:


DISCLAIMERS: PLEASE DO YOUR OWN RESEARCH. WE ARE NOT RV EXPERTS! WE ARE NOT RESPONSIBLE FOR YOUR RIG! We just want to share our experiences about this project in this blog. We do get a very small commission at no cost to you if you use one of the Amazon Links (a/k/a beer money).
Steps for Rear Air Bag Dump System
The installation of our system involved the following steps.
(1) Dry Fit the Rear Air Bag Dump System

Dry fitting the Rear Air Bag dump system

Using a lot of Teflon plumber’s tape, we dry-fitted the system together. That is tougher than it sounds because we needed the valves to be oriented so that we could actually use them.
(2) Figure Out Where Mount the Rear Air Bag Dump System
The location is largely a matter of personal preference, as well as the specific Super C layout. For our rig, Kasie opted to locate the rear air bag dump system near the driver’s side exterior storage bay in front of our rear tires. From that area, she figured out the general path that the air lines would go back to each of the rear air bags (more on that below).
She drilled a couple of 5/8” holes (wide enough to receive the air brake tubing and loom). The loom probably isn’t needed, but because we had some laying around from a prior project, Kasie decided to use it. Next, Kasie attached some plywood to the bay sidewall where the rear air bag dump system would be mounted. She then fastened the dry-fitted system to the plywood panel.

Our rear air bag manual dump system.

Ideally, the valve handles would have been oriented so that they ran parallel to the bay side wall and take up less space. However, it was quite difficult to get all of the pieces aligned in that configuration AND air-tight. In the end, Kasie was able to orient the valves so that were perpendicular to the exterior bay side wall.
(3) Run the Air Line Hose
Where exactly to run the air lines is also a matter of personal preference and chassis/floorplan configuration. Below are photos generally showing the route that Kasie chose.
Passenger Side

Air dump lines on the passenger side of our S2RV chassis.

The new passenger air line was routed to the driver’s side so that both lines could be run to the air bag dump system located in the exterior bay on the driver’s side of the rig.
Driver Side

Air dump lines on the driver side of our S2RV chassis

A few things to note on the installation:
Kasie made sure that the air bags were deflated before running the new air lines. Because we had already leveled the rig, she didn’t take any extra steps to do deflate the air bags.
Kasie installed the new air hose lines so that each “T” was before motion control unit (“MCU”) adjacent to the air bag. If your rig doesn’t have MCUs, you may want to consider installing them. Check out our blog “Four Easy (and Not So Easy) Upgrades to our S2RV Chassis” for more info on the MCUs.
Kasie routed the new passenger side air line towards the rear of the coach through part of the frame in “U” shape in order to route the line to the driver’s side of the rig. She then zip-tied the both newly installed air lines together as they made their way to the exterior bay with rear air bag system.
Kasie used a Husky pipe cutting tool (similar to the one below) so that the cuts in the air lines were clean and straight.

(4) Test the Rear Air Bag Dump System
After connecting everything, Kasie tested the system for leaks. She aired up rear air bags by turning on the RV and then retracting the jacks. Then, she used sprayed soapy water on all of the connections to look for leaks. There were a couple so that meant more Teflon tape plus more time to complete the project.
Final Thoughts
Installing a manual rear air bag dump system on S2RV chassis looks pretty straight-forward, but it is not. Getting all of the parts to align AND be air-tight is not easy. Moreover, routing the air lines and installing the “T” in such a tight space wasn’t a cake-walk. The project took about a day to complete.
Would we do it again? I’m honestly not sure if all of this work is worth shaving several minutes off of our leveling process. Kasie seems to think it is, especially because our plans over the next several months will involve us setting up the RV every few days. Only time will tell…