
Full-Time RV Newbie Mistake?: Our $60,000 Bike Rack!

About Our Electric Bikes
We LOVE (that’s capital L-O-V-E) our e-bikes, which we’ve owned since 2018. Although our specific model is no longer available, I-Zip’s Vida model is probably the closest thing on the market today.
The bikes are “pedal assist” which means that we can use the electric assist or not use it. Eighty to ninety percent of the time, we do not use the electric assist.
We have NEVER run out of battery. We typically only use about 1/4 to 1/3 of a charge on our long rides. That means we can ride close to 40 miles with no problem.
We especially like the big beefy full size tires (27.5”)!
With an integrated battery and a mid-drive motor, the bikes have good aesthetics AND power.
The e-bikes are capable of going 28 mph! We’ve only gotten close to that a couple of times when we were trying to beat a storm on the ride home.
The main downside to our bikes is that they are heavy (55 lbs/bike).
RV Traveling with Electric Bikes
When we started RVing back in 2019, one of the first things we had to think about was where to store our beloved electric bikes. We removed the top bunk in our Jayco Greyhawk 31F and used the bunk area to store our electric bikes. We purchased a THINStem kit (two removable pedals, movable stem) to make the bikes more easily fit in the space (this video shows how the kit works). It was a little cumbersome to get the bikes in and out of the RV door when we wanted to go on rides, but we thought that our indoor storage solution worked well.
After deciding to live full-time in “Big Lady” (our Entegra AccoLADE XL 37L), we struggled with how to successfully travel with and store our electric bikes. Even with our big 39-foot rig, we simply didn’t have room in our RV to store them indoors because our bunks were filled with other items.
Given our dillemna, we seriously considered getting new bikes that MIGHT be easier to store inside the RV or inside the back of our tow vehicle, a Jeep Cherokee Trailhawk.
Bikes With Smaller Wheels. I know a lot of RVers rave about their teeny-tiny electric bikes with 20” wheels. LECTRIC makes a good entry level bike with tiny wheels (example below). But personally, I just don’t like the way these little bikes look. I feel like people would look at me the way I look at a guy driving a Mazda Miata convertable. Riding a bike with such small tires is also a TOTALLY different experience, and I just couldn’t see myself enjoying the ride as much with a small-wheeled bike.
Foldable Bike. Foldable bikes are all the rage. However, in my opinion, there are just a handful of companies that make a “good” foldable full-sized e-bike with a mid-drive motor. Most full-size foldable bikes are made in China and have horrible online reviews; actually making a warranty claim and getting a part would probably be a nightmare. More importantly, I’m not convinced that a foldable bike is “THE” solution for us. The American-made Montague M-E1 folds down to 38″x38″x13”, but even at that size, finding a place to store two bikes is challenging. Two M-E1 bikes MIGHT fit in the back of our Jeep Cherokee Trailhawk, but we wouldn’t be able to store anything else back there. The bottom line is that purchasing two foldable full-sized bikes probably would not solve our storage problem.


Montague M-E1
Ultimately, we decided to keep our existing e-bikes and look at outdoor storage options. We can’t predict the weather, which means that sometimes we have to drive in the rain or snow. Therfore, any outdoor option was also going to require us to cover the electric bikes to protect them from inclement weather. Here’s the bike storage/travel options we considered with those considerations in mind:
Attach a bike rack to our Tow Vehicle. This sounds like an easy solution, right? Unfortunately, any cover for the e-bikes would obstruct both our license plate and our taillights. Sure, we could move the license plate to the rack so the plate is visible. And, there are a few translucent/transparent bike covers out there on the market (here’s an example) . However, even with a clear cover, I still worry that the taillights may not be fully visible, especially in the rain or snow., which is a safety issue. I’m also concerned that a “see-through” bike cover could be a legal issue in some of the jurisdictions we might be traveling through.
Attach a Bike Rack to the FRONT of our RV. Sorry no. I don’t think our bikes make good cattle guards. I am also concerned that the covered bikes would interfere with the use of our motorhome’s headlights. We didn’t really consider this option much.
Attach a Bike Rack to the ROOF of our Tow Vehicle. Another sorry no. We’re both too short, and we would probably end up damaging our tow vehicle getting the bikes on and off.
Attach a bike rack to the ladder of our motorhome. Still another no. That just doesn’t seem very stable.
Attach a bike rack to our Motorhome. We did A LOT of online research on this option. We were hesitant to use the $450 bike-rack we already owned since 2018 (KAC K2) because it was not explicitly motorhome-approved. We also needed to make sure that the bike rack would not interfere with our Roadmaster Nighthawk tow system. Ultimately, we purchased a Swagman Current bike rack where the manufacturer confirmed could be used in connection with a motorome. Did it work?
Our “motorhome-approved” bike rack was a disaster. On our first trip, one of our e-bikes slipped a few inches, causing them to rub against each other and the bike rack itself. The paint on my bike frame was removed in a couple of areas from the shearing forces. We also lost a bike bag on that same trip. I felt lucky that the bike bag didn’t break our tow vehicle’s windshield or do other damage to our tow vehicle.
On our next voyage, we quadruple-checked the bike rack set-up to make sure things were secure and wedged several foam pool noodles between the bikes for added protection. We turned on the RV’s back up camera en route only to cringe as we watched the bikes bob up and down as we traveled on the highway. In short, the “attach a bike rack to our motorhome” option did not feel remotely safe.
Of note, Swagman (and other manufacturers) also make few “RV-approved” bike racks which are specifically designed to handle the added force of being used on a tent trailer, travel trailer, 5th wheel, or motorhome. Perhaps we should have purchased one of those “RV-approved” bike racks instead of a “motorhome-approved” bike rack. At this point though, we really weren’t feeling like spending additional $300-$400 yet another bike rack.

This Joy-Tech bike cover touts a “transparent mesh-like pvc to ensure that the car taillights will not be blocked” but I’m not convinced that this isn’t a safety or legal issue.
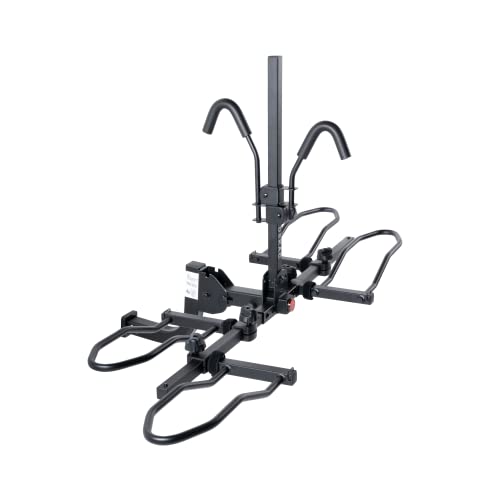
KAC K2: We bought this bike rack in 2018 to use on the back of our Jeep Cherokee Trailhawk. That wasn’t a good solution because our license plate and taillights would not be fully visible when using a bike cover. This bike rack is also not explicitly rated for use with a motorhome or RV.
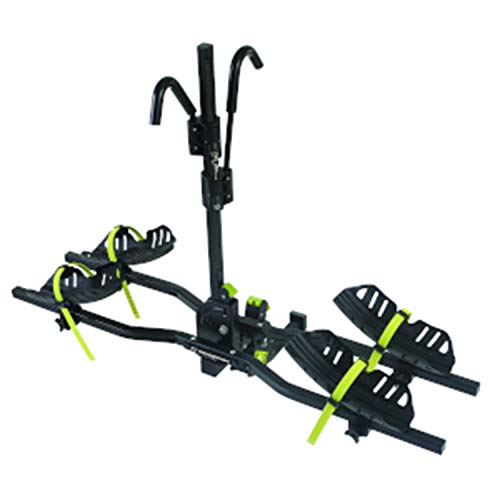
Swagman Current: The manufacturer confirmed that this bike rack can be used on a motorhome. We don’t recommend it though.

Swagman Nomad: The manufacturer says this bike rack is “RV approved.” It looks a lot like the KAC K2 rack we purchased back in 2018. We did not purchase this bike rack, but perhaps we should have.
Our “$60,000 Bike Rack”
So, as the proud owners of two bike racks and a couple of e-bikes that were getting more beat up on each trip, we started thinking about one last option. Rather than spend more money on yet another bike rack, we decided to spend A LOT MORE MONEY. How much more? About $60K.
Ultimately, we decided to trade in our tow vehicle for a full-sized truck so that we could safely and securely store and carry our e-bikes in the truck bed. Yes, our $60,000 bike rack is really a GMC Sierra 1500 Elevation.
Admittedly, we were probably in the market for a new tow vehicle anyway. We had over 30,000 miles on our 2019 Jeep Cherokee Trailhawk, and an additional 20,000 miles on it from flat towing it around the country. In the next year, we would need to get new tires and also do some maintenance that we had been neglecting. Plus, Kasie just loves spending money (I don'‘t). She does most of the driving and so if a new truck was going to make her happy, then I wouldn’t object.

Our 2019 Jeep Cherokee Trailhawk.

Our $60,000 Bike Rack (a GMC 1500 Sierra Elevation) on the day we purchased the truck.
Truck Bed Fork Mount: A $60 Bike Rack
For folks who already have a truck, mounting a bike in a truck bed is fairly simple and inexpensive. Just attach a couple of fork mounts to a board sized to wedge into the width of the truck bed. Here’s what we used:
2”x6”x8” pressure-treated lumber (~$10)
Circular saw
Screws and drill driver
Two bike fork mount (~$20 each)
The rear tire of each bike rests in one of the truck bed’s grooves. One nice benefit to this flexible system is that we can space the bikes apart so that our bikes won’t rub against each other. We also secure the bikes to truck bed by running a tie-down strap along the back part of the frame.
Admittedly, I was initially skeptical that this simple solution would work. My main concern was the stabilty of the fork mount itself and the wear that might occur on the bike on the fork. Yet, I had to keep in mind that every time I ride my bike, the fork mount is undergoing all sorts of stresses and strains. When the bike is mounted to a truck bed, the stresses are probably way less than riding the bike because of the suspension system of the truck.
The main downside to this bike storage system is that we do have to remove the wheel to store the bikes in the truck bed. As a result, when we arrive at a campground where we think we are going to be riding on multiple occasions, we remove the bikes from the truck bed and use the Swagman Current bike rack attached to the RV for stationary storage.
(2023 Update): After posting the video, we made two major changes to our system.
First, we added a truck cap to better protect the e-bikes from the snow and theft. We opted for the A.R.E. CX Revo (base $3085). We added the window pet screens, keyless entry, and some other options so the total cost with installation was $4460. So yes, now we have a $65K bike rack!

Our truck cap! Just add another another $4500!
Second, we reconstructed the fork mount system to provide better access to the bikes. Essentially, we created a sliding tray. Below are the basic components of the new sliding tray system:
(1) Cut a piece of plywood sized to fit between the wheel wells and extend the full lengh of the truck bed
(2) Glue/screw two small blocks of wood to the plywood where the fork mounts will be attached. Screw from both the bottom and the top of the plywood to make sure wooden blocks are secured to the plywood.
(3) Attach the two fork mounts to the two small blocks of wood using screws.
(4) Glue/screw two ~10-inch pieces of wood to the plywood where each rear tire will rest to essentially make a groove for each rear tire.
(5) Attach two metal handles to the plywood.


To use our “bike tray,” we grab the handles and slide the entire tray out a few feet. This allows us to access the bikes without needing to crawl way inside the truck bed. Importantly, we don’t pull the bikes out very far — just enough to be able to grab them. There’s also enough room on the sides to keep a camping chair, as well as plenty of room between the bikes to keep our pet fence system (three fencing panels and two lattice panels), outdoor rug, and some other items in the truck bed.

Our updated $60,000 bike rack (2023)
If you ask me, it’s a pretty neat and inexpensive sliding tray deign. Yes, it’s a little white-trash, but hey….
Of note, several companies make sliding trays for truck beds. We researched those, but the trays sit on the truck bed so that the tray itself is a few inches higher than the truck bed. Unfortunately, our bikes would have been too tall to fit inside the truck bed with the truck cap on if we used one of those classy looking sliding truck beds.
Final Thoughts
In most campgrounds, I see all sorts of bike racks being used on the back of motorhomes. I always wonder why we had so much trouble and others apparently didn’t. If you have a bike rack that you’ve attached to your motorhome to tow heavy e-bikes without ANY incidents AND you are able to put a cover on the bikes to protect them from the weather, I’d love to know the model and if there is anything special you do with the set-up.
In the meantime, thanks for reading and safe travels.
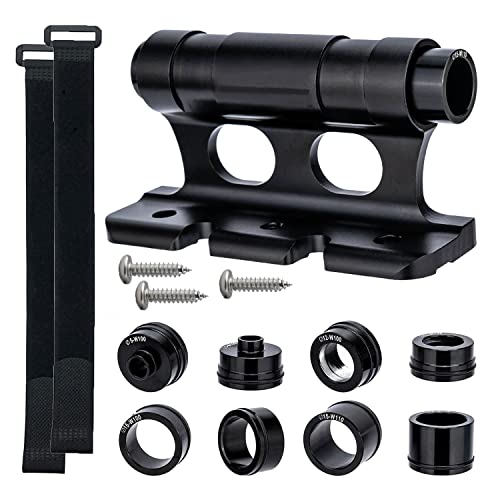
We like this Nansike bike fork mount because it comes with rings so that the mount can be appropriately sized for any bike.